VSP Calculations at Point of Sale
You now have visibility to errors and warnings in Point of Sale (POS), which allows you to address issues prior to submitting the order and a claim. These enhancements aim to reduce order and claim errors, save time and improve patient satisfaction. The calculator features are similar to what you have been using in Claims Management, just available earlier in the ordering process. The VSP Calculator supports a select group of plans, see VSP Plans Available for Automatic Benefits Calculation.
What Changes You Will See in POS
Errors and warnings now display real-time in POS when you calculate the order. Behavior is similar to before:
-
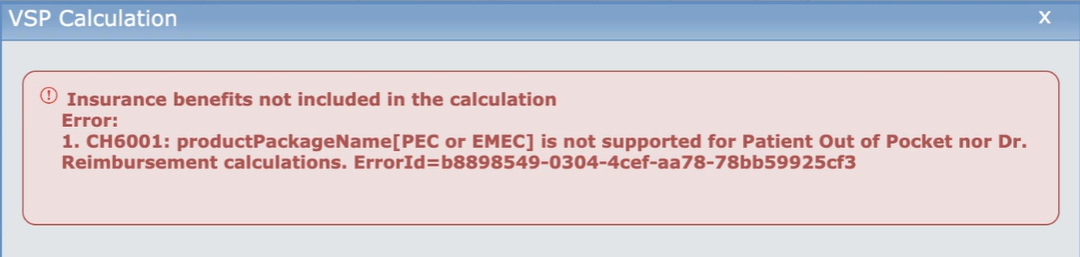
Errors display in red. Errors indicate items that must be corrected before the order or claim can be submitted; the message continues to display until the error is corrected. You have the option to correct the error, continue without insurance or calculate manually.
-
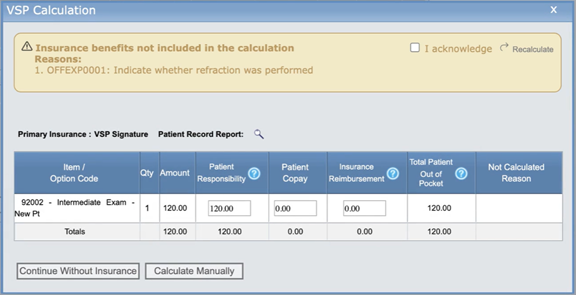
Warnings display in yellow. You can correct the warning, acknowledge the warning and continue with the order, continue without insurance or calculate the insurance manually.

When you acknowledge a warning, you can continue to submit the order. If there are no other reasons for the claim to go on hold, then the claim is billed to the carrier and a record of the acknowledgment is kept with the claim and visible in billing.
Using the VSP Calculator in POS
The following content provides more information on managing warnings. You can also Watch the video to learn more.
-
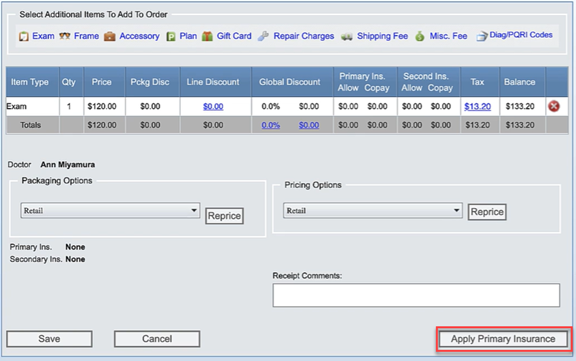
Once you have added all items to the order, click Apply Primary Insurance.
-
The Select Insurance screen displays with the available authorizations.
-
Select the appropriate Item Type (exam, frame, lens, contact).
-
Click Calculate Benefits. At this point, the calculator returns any applicable errors or warnings.
Automatic VSP benefit calculations are not currently available for IOF lenses. When pricing a VSP IOF lenses order, calculate the amounts manually.
See Warnings and Errors in the VSP Interface to learn more about possible errors/warnings, causes and how to resolve.
Managing a Warning
When you receive a warning, you can either fix the warning or acknowledge the warning and continue.
Correcting a Warning
-
To correct the errors in the warning:
-
If the order includes eyeglasses/contacts, click Edit Order. Return to the pricing screen where you can edit the order and then apply benefits again.
-
If the order is exam only, on the warning, select I acknowledge and click Recalculate.

-
-
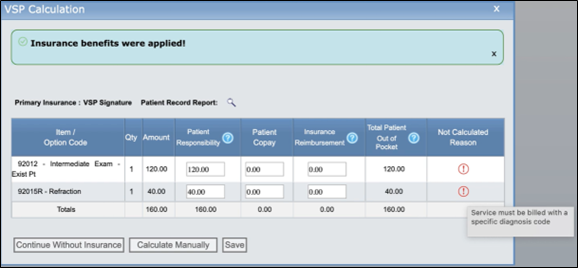
The system recalculates and applies the benefits and displays the items not calculated. Hover over the red exclamation point for that item to view the reason benefits were not calculated.
-
Click Save to return to the pricing screen. From the pricing screen, click the red X icon to delete the items being billed.
-
Add the exam service items again, correcting the errors. For the example shown in the screen, you would add the exam with the required diagnosis code.
-
Click Apply Primary Insurance. This time, the benefits are calculated without errors and you can save, price and invoice the order.
Acknowledge a Warning
-
If you choose to acknowledge a warning, select I acknowledge and click Recalculate.

-
The system recalculates and applies the insurance benefits.
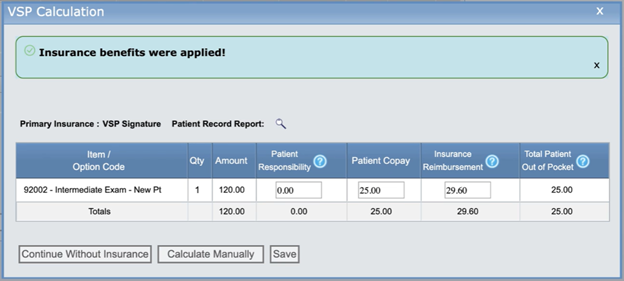
-
Click Save and then price and invoice the order.
Acknowledging a warning allows you to complete the order. If there are no other reasons for the claim to go on hold, then the claim is billed to the carrier and a record of the acknowledgment is kept with the claim and visible in billing.
Changes in Billing
In Billing, you now have visibility into any orders submitted with a warning.
From the claim detail, you can see the order is billed to the carrier.
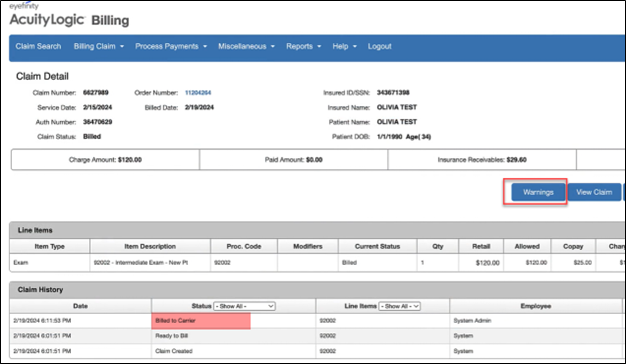
Click Warnings. The Warnings screen lists the error number and detail and shows the warning was acknowledged on the order.
