What's New in AcuityLogic 7.14 for Cloud Users
Eyefinity announces the newest version of AcuityLogic. In addition to resolving known issues in previous versions of AcuityLogic, this updated version offers new features and expanded functionality.
Topics include the following:
For more information on AcuityLogic features, training, and integrations, contact your account representative, or call Eyefinity at
Admin Enhancements
Admin includes enhancements in the following areas:
Specifying Whether the Last Exam Date Is Updated on a Patient's Profile
To update the Last Exam date on a patient's profile
- In Admin, click Company, and select Product Mapping.
- In the Products table, click the link for your company in the Other Items column.
- In the Other Items Mapping window, select Exams from the Item Type drop-down list.
- In the Other Items > Exams table, select the exam's Update Last Exam Date check box:
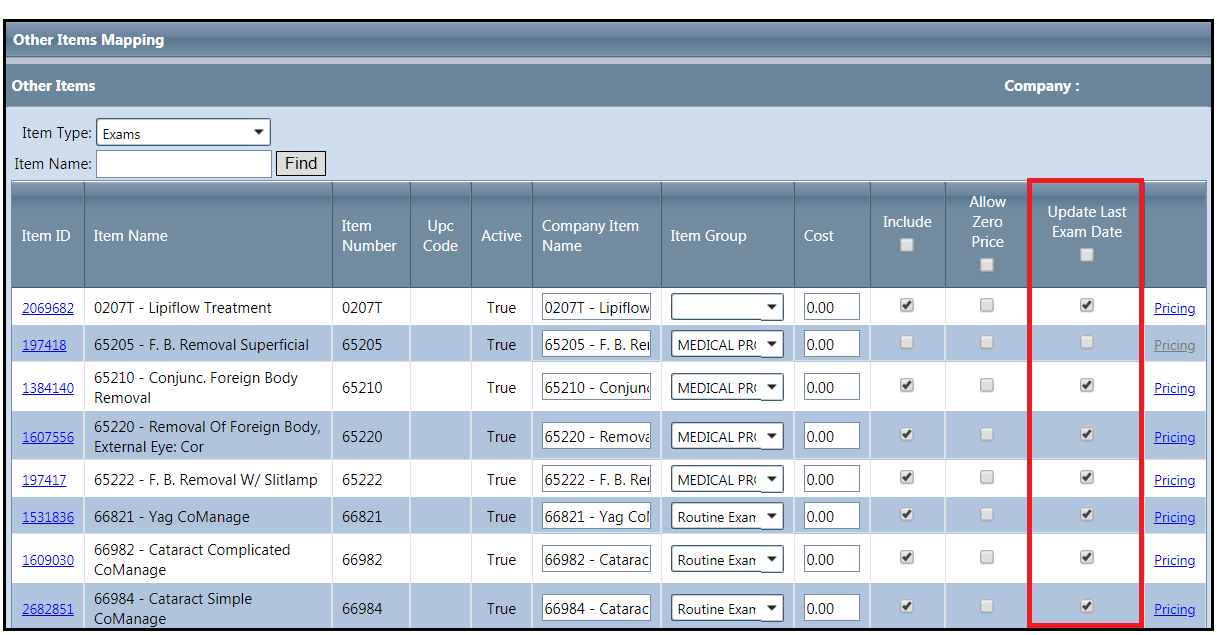
- Click Save.
Excluding Patient Address and Signature from Invoices
You can now exclude the patient address, the signature section, or both from your invoices:
- In Admin, click Company, and select Company Setup.
- In the Company Information window, click the link for your company in the Company column.
- In the Company Information window, expand the Patient Billing Statements and Invoice Customization menu.
- On the Invoice tab, select (to display) or deselect (to exclude) the following options:
- Patient Address
- CC Signature Capture
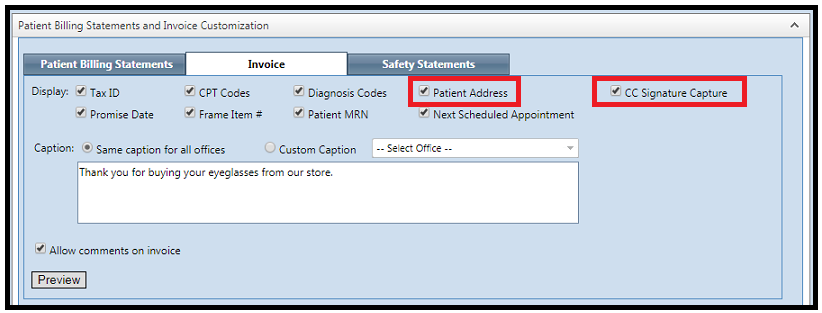
- Click Save.
The following figure shows examples of the items you displayed or excluded:

POS Enhancements
POS includes enhancements in the following areas:
Retrieving New or Existing Eligibility Authorizations for VSP Insurance
You can now use the Add Eligibility window to retrieve new or existing eligibility authorizations for VSP insurance from eyefinity.com or VSP member services.
To retrieve a new or existing eligibility authorization for VSP insurance
- Open a patient profile.
- Click the Insurance tab.
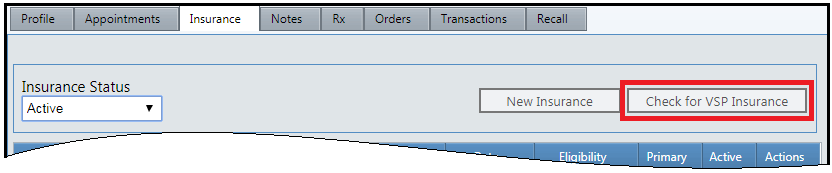
- From the Insurance Status drop-down list, select Active.
- Click the new Check for VSP Insurance button:
- In the new Check VSP Eligibility dialog box, do one of the following:
- If the patient is the VSP subscriber or member:
- Click Yes.
- Enter the patient’s social security number (SSN) or VSP member ID.
- Click Find VSP Insurance.
- If the patient is not the VSP subscriber or member:
- Click No.
- In the Subscriber Information dialog box, enter the required information.
- Click Find VSP Insurance.
If the patient has VSP insurance, AcuityLogic adds the information to the table on the Insurance tab.
- If the patient is the VSP subscriber or member:
- On the Insurance tab, click the Eligibility link in the row of the VSP carrier/plan whose eligibilities you want to authorize.
The Eligibilities section appears:

- Click Add Eligibility.
The enhanced Add Eligibility window appears.
The window is now easier to read and includes a list of additional VSP benefits for which the patient is eligible. To obtain authorization for any of those benefits, you first must ensure that the carrier and plan were added to the patient's profile.
- Do one of the following:
- To retrieve new VSP eligibility authorizations:
- In the window, select the eligibilities that you want to get authorization for.
- Click Authorize:

AcuityLogic sends an authorization request to Eyefinity. After the new authorization is generated, it is displayed in the Eligibilities section of the patient's Insurance tab.
- To retrieve existing VSP eligibility authorizations:
- In the Retrieve Existing Authorization field, enter the authorization number you obtained from eyefinity.com or VSP member services.
The Authorize button changes to a Retrieve button:

- Click Retrieve.
AcuityLogic retrieves the existing authorization information from Eyefinity. It is displayed in the Eligibilities section of the patient's Insurance tab.
- In the Retrieve Existing Authorization field, enter the authorization number you obtained from eyefinity.com or VSP member services.
- To retrieve new VSP eligibility authorizations:
Identifying Primary and Secondary Insurance
The following windows and tabs were enhanced to clearly identify a patient's primary insurance plans.
- Patients can have more than one primary insurance plan. For example, they may have a primary vision insurance and a primary medical insurance.
- Any plan not identified as a primary plan is a secondary plan.
- New insurance tab (POS)
This tab is displayed when you click New Insurance in the patient profile's Insurance tab. It now contains a Primary Insurance option, which you can select when you add an insurance plan. By default, the option is not selected.
 A Primary Insurance option was also added to the corresponding Insurance tab in BackOffice.
 - Insurance tab in patient profile (POS)
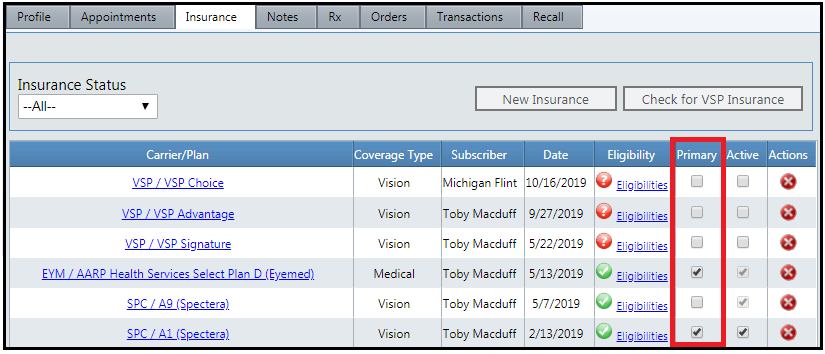
The table of insurance plans now includes a Primary column. To change a plan from primary to secondary or vice versa, select or deselect its Primary check box:
 A Primary column was also added to the corresponding Insurance tab in BackOffice.
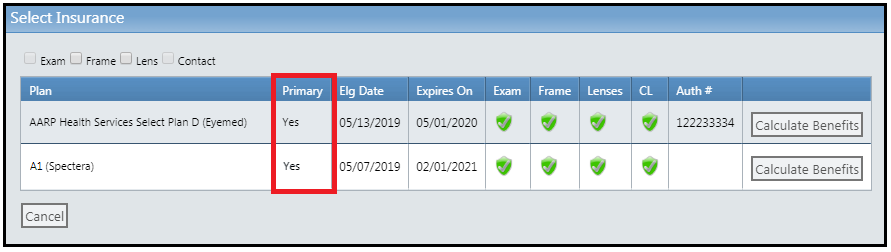
 - Select Insurance window (POS)
This window opens when you click Apply Primary Insurance or Apply Secondary Insurance in the patient's order pricing page. It now contains a Primary column:
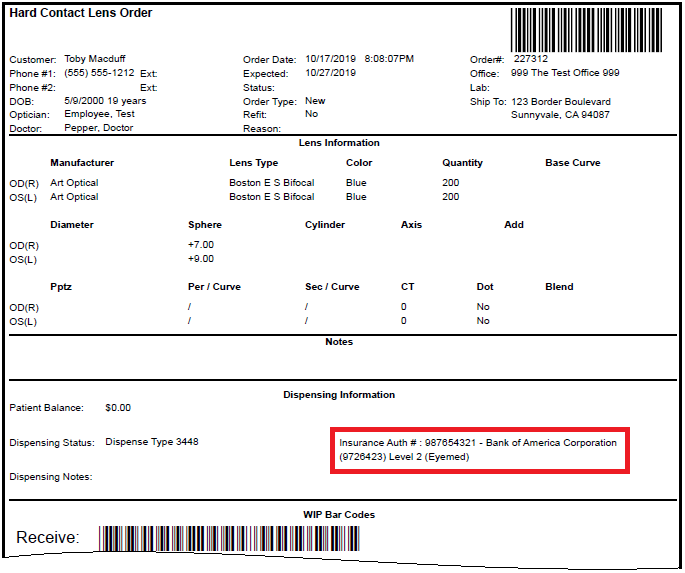
Displaying Insurance Information on Contact Lens Lab Orders
Lab orders for contact lenses now display insurance information, including authorization numbers, in the Dispensing Information section of the order:
Improving Performance When Adding Insurance
Previously, when you clicked New Insurance on the Insurance tab of a patient profile, AcuityLogic often generated the new insurance page slowly. It also saved changes to the page slowly. Now, the generate and save operations are 10 to 15 seconds faster.
Fixed Issues
AcuityLogic 7.14 fixes issues in the following area
Billing
POS
- In Scheduler, the Find Open Appointments feature no longer misses open slots after encountering two consecutive exceptions of any type.
- If a plan's insurance schedule contains a frame with the Allow -> Discount - Contract method (Allowance Type = Call, Receivable Type = Call, Copay Type = None, Discount Type = None), an unknown error no longer occurs when you try to apply the plan to an order.