Posting Inventory for a Central Inventory Session in AcuityLogic DC
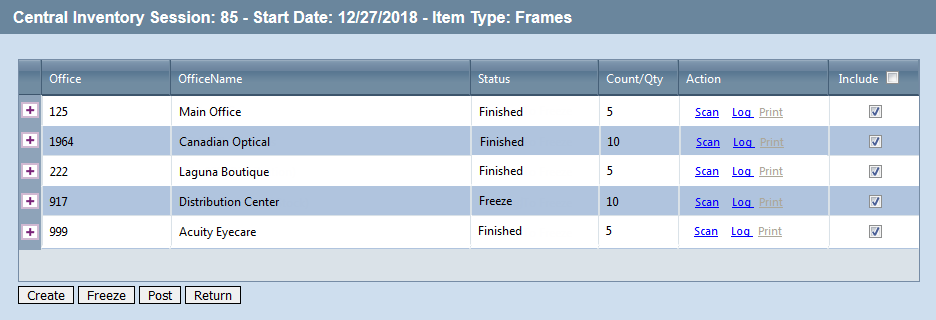
You can post inventory for a central inventory session after the selected locations finish recording inventory counts. The status that appears for a location can depend on the location type:
- For office locations, users can close inventory sessions in AcuityLogic POS, and the status that appears for the location is Finished.
- For distribution center locations, users cannot close inventory sessions in AcuityLogic DC and the status that appears for the location is Freeze.
You can post inventory for locations with the Finished or Freeze status in the Central Inventory Details window. If necessary, you can also update the inventory count for locations with these statuses.
To post inventory for a central inventory session
- Click Inventory and select Central Inventory.
The Central Inventory window opens.
- Click the Details link for the session.
The Central Inventory Details window opens.

- Select the locations you want to post inventory for using one of the following methods:
- To include all locations, select the Include check box in the column header.
- To include individual locations, select the Include check box next to a location.
To exclude a location, deselect the Include check box. - Click Post to post inventory for each selected location.To update the inventory for a location, click the Scan link for the location and update the inventory in the Inventory Physical Count window by using the process you used previously.
- Click OK in the dialog box that opens.
AcuityLogic posts the inventory for each selected location and changes the status to Waiting To Post. The status changes to Post after the inventory finished posting.