Managing Existing Appointments
From the Appointments tab, you can view a list of existing appointments, view appointment details, and add appointment notes. You can also confirm, reschedule, or cancel existing appointments.
Telehealth appointments are denoted by a Telehealth Visit (camera) icon in the Doctor column. If the resource has been configured as a full-time telehealth user and a platform partner was not selected from the In-Office Telehealth drop-down list, a warning icon appears next to the Telehealth Visit icon.
To manage existing appointments
- Open a patient profile. See Opening Patient Profiles.
- Click the Appointments tab.
A list of the patient’s appointments is displayed.
- Click the following icons, buttons, and links to perform various tasks:
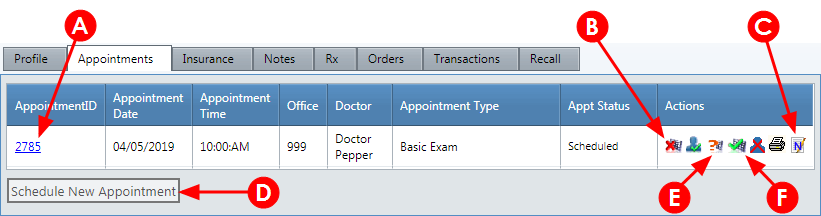
- View the appointment details.
- Cancel the appointment.
- View or add notes for the appointment.
Enter notes in the Note Detail field and select one of the following check boxes if necessary:
- Urgent: A message appears at the top of the Profile window indicating that the patient has an urgent note.
- Followup: The note is added to the Patient Followup Notes report that you generate from the reports section.
- Schedule a new appointment for the patient in the Scheduler.
- Reschedule the appointment.
- Confirm the appointment.