Recording Patient Profile Information
From the Profile tab, you can record patient profile information including contact information and communication preferences.
To record patient profile information
- Open a patient profile. See Opening Patient Profiles.
- Click the Profile tab.
The patient’s profile displays with the required fields highlighted in yellow. You must complete the required fields before you can save the patient’s profile.
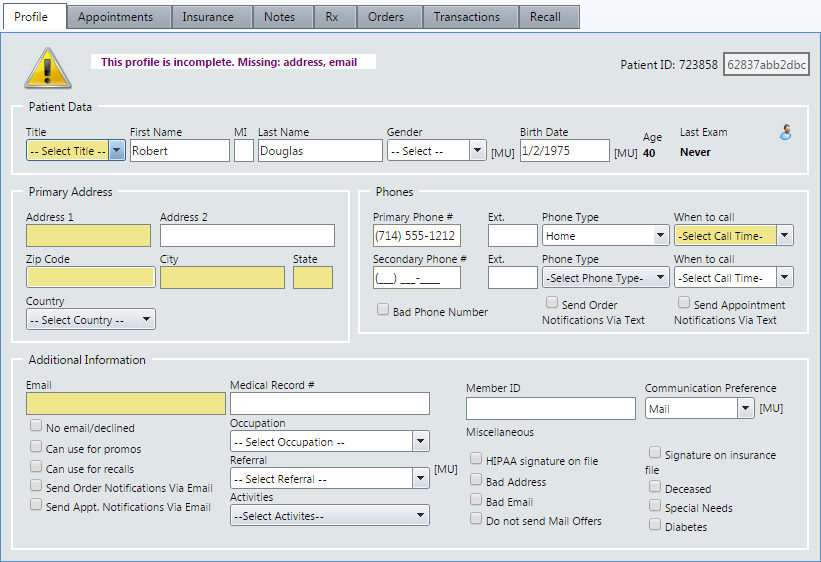
- Enter or select the patient’s title, address, phone information, and email in the appropriate fields.
- Select the patient’s gender from the Gender drop-down list. AcuityLogic may populate this field automatically depending on your selection in the Title drop-down list.
- Select the Bad Phone Number check box if the provided phone number is incorrect. If you select the Bad Phone Number check box, AcuityLogic displays a message at the top of the Profile window as a reminder to update this information.
- Do not select the Send Order Notifications Via Text and Send Appointment Notifications Via Text check boxes, as the functionality for these options are currently undergoing development.
- Select one or more of the following check boxes to indicate the information that can be emailed to the patient:
- Select the No email/declined check box if the patient does not have an email address or declines to provide an email address.
- Selecting this check box disables all other email check boxes.
- Select the Can use for promos check box if the patient wants to receive promotional emails. If you select this check box, AcuityLogic uses the patient’s email address when you use the survey and marketing functionality in AcuityLogic BackOffice.
- Select the Can use for recalls check box if the patient wants to receive recall notices by email. If you select this check box, AcuityLogic uses the patient’s email address when generating recalls.
- Do not select the Send Order Notifications Via Email check box, as the functionality for these options are currently undergoing development.
- Do not select the Send Appt. Notifications Via Email check box, as the functionality for these options are currently undergoing development.
- Enter the patient’s medical record number in the Medical Record # field, if applicable.
- Select the patient’s occupation from the Occupation drop-down list, if needed.
- Select a referral source from the Referral drop-down list, if needed.
- Select one or more check boxes for the patient’s activities in the Activities drop-down list, if needed.
- Enter a Member ID in the Member ID field, if applicable.
- Select the patient’s communication preference from the Communication Preference drop-down list.
- Select the HIPAA signature on file check box if you have a record of the patient’s signature and consent according to HIPAA regulations.
- Select the Bad Address check box if the provided address is incorrect. If you select the Bad Address check box, AcuityLogic displays a message at the top of the Profile window as a reminder to update this information.If this check box is selected, a statement will not be created for the patient when you generate the Patient Statement report. For information about the report see Patient Statement in General Reports in AcuityLogic POS.
- Select the Bad Email check box if the provided email address is incorrect. If you select the Bad Email check box, AcuityLogic displays a message at the top of the Profile window as a reminder to update this information.
- Select the Do not send Mail Offers check box if the patient does not want to receive mail offers.
- Select the Signature on insurance file check box if you have a record of the patient’s signature on their insurance file.
- Select the Deceased check box if the patient is deceased.
- Select the Special Needs check box if the patient has special needs.
- Select the Diabetes check box if the patient has diabetes.
- Click Save to save the patient profile.