Migrating Data from OfficeMate/ExamWRITER to AcuityLogic and Eyefinity EHR
This document explains how to use the Eyefinity Self-Service Conversion tool to migrate patient data from OfficeMate/ExamWRITER to AcuityLogic and Eyefinity EHR.
This migration is self-run and live streaming. After moving your historic data to the target system, you can continue to work in the source system. As you add or modify patients and appointments, the conversion tool moves the new data to the target system in real time. No later “delta migration” or cutover is required.
This document includes the following topics:
Perform a Self-Service Conversion
Use the following checklist to guide you through the self-service conversion process. For information about how to perform a task, click on the task. Perform the tasks in the order listed.

Check the Migration System Requirements
Make sure your AcuityLogic system meets the migration system requirements. For information about those requirements, see Production Environment Server Requirements for AcuityLogic.
Create an Active Directory User for OnRamp
Create the Active Directory account before installing OnRamp.
To get access to required resources (databases, file systems, and so on), OnRamp must run as an Active Directory user account.
To Create an Active Directory User:
-
Create a local or domain user account for xbridge.
-
Set the password for the xbridge user account to never expires.
-
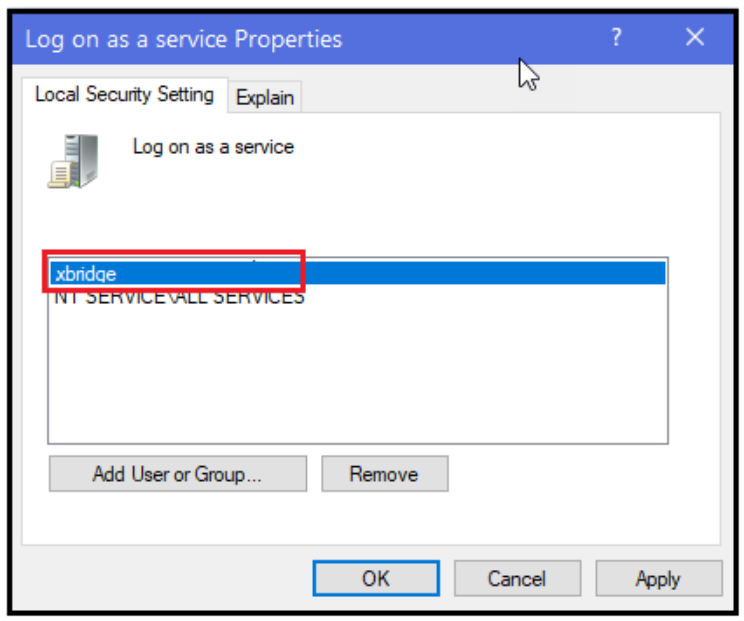
Allow the user to Log on as a service in the Local Security Policy. This enables the OnRamp service to run under the context of the xbridge user account to ensure appropriate access.
-
Open the Local Security Policy program.
-
Expand the Local Policies folder.
-
Click the User Rights Assignment folder.
-
In the Policy list, find Log on as a service, and double-click it. The Log on as a service Properties window opens.
-
Click Add User or Group.
-
In the Select Users, Computers, Service Accounts, or Groups window, select the object type (Users), select the account location, enter the user account name, and click OK.
The xbridge user account is now listed.
-
Click Apply and OK.
-
Create Database User Access Accounts
Depending on the Xbridge functionality required for your system, the xbridge Active Directory user account may need access to various resources, such as the following:
-
Read/write access to the databases of your source target practice management systems (OfficeMate, AcuityLogic, and so on).
-
File system access to local drives or network shares.
Database access (SQL Server, MySql, and so on) can be controlled by using built-in database user accounts. For example, to provide read/write access to a database you host in Microsoft SQL Server:
-
Add a SQL login (recommended user name is xbridge).
-
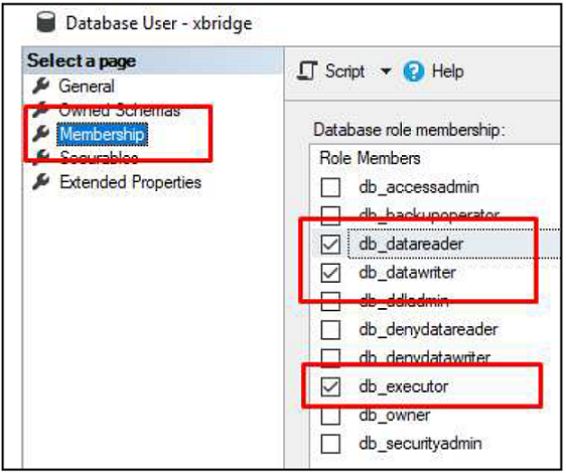
Add the xbridge user to the following roles, based on the permissions required for your conversion:
-
db_datareader (for target system users)
-
db_datawriter (for target system users)
-
db_executor roles
-
Log in to Xbridge Account
-
Obtain login credentials for your Xbridge account from yourEyefinity account manager.
-
Go to the Xbridge Log In page (https://app.xbridge.io/), and enter your credentials.
-
Click Log In. The Healthcare Systems page opens.
Create OnRamp Installations and Activation Codes
OnRamp enables Xbridge to establish a secure two-way connection with an on-premises AcuityLogic system database or file system without using a VPN. It enables the migration process to read data from the source database and write data to the target database.
To Create OnRamp Installations and Activation Codes:
-
In the Healthcare Systems page, click Select in the row of the healthcare system for which you want to create an OnRamp installation.
-
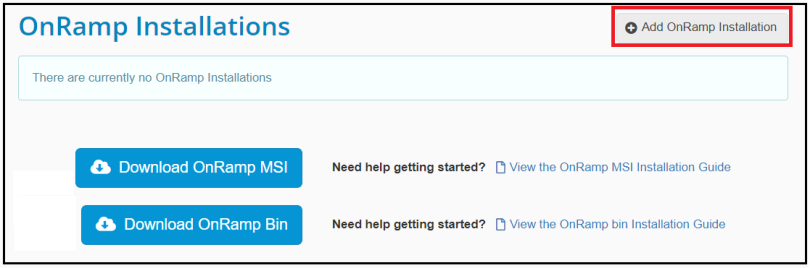
In the panel on the left, click OnRamp Installations. The OnRamp Installations page for the selected healthcare system opens.
-
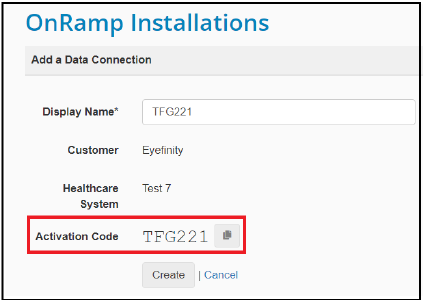
Click Add OnRamp Installation. A new OnRamp installation displays. It includes an activation code.
-
Change the Display Name to something more appropriate, such as "OfficeMate Source OnRamp".
-
Click Create. The new OnRamp installation appears on the OnRamp Installations page.
-
Repeat steps 3 through 5 to create a target installation named Target OnRamp.
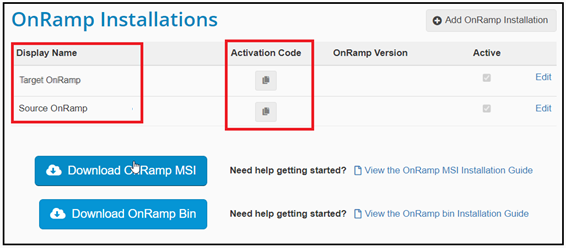
Record the activation codes. You will need them during the Installing OnRamp as a Windows Service task.
Installing OnRamp as a Windows Service
To connect to your practice's data, OnRamp must be installed on a server in your production environment.
-
Create the following directories:
-
C:\\OnRamp — A base directory for all your OnRamp installations
-
C:\\OnRamp\HealthCareSystemName_DataSystemName — A subdirectory with a descriptive name for the OnRamp instance you’re installing
-
C:\\OnRamp\HealthCareSystemName_DataSystemName\bin — A subdirectory named “bin”
-
-
Go to the Healthcare Systems page in Xbridge, and select the appropriate healthcare system.
-
In the panel on the left, click OnRamp Installations.
-
In the OnRamp Installations page, click Download OnRamp Bin.
-
Save the downloaded OnRamp ZIP file to the bin directory created in step 1.
-
Extract the contents of the ZIP file to the bin directory.
-
Open a command prompt as Administrator.
-
Navigate to the bin directory.
-
Type install, and press Enter. The OnRamp Windows service is installed.
-
To run it as a local service, type L, and press Enter.
-
To use an instance name, type Y, and press Enter.
-
Enter a name for the instance, and press Enter.
Tip: Use the same name as the subdirectory for the OnRamp instance. -
Enter the OnRamp Activation Code, and press Enter.
For example: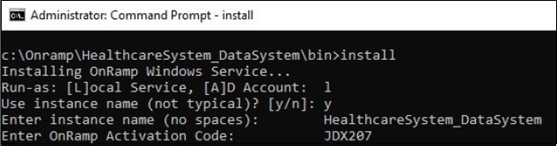
-
Follow the prompts to enter the login credentials for the domain user created in Create an Active Directory User for OnRamp .
-
When the installation is complete, navigate to the OnRamp Installations page, and verify each installation has a green check mark and an OnRamp version number next to it.
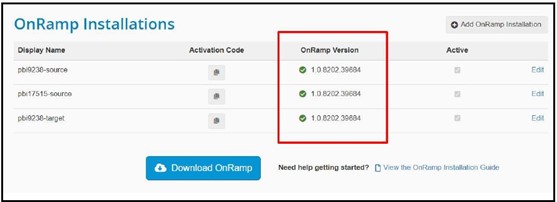
The activation code was generated when you created the source and target OnRamp installations above (see Create OnRamp Installations and Activation Codes).
Creating a Migration Project
To create a migration project, perform these tasks:
You use migration projects to set up each migration that Eyefinity Self-Service Conversion performs.
The first migration project must be made from scratch, but all subsequent migration projects can be made by cloning an existing project. Clones save time; for example, if a healthcare system contains a migration project for each location in your company, you can create subsequent projects simply by cloning the first, renaming the clone, and changing the filter.
Add a Migration Project to the Healthcare System
-
From the appropriate healthcare system, open the Migration Projects page.
-
You can add a project from scratch, clone a project or modify an existing project:
-
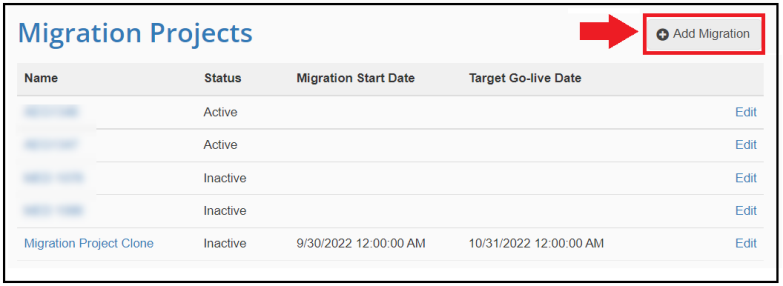
To create a project from scratch, click Add Migration.
-
To clone a project, click on the name to open an existing project and click Clone this Migration Project.
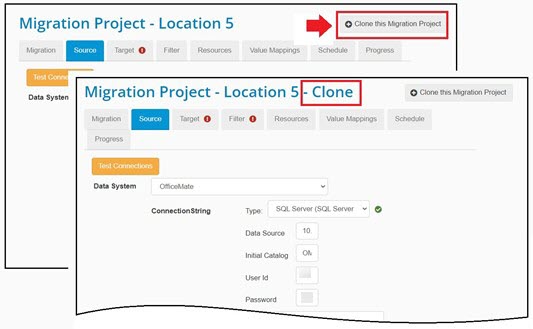
The clone's name is the same as the original project with "Clone" appended (as shown above). -
To modify a project, from the Migration Projects page, click the name to open to the project.
-
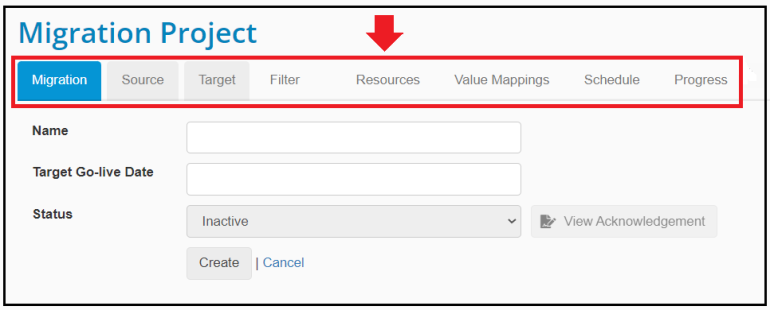
Once a project is added, the Migration Project page opens. The page contains multiple tabs used to configure the project.
Name the Project
-
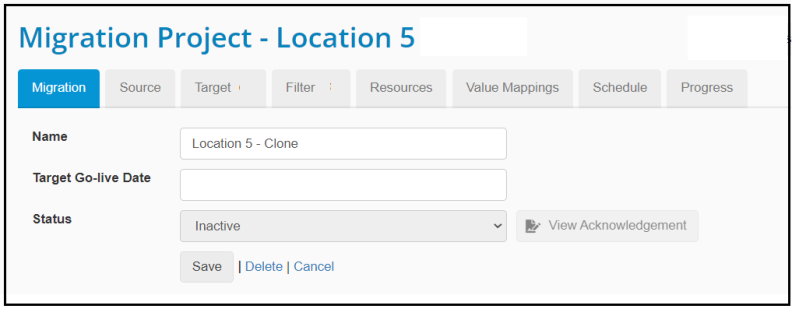
On the Migration tab, enter the following information:
-
Name: Eyefinity recommends a name that identifies the type of data.
-
Target Go-live Date: This date is informational.
-
-
Save your changes.
Create a Source Connector
Use the Source tab to define the connection between the source data system and the OnRamp installation that reads the data.
-
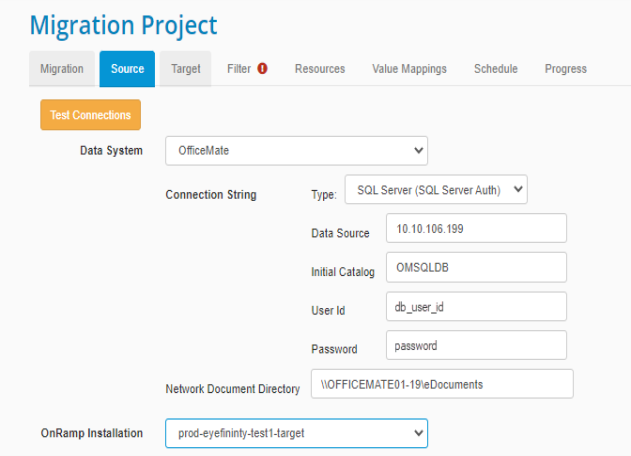
From the Data System drop-down list, select the source data system (OfficeMate) - the system that sends data.
The Source tab is populated with additional fields.
-
Enter the following Connection String information:
-
Connection String: The string used by OnRamp to connect to the source database. It contains:
-
Type: OfficeMate database type (SQL Server Auth, SQL Server Windows Auth, or MySql).
-
Data Source: Server where the OfficeMate database resides.
-
Initial Catalog: OfficeMate database name.
-
User Id and Password: Credentials for logging into the OfficeMate database and reading data.
-
Credentials are required only if a standalone SQL user is created. If the Active Directory user running the OnRamp service is granted the necessary SQL permissions, a Windows Auth approach is supported.
-
-
NetworkDocumentDirectory: Where OfficeMate eDocuments are stored on your network share. You may need to create this path. In your file explorer, locate the eDocuments directory, and then right-click on the directory and select Properties. The eDocuments Properties screen displays. Select the Sharing tab and click Share.
-
OnRamp Installation: The OnRamp installation that connects to and pulls data from the source OfficeMate.
-
Test Connections: This button tests the connection between the source database connection string and the OnRamp service. It appears after you select the OnRamp installation.
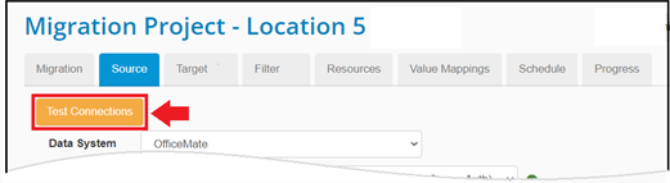
-
Green dots indicate the connections are good.
-
If a red dot is returned, hover over the dot to get more details. Adjust accordingly and test the connection until only green dots are returned.
-
-
-
Save your changes.
Create a Target Connector
Use the Target tab to define the connection between the target data system and the OnRamp installation that writes to it.
-
From the Data System drop-down, select the target data system -- this is where you send the data.
To send data to both AcuityLogic and Eyefinity EHR, select AcuityLogicPMEyefinityEHR.
The Target tab is populated with additional fields.
-
Enter information in the following Target tab fields:
-
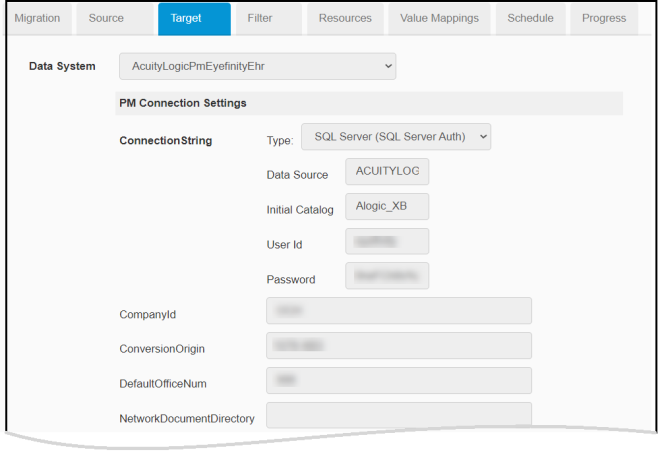
PM Connection Settings (AcuityLogic)
-
ConnectionString: The string used by OnRamp to connect to the target database. It contains:
-
Type: AcuityLogic database type (SQL Server Auth, SQL Server Windows Auth, or MySql).
-
Data Source: Server where your AcuityLogic database resides.
-
Initial Catalog: AcuityLogic database name (the default name is ALogic).
-
User Id and Password: Credentials for logging into the AcuityLogic database and writing data to it; credentials are required only if a standalone SQL user is created. If the Active Directory user running the OnRamp service is granted the necessary SQL permissions, a Windows Auth approach is supported.
-
-
CompanyId: the Company ID added to patient records when created in AcuityLogic.
-
ConversionOrigin: Conversion in which a patient was migrated.
-
DefaultOfficeNum: Value to use if you don’t know the actual office number.
-
NetworkDocumentDirectory: The target system directory where migrated documents from the source system are stored.
-
-
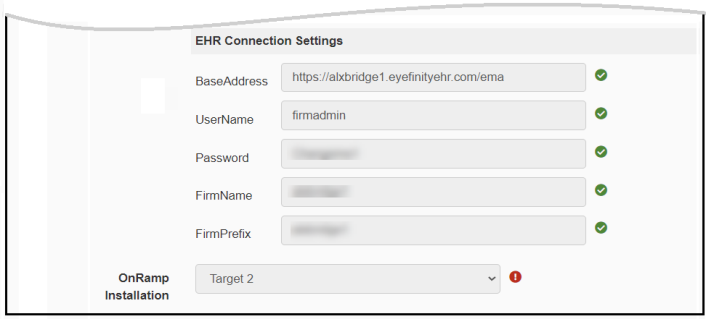
EHR Connection Settings (Eyefinity EHR API authentication details).
-
BaseAddress: URL for logging in to Eyefinity EHR.
-
UserName: System administrator user name for loading data into Eyefinity EHR.
-
Password: System administrator password.
-
FirmName:
-
FirmPrefix:
-
-
OnRamp Installation: The OnRamp installation that connects to your target system database. In some cases, this is the same one selected for the source. Note: If the source and target systems are on different networks, you must use two OnRamp installations.
-
Test Connections: Click to test the connection between the source database connection string and the OnRamp service.
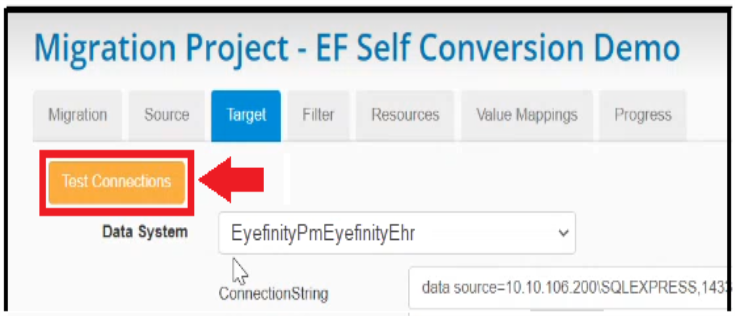
-
Green dots indicate the connections are good
-
If a red dot is returned, hover over the dot to get more details. Adjust accordingly and test the connection until only green dots return.
-
-
Select Locations to Migrate to the Target
Use the Filter tab to select one or more source locations for the migration project to migrate to the target.
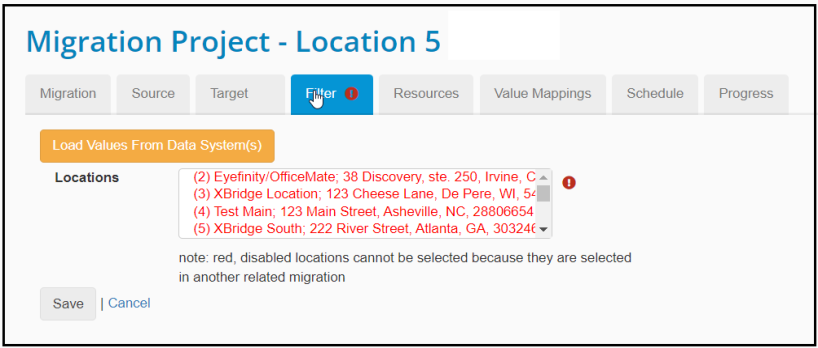
Red locations have already been migrated. The conversion tool prevents you from remigrating red locations so you do not lose changes made to the data in the AcuityLogic system.
If you add a location to the source system, click Load Values from Data Systems to update the Locations list with the new location.
Select Resources to Migrate
Use the Resources tab to select the items you want to migrate to AcuityLogic or Eyefinity EHR.
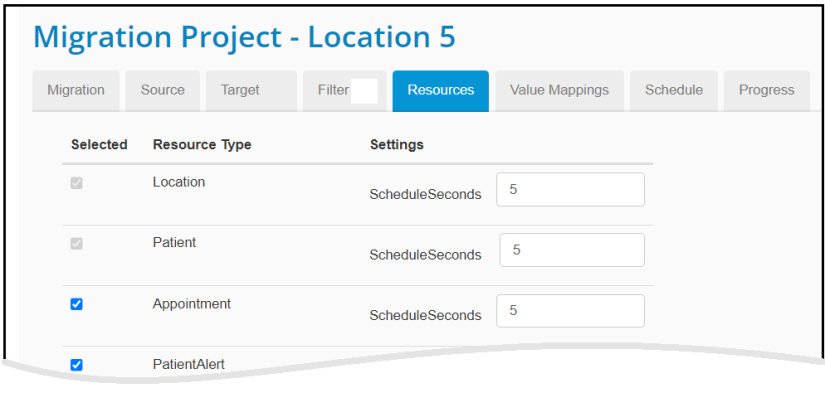
-
Locations and patients always migrate because all other resources have dependencies on them.
-
ScheduleSeconds specifies the frequency at which new or modified records are extracted from your source system. If you’re caught up in a rush and still using your old system, you might want to reduce the frequency to one every 60 seconds.
Map Source Values to Target Values
Use the Value Mappings tab to map source values to target values.
-
On the Value Mappings tab, click Load Values from Data Systems.
-
Click Auto Map Values.
-
Complete the mapping for values not automatically mapped by selecting the source values and the target, and then click Map.
Activate a Migration Project
To run a migration project, perform these tasks:
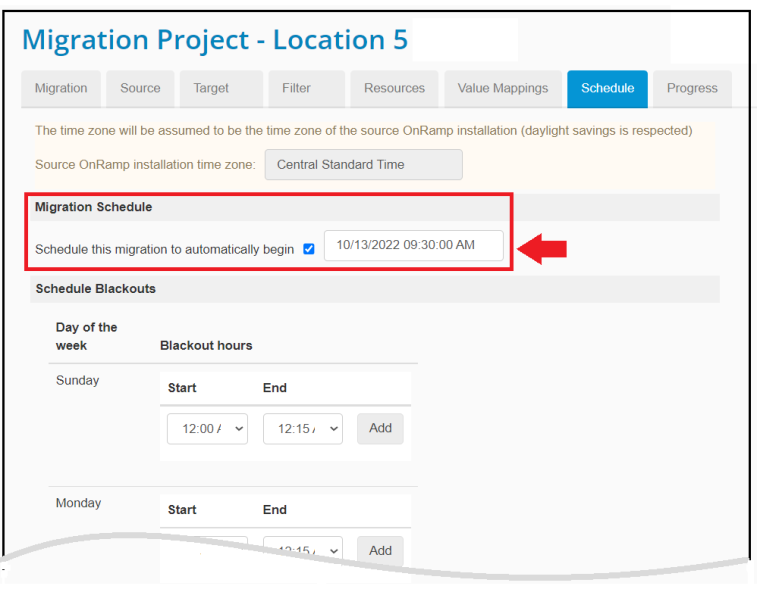
(Optional) Select a Future Start Date
Use the Schedule tab to set the project to automatically start at a future date.
-
In the Migration Schedule section of the Schedule tab, check Schedule this migration to automatically begin.
Today’s date displays in the field next to the checkbox.
-
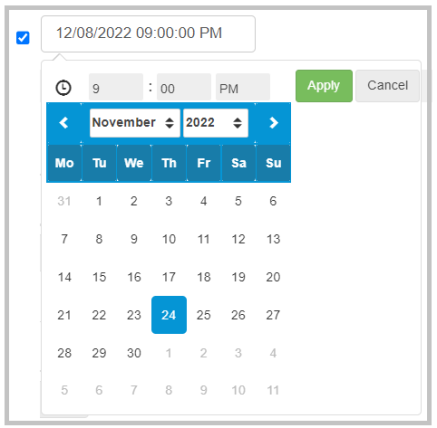
To change the start date and time, click in the field. A calendar tool appears.
-
Use the calendar to specify a different date and time, and then click Apply.
As long as the project is Active, the migration job will now automatically start running at the specified date and time.
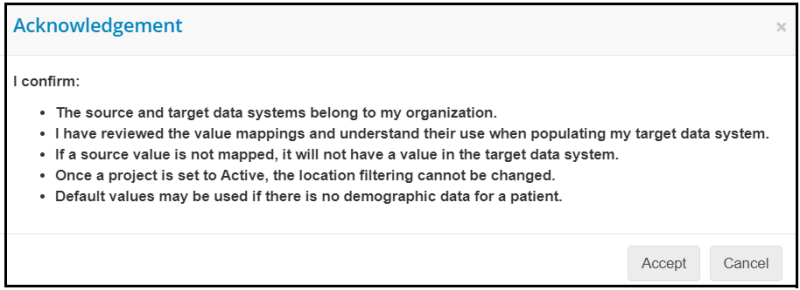
Accept the Terms of Use
Before you can activate a project, you must agree to abide by its terms of use.
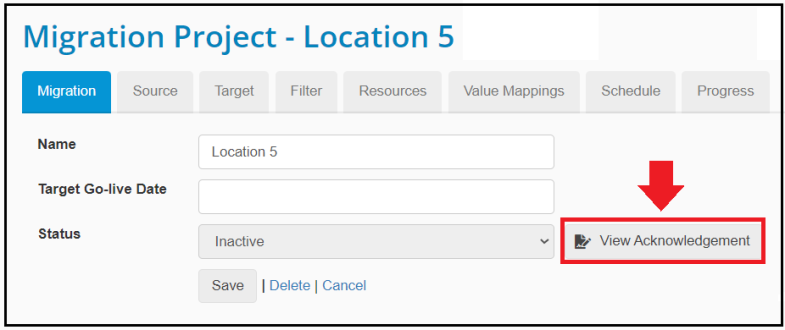
-
Navigate to the Migration tab, and click View Acknowledgement.
-
Read the terms of use, and then click Accept.
-
In the confirmation message, click Yes.
After you click Yes, the project is read only.
You can still set it to Active or Inactive, but in both cases, it remains read only.

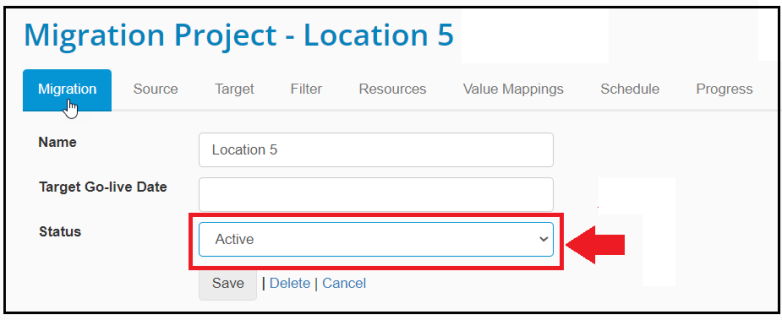
The migration project is now read only, and the Status drop-down list is enabled.
Set Project Status to Active
From the Status drop-down list, select Active. Unless you set the migration to start on a future date in the Schedule tab—see (Optional) Select a Future Start Date—the migration begins immediately.
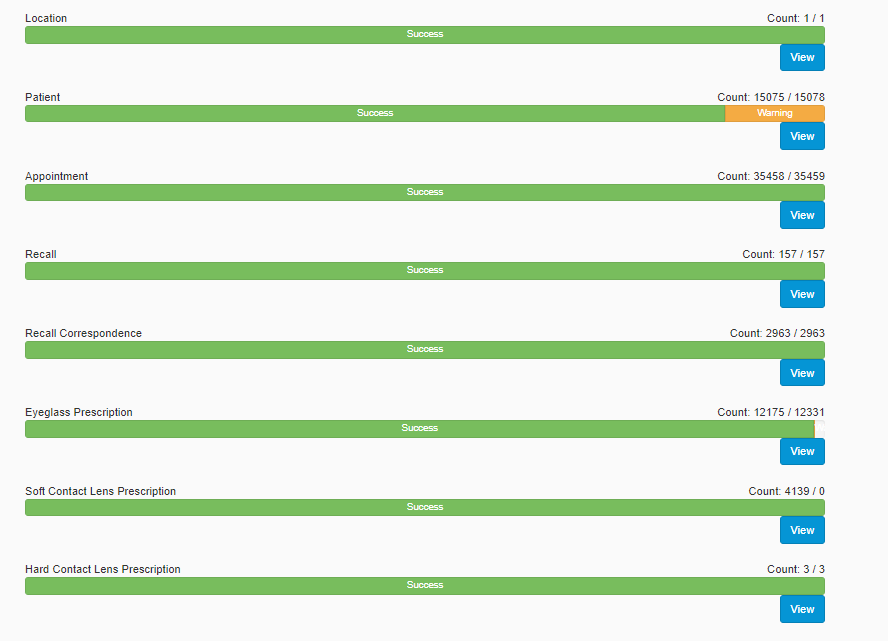
Track the Project's Progress
Use the Progress tab to view the number of records migrated for each resource.
-
Navigate to the Progress tab.
The information on this tab is not “live,” but you can periodically refresh the results to check your progress.
For each resource you’re migrating, this tab shows the number of (count):
-
Source records.
-
Staged records.
-
Staged (queued) records.
-
Staged (blocked) records.
-
Success (highlighted in green) - the number of records migrated without issue.
-
Warning (highlighted in yellow) - the number of records migrated but missing some data.
-
Error (highlighted in red) - the number of records not migrated. To review the error, view the detailed report (Step 2). To retry migrating the record, modify the source record.
-
-
To see a detailed report of the migrated records, click View under the appropriate resource bar.
For example: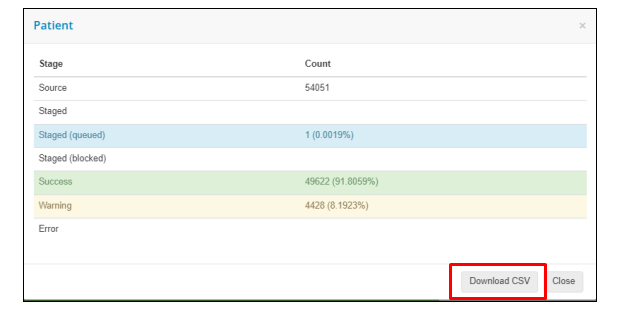
From the report, you can download a CSV file to get a list of everything migrated.
Validate the Migrated Data
After your migration is finished, validate the results by comparing the totals shown in the Progress tab with those in the Statement of Work (SOW) created by you and Eyefinity before you configured the migration project.