Navigating the OfficeFlow Screen
To access the OfficeFlow screen, click the OfficeFlow tab.
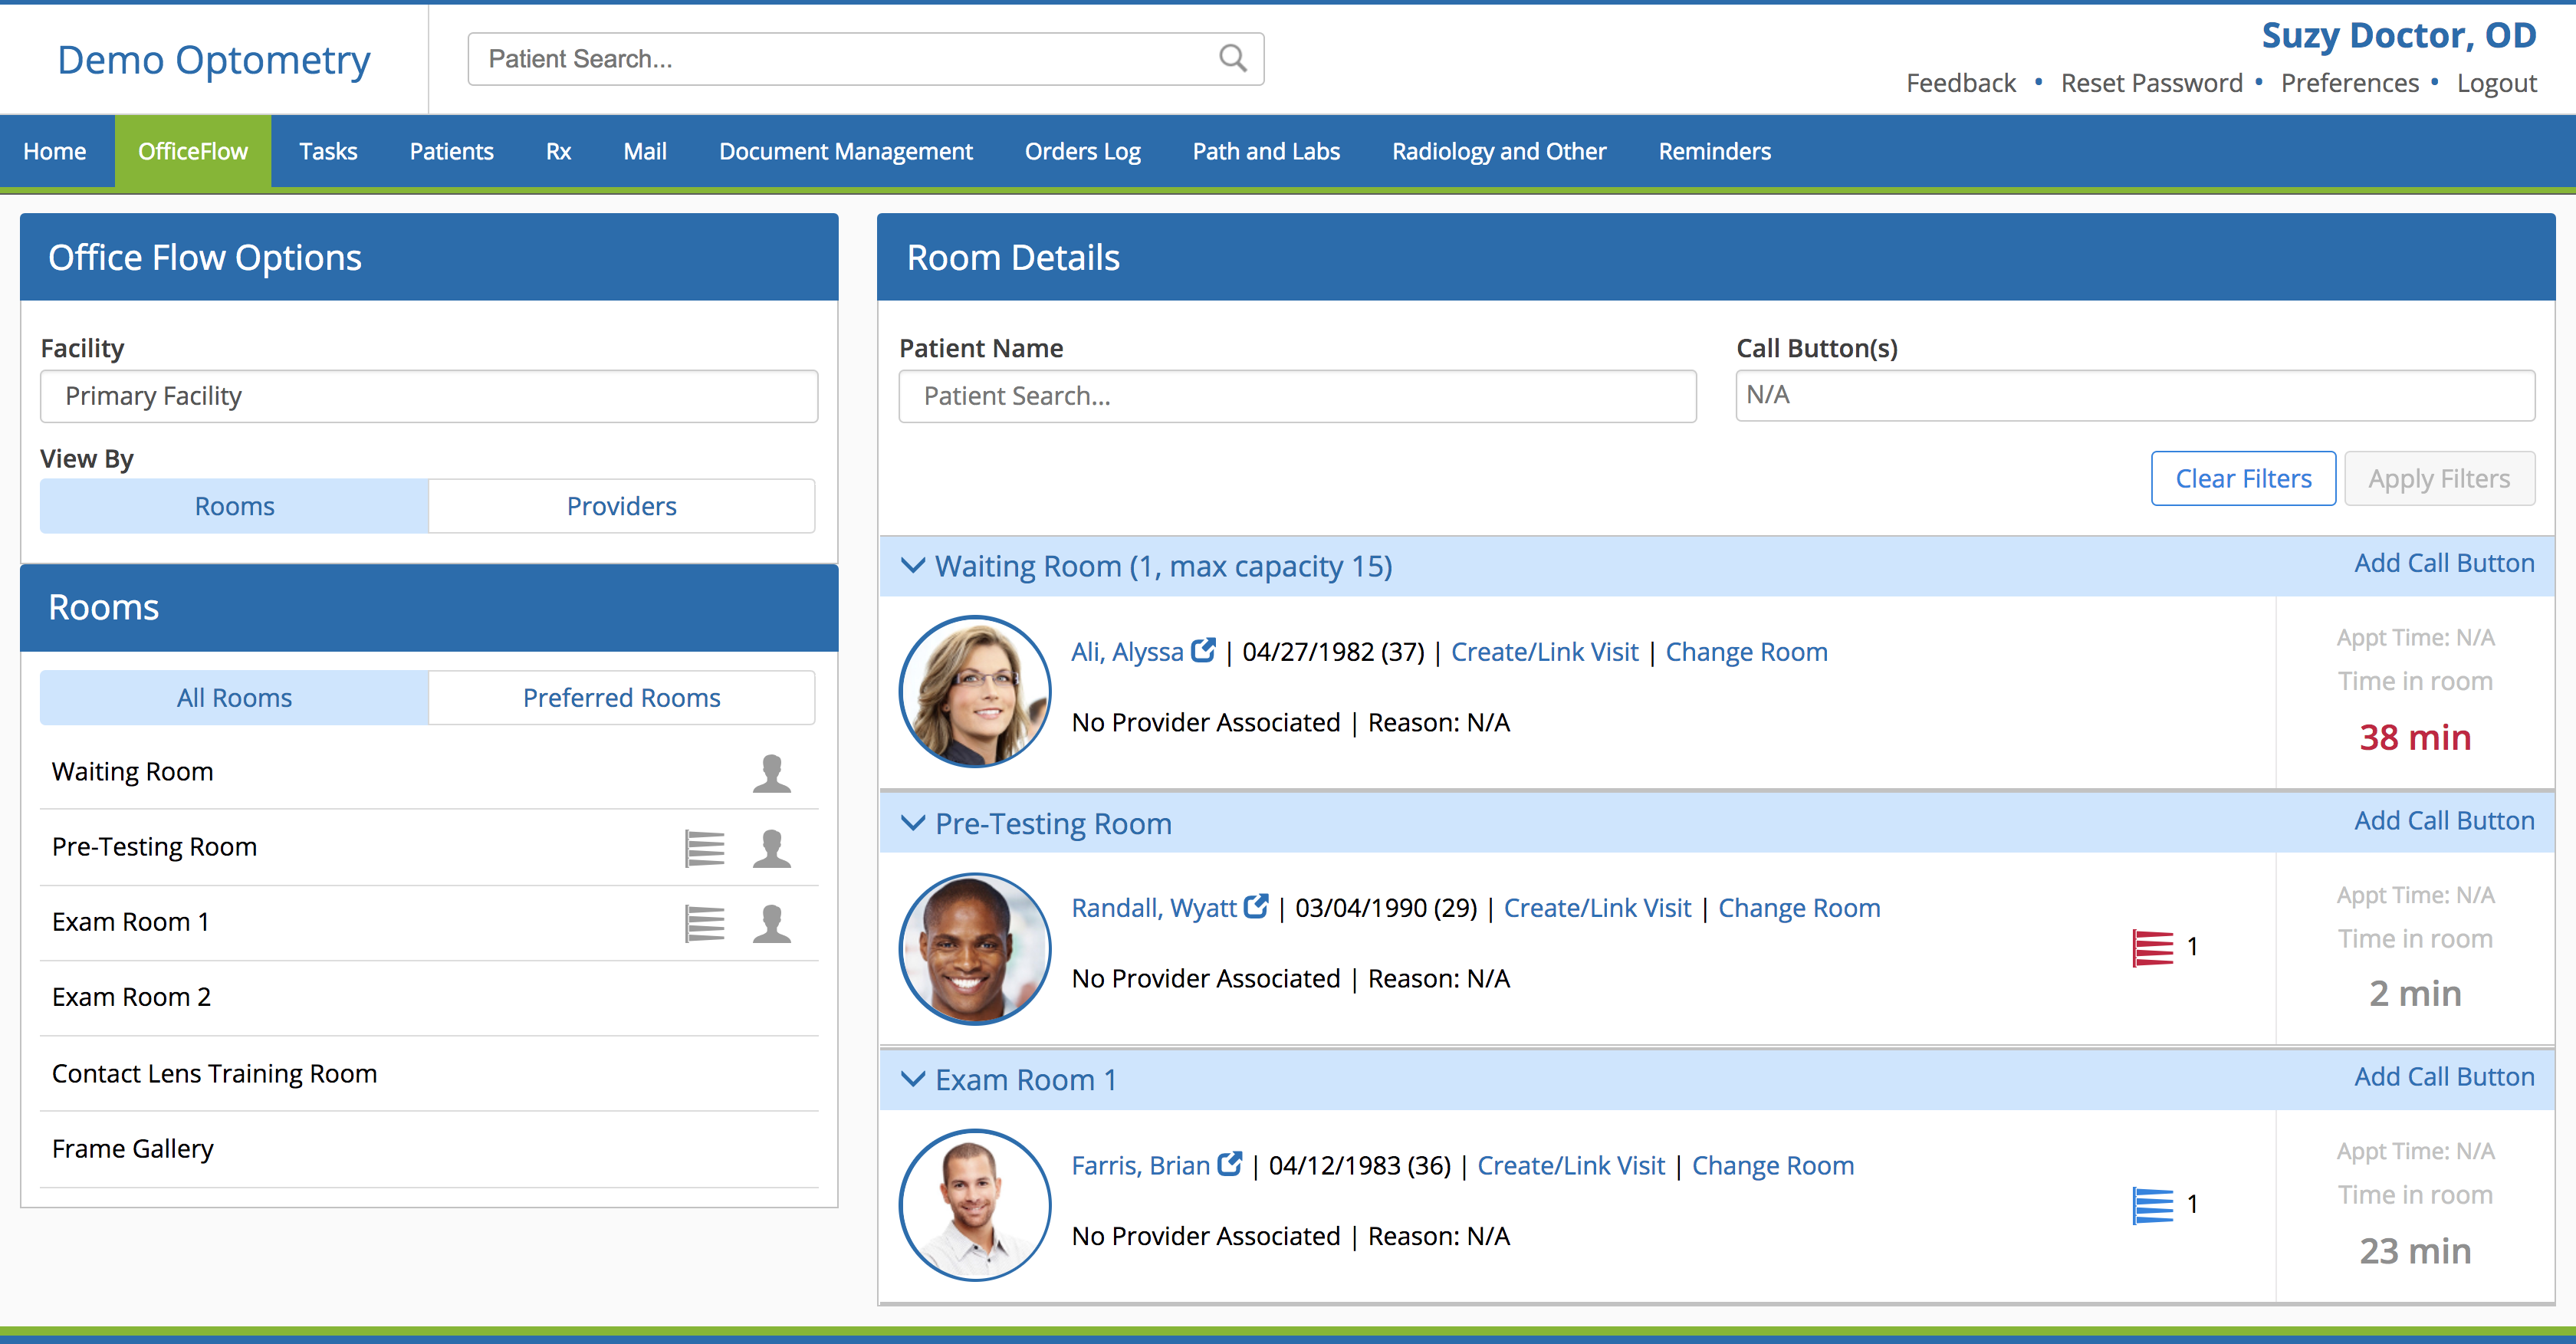
The OfficeFlow screen is separated into three sections:
- Office Flow Options. Choose the Facility you'd like to view using the drop-down list, or filter the patients you'd like to View By the room they're in or the provider they're scheduled to see.
-
Rooms. View All Rooms at the selected location or narrow the list down to your Preferred Rooms. You can also click on and highlight rooms to view only those rooms. Rooms with a patient icon are currently occupied, and patients that have a flag icon next to them currently have a call button associated with their visit.
Preferred Rooms are set within Preferences. For more information, see Setting Your Preferred Rooms.
- Room Details. View the specific details for patients in rooms you're currently monitoring. The time the patient has been in the room is displayed at the end of the row. If the patient has any call buttons pending, a flag icon will display with the number of pending tasks next to it. A red flag means the task is urgent, whereas a blue flag indicates a normal level of priority. You can take the following actions from this area:
- Open the patient's chart by clicking their Name.
- Create a visit for the patient by clicking Create/Link Visit.
- Open the patient's visit by clicking Open Visit.
- Change the room the patient is in by clicking Change Room.
- Assign a call button for the patient by clicking Add Call Button.
- View and edit any of the patient's pending call buttons by clicking the flag icon.