Navigating the Visit Overview (Web)
You can use the Visit Overview to navigate to any section of the visit and track its overall progress. To view the Visit Overview screen, open an existing visit or create a new visit.
The Visit Overview is separated into several sections, enabling you to see what's been recorded at a glance. The sections for CC/HPI | ROS, Vision Summary, Exam, and Impressions and Plans have progress indicators that change from orange to green as each section is documented.
You can also use the Action Bar at the top of the screen to quickly navigate to different sections of the visit, preview visit documents, manage attachments, finalize visits, and more. For more information on the Action Bar, watch this video tutorial.

Clicking the Integrations tab above the Action Bar enables you to Send Glasses & Contact Lens Rx's to the practice management side of the platform as well as Send Charges. This is also where you can pull in data from integrated devices at your practice using the Equipment Interface button. For more information on the Integrations tab, watch this video tutorial.

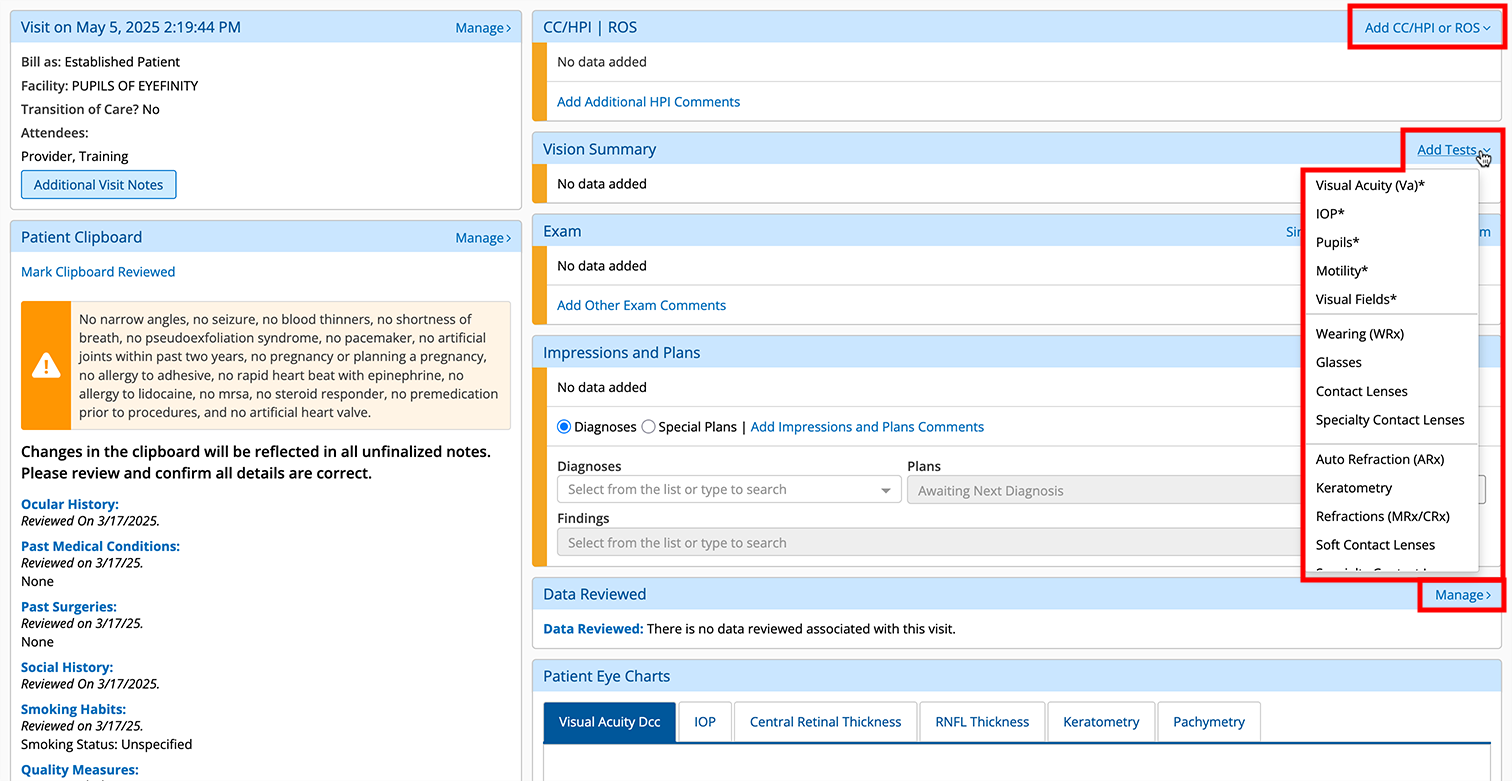
Documenting the Entire Exam
You can document an entire exam without ever navigating away from the Visit Overview. Just locate the exam sections in the right-hand colum, and click the action links in the section header.
Performing other Tasks
You can also do the following from the Visit Overview:
- Review and edit the patient's history using the Patient Clipboard section. For more information on using the Patient Clipboard, see Taking the Patient History.
- View all glasses and contacts prescriptions for the patient under the Active Optical Rx section.
- Review and override billing codes using the Billing section. For more information on coding, see Coding and Finalizing.
- View changes over time in the patient's visual acuity
 A measurement of visual performance using the letter chart., IOP intraocular pressure. Eye pressure, as determined by the amount of aqueous humor filling it. High IOP (ocular hypertension) can be a sign of glaucoma., central retinal The sensory membrane that lines the eye; it is composed of several layers and functions as the immediate instrument of vision by receiving images formed by the lens and converting them into signals that reach the brain by way of the optic nerve. thickness, and more using the Patient Eye Charts.
 - Track the patient's vitals and test results using the Vitals and Tests and Results sections.
- View any active therapeutic Rx's written for the patient during the visit using the Rx section.
- Keep track of any attachments for the visit under the Attachments section.