What's New in Encompass 6.0
Release Date: February 11, 2022
Eyefinity announces the newest version of Eyefinity EHR! In addition to resolving known issues in previous versions, this updated version improves upon its robust attributes and offers useful new features and expanded functionality. For additional information on Eyefinity EHR features, training, and integration with practice management systems, visit www.eyefinity.com or call 800.942.5353.
To see the new features action, watch the recorded webinar.
This page includes the following topics:
- Patient Portal
- Enhancements for Both iPad and Web
- iPad-Only Enhancements
- Web-Only Enhancements
- Known Issues
Patient Portal
Patients can now easily view and print glasses and contact lens prescriptions within the patient portal! This feature alleviates much of the burden of complying with the FTC Contact Lens Rule from practice staff and doctors.
To view and print glasses and contact lens prescriptions, patients must log into the patient portal, click the Eyewear Prescriptions tab, and click Download and View next to their latest prescriptions.
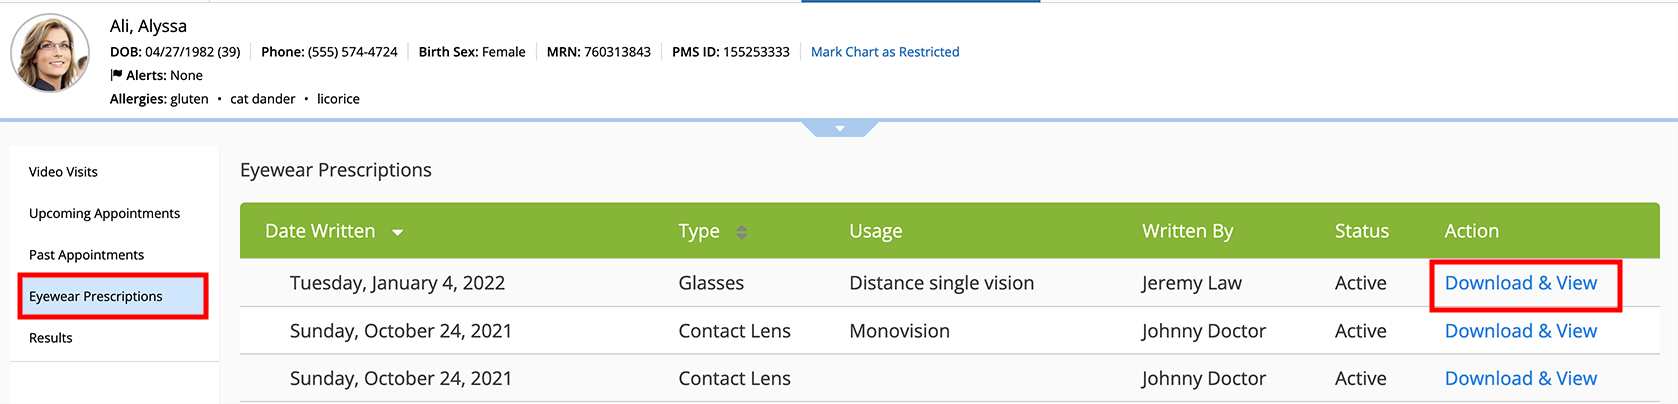
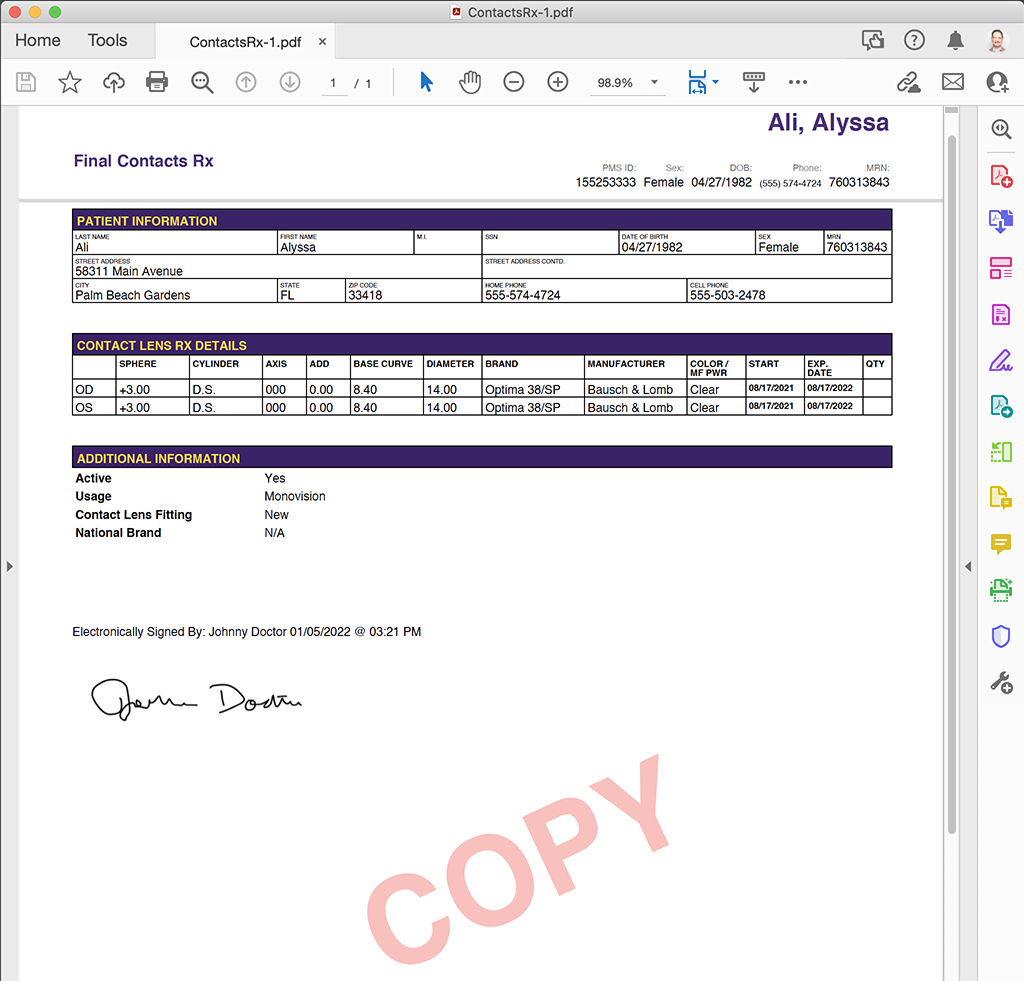
Prescriptions are displayed as a PDF, just as they would if displayed by practice staff, except the patient’s PDF includes a “Copy” watermark. Prescriptions that are older than one year include an "Expired” watermark.
To control whether their signature appears on patient-printed prescriptions, individual providers can set their own preferences.
- Tap the Home action bar icon to return to the home screen.
- Tap the Account action bar icon.
- Tap Preferences.
- Tap the My Electronic Signatures tab.
- Tap the Appear on Valid Glasses and Contact Lens Prescriptions in the Patient Portal toggle to enable it.
- Tap Done.
- Click Preferences in the page header.
- Scroll down to My Electronic Signatures.
- Select the Appear on Valid Glasses and Contact Lens Prescriptions in the Patient Portal check box.
- Click Save.
Glasses and contact lens prescriptions are available in the patient portal even if the visit is hidden. To hide a prescription, you’d need to mark the prescription inactive.
Glasses and contact lens prescriptions are displayed in the portal by default. Practice administrators may disable this feature if it’s not suitable for the practice:
- Log into the Eyefinity EHR web application as an administrator.
- Locate the Manage Patient Portal Settings section in the left column.
- Click Optical Rx Settings.
- Select the No radio button.
- Click Save.
Enhancements for Both iPad and Web
- The new PDF kits feature enables you to bundle multiple fillable PDFs within PDF Manager into a single package so that staff and patients can access multiple documents at the same time. With multiple PDFs bundled into a kit, staff no longer need to hunt for individual PDFs when checking in a new or returning patient or when gathering consent for various procedures. Here’s how to create PDF kits:
- Log into the Eyefinity EHR web application as an administrator.
- Locate the Firm Forms section in the left column.
- Click Manage PDFs.
- Click the PDF Kits tab.
- Click Create PDF Kit.
- Enter a PDF Kit Name.
- Optionally select a Category, Providers, and Facilities to help staff filter kits.
- Locate the PDF forms at the bottom of the page that you wish to add to the kit and click Add to Kit.
Selected forms appear in the Forms in Kit section in the middle of the page.
- Click, drag, and drop the forms in the order you wish them to appear in the kit.
- Select the Separate Forms upon Finalization check box to split the kit back into individual PDF forms when staff finalize the forms in the patient’s record.
- Click Save.
- You can add an individual PDF form to multiple kits.
- Kits are limited to 20 form files.
- Kits cannot currently be sent to the patient portal.
- Sticky notes now display the date, time, and user who created or last modified the sticky note. To see the edit history of a sticky note, click View History in the browser or tap the sticky note and then tap History in the iPad app.
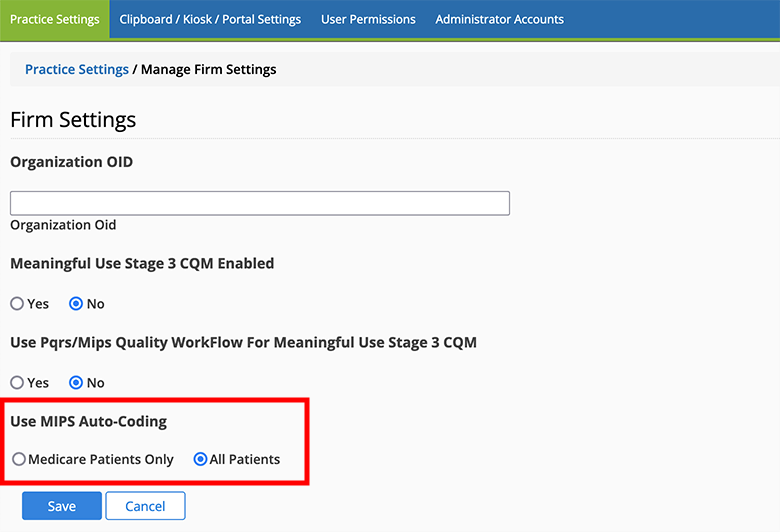
- Practice administrators can now choose to transmit Category II CPT codes to their practice management system for all patients rather than only Medicare patients. This is particularly useful for practices that participate in HEDIS reporting with multiple insurance carriers. Because some insurance carriers will reject claims with Category II CPT codes if they aren’t expecting them, you can control which carriers receive those codes within your practice management system. Here’s how to send Category II CPT codes to your practice management system for all patients:
- Log into the Eyefinity EHR web application as an administrator.
- Locate the Firm Settings section in the left column.
- Click Manage Firm Settings.
- Select the All Patients radio button.
- Click Save.
-
The No Charge Visit plan now gives you the option to suppress generation of all CPT codes other than the Eyefinity-specific code, 11111, that indicates a no charge visit.
iPad-Only Enhancements
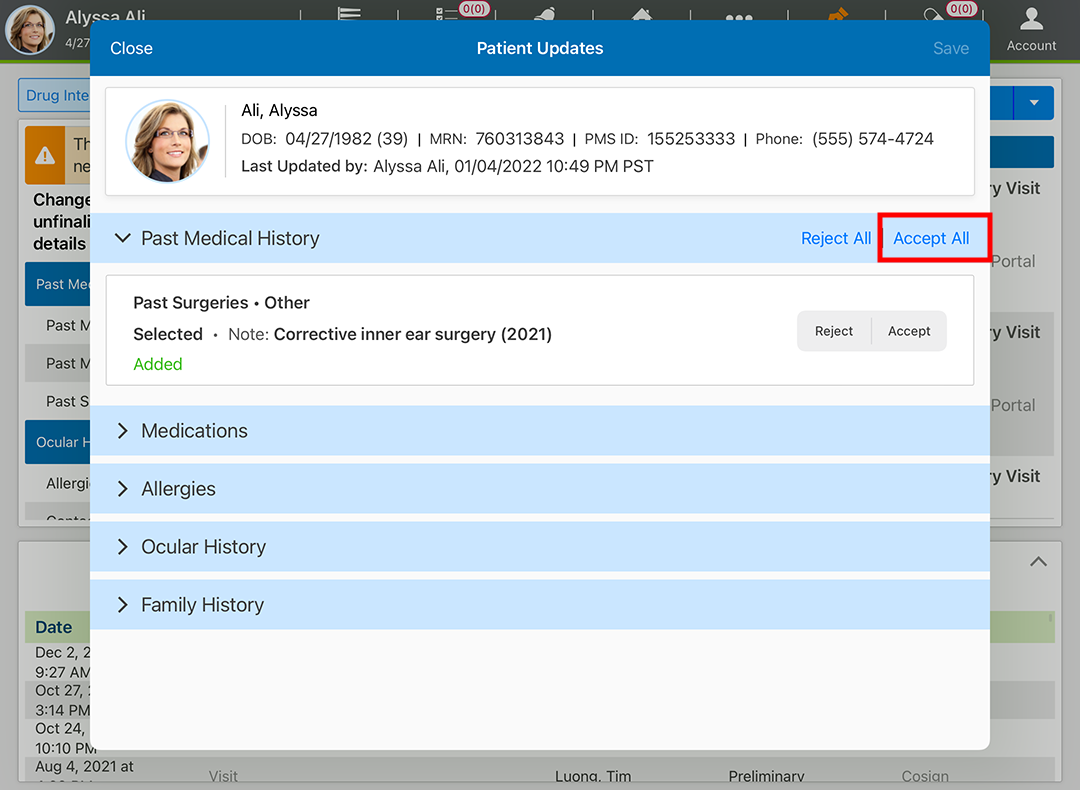
- We've streamlined the process of reviewing and approving updates the patient made to their clipboard in the patient portal or kiosk. Previously, when you approved changes, you had to manually collapse the category and expand the next category. Now, when you tap Accept All, the category automatically collapses, and the next category expands. We added this functionality to the web application in November 2021.
- You now have the ability to refresh the E/M Expert in the Quick Impression edit window. This will help take some of the guesswork out of coding levels.
Web-Only Enhancements
We have redesigned the web application to a more modern look and feel (described below). Some elements of the updated layout will not appear until later this month (February 2022).
-
We redesigned the action bar icons throughout the web application. The redesigned icons not only create a more modern look and feel, but we designed them to fit better in the action bar. In some cases, we collapsed several action bar icons into a single drop-down button as illustrated by the Regulatory Reporting button in the screenshot below. The net effect is you can see more patient data before scrolling.

-
We redesigned the patient header to help it look less busy and help clickable links stand out more easily.
-
The Eye Exam set now displays tabs along the left side of the window just as it displays within the iPad app. This harmonization is part of a larger effort to align the web application and iPad app and make it easier for you to move back and forth between these two access points.

-
You can now view a list of a patient's past and present global periods. This table also allows you to hide the "GP" indicator from appearing in the patient header for individual global periods.To view the global period table
- Sign into the Encompass web application.
- Open the patient's chart.
- Click the Global Period tab, located on the left side of the page.
Known Issues
The initial release prevented sticky notes from displaying on the Visit Overview screen within the iPad app. This issue was resolved within a week of the release with an optional app update published on the App Store on February 17.