Recording the Findings in the iPad App
Based on the diagnosis you select, the Findings drawer shows a list of related findings. You can select from the list of findings or enter details for a custom finding.
- In the Ocular Exam Room, tap Findings to open the Findings drawer.
You cannot select a Finding unless a Diagnosis is first selected.
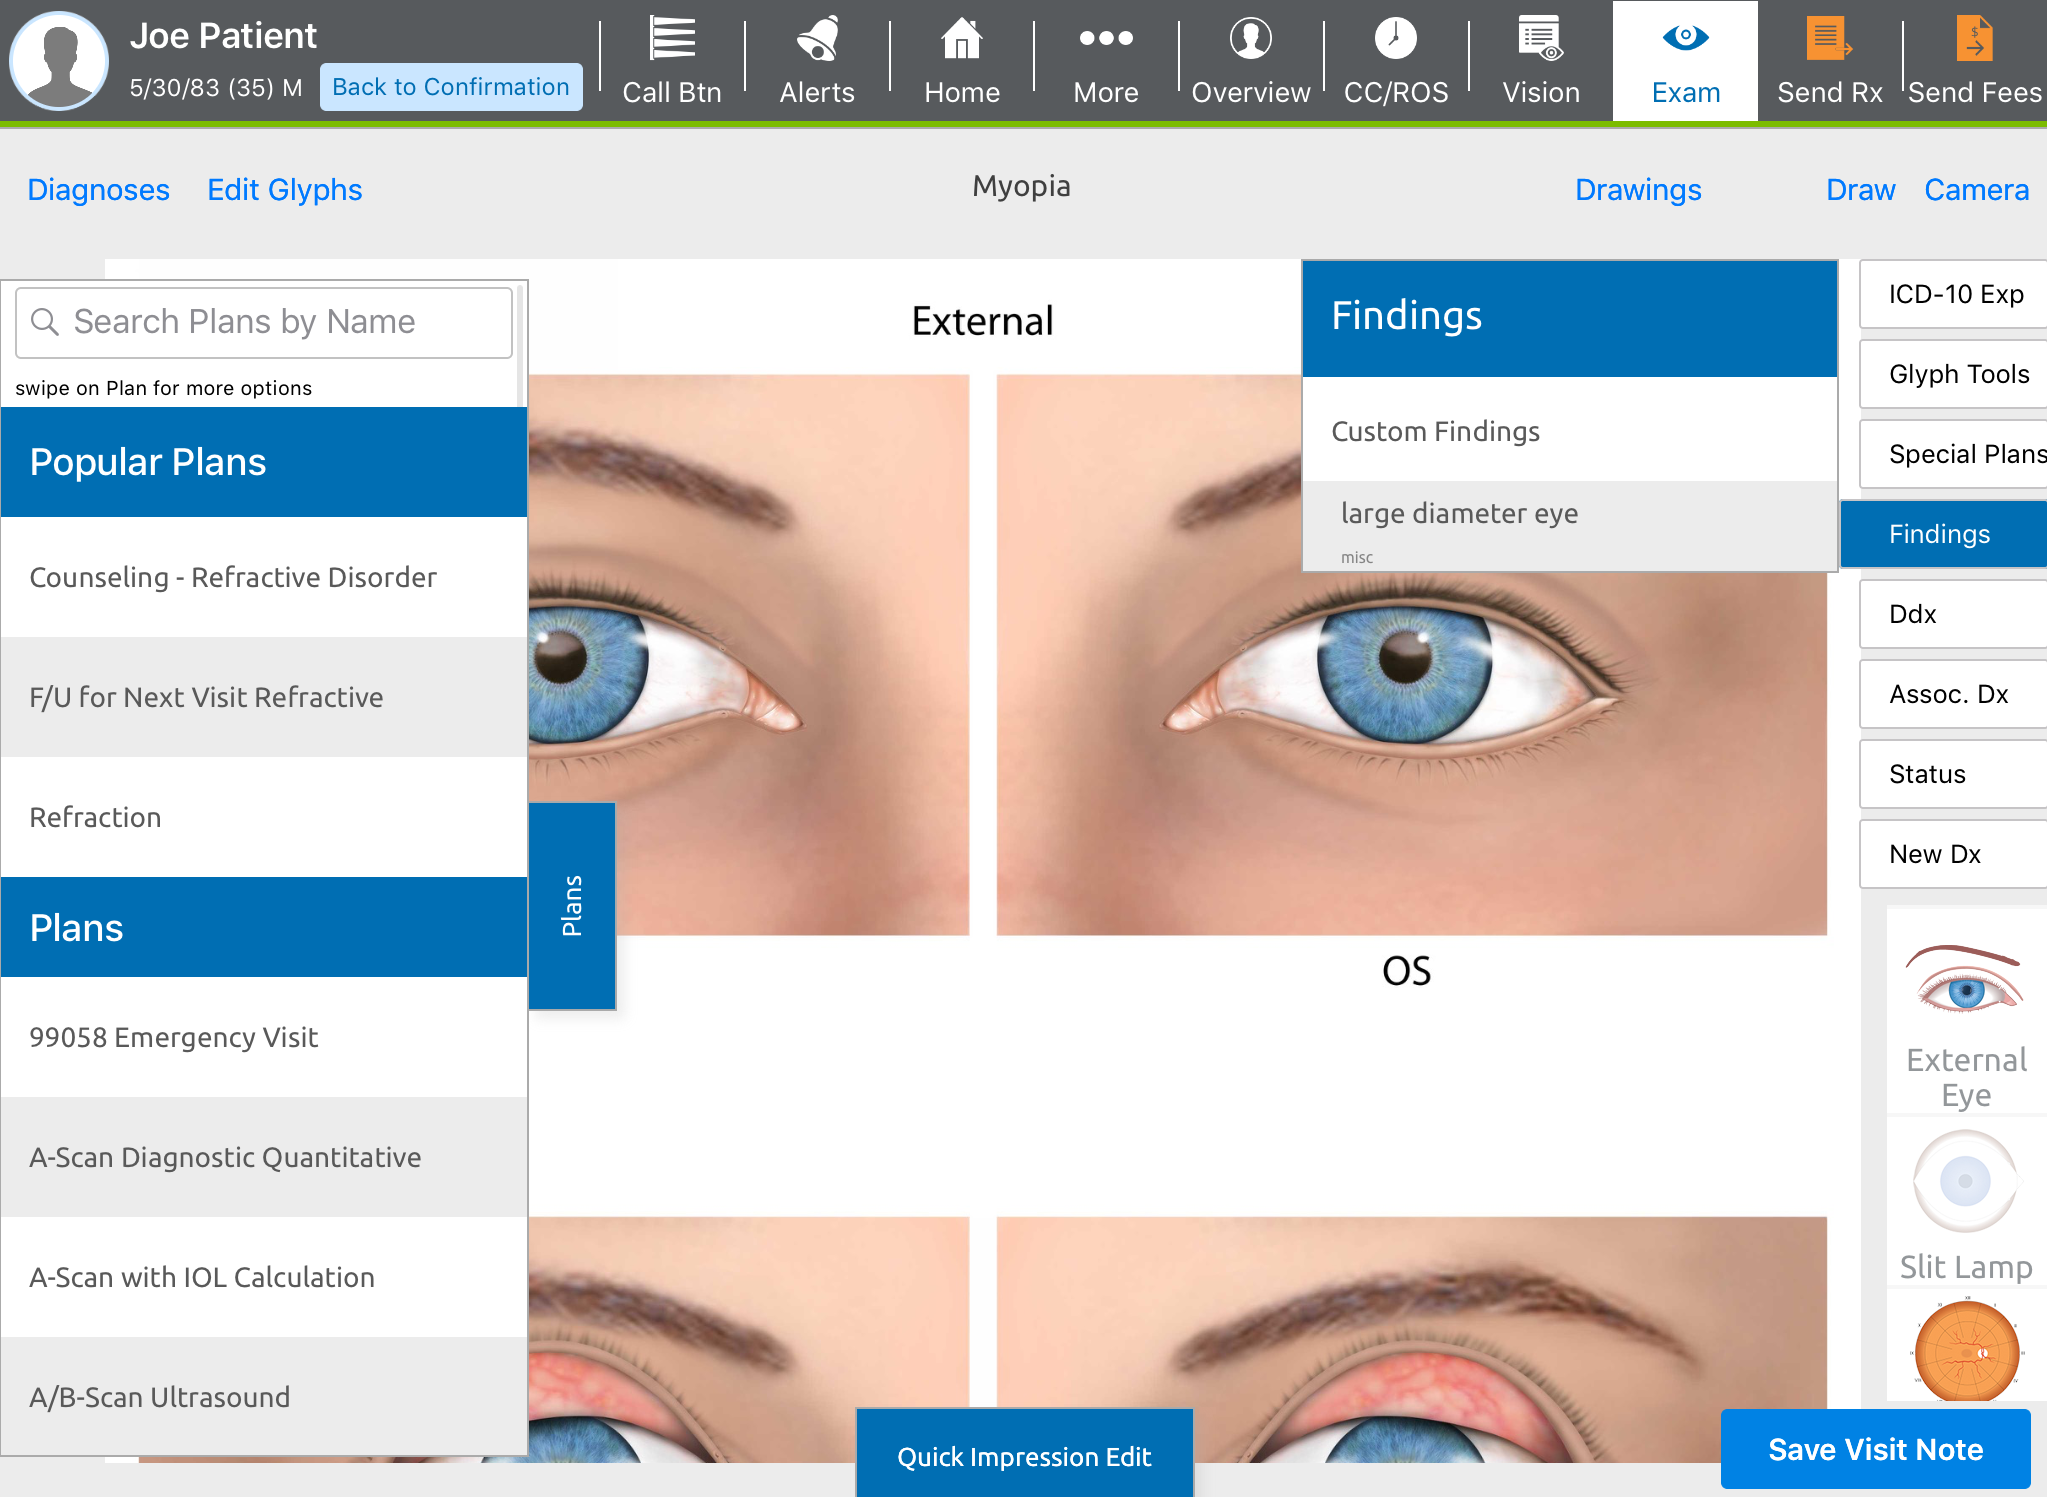
- Select one or more of the findings listed, or tap Custom Findings to add to this list.
- If you tap Custom Findings, enter the information for the findings. Select whether or not the finding is a Positive indication.
- Select the body system the Finding relates to.
- Select whether you want to Always remember this finding.
If you select this option, this will permanently be a finding for this diagnosis only.
- Tap Done.
- Tap the location where you see the finding on the Eye diagrams.
This overrides the default statements in the Exam Set for the given system.
You may need to close drawers to tap on the Eye diagrams.
Tapping the location on the Eye diagram does not record a specific location in your note. It simply indicates OD Oculo dextra. Latin abbreviation for right eye., OS Oculo sinestra. Latin abbreviation for left eye., or OU Oculo uterque. Latin abbreviation for both eyes. in your note.
Tapping the location on the Eye diagram is important for ICD-10 coding.
If you need to document different findings for the right and left eye, deselect the first finding, select the new finding, and tap the new location. - If you make a mistake, tap Undo in the upper-right corner of the Eye diagram to remove the dot you last entered.
- Tap Findings to close the Findings drawer.