Taking Photos for a Patient Visit in the iPad App
You can use the iPad camera to take photos for a patient visit.
To take photos for a patient visit
- Access the Ocular Exam Room.
- Tap Camera at the top of the screen.
-
Use the iPad to take the photo(s).
Photos you take will appear in a box in the corner of the screen with a number indicating the total amount of photos you've taken.
-
Tap View Photos once you're done taking photos.
The Photo Preview screen appears.
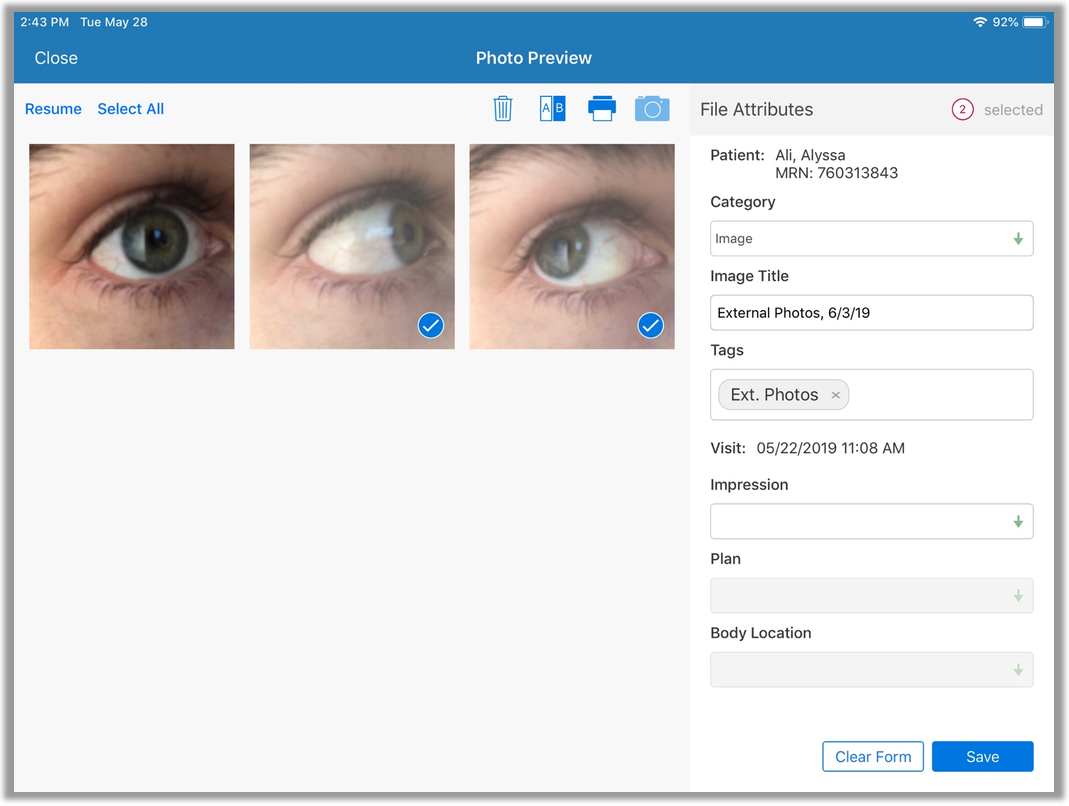
From this screen, you'll be able to specify which photos you actually want to save to the patient's chart. For example, you might want to separate the photos by OD
 Oculo dextra. Latin abbreviation for right eye. and OS Oculo sinestra. Latin abbreviation for left eye. and save them as separate attachments. If you're satisfied with the photos you've taken and want to add all of them to the patient's chart, skip ahead to Step 6.
 -
To select specific photos, tap Select.
You can do the following with selected photos:
- Save. If you're satisfied with the selected photos and want to save them, skip ahead to Step 6.
- Delete. Tap the trash can icon to delete the selected photos. Keep in mind that you'll have the option to discard any unsaved photos when you exit the Photo Preview.
- Compare. Tap the compare icon to launch a side-by-side comparison of two or more photos.
- Print. Tap the printer icon to print selected photos if your iPad is connected to a wireless printer.
-
Optional: Select a Category for the photo(s).
Categories can be configured within administration.
- Optional: Enter an Image Title.
-
Optional: Select Tags for the photo(s).
Tags must be set up within administration.
- Optional: Select an Impression to associate the photo(s) with.
-
Tap Save.
The photos are saved to the patient's chart as an attachment. If there are remaining unsaved photos, you can continue working with them or tap Close to exit the Photo Preview screen and return to the exam.