Creating Exam Drawings Using the Drawing Board in the iPad App
You can use the Drawing Board to create and modify drawings. You can store the drawings in the visit note or in the drawing library.
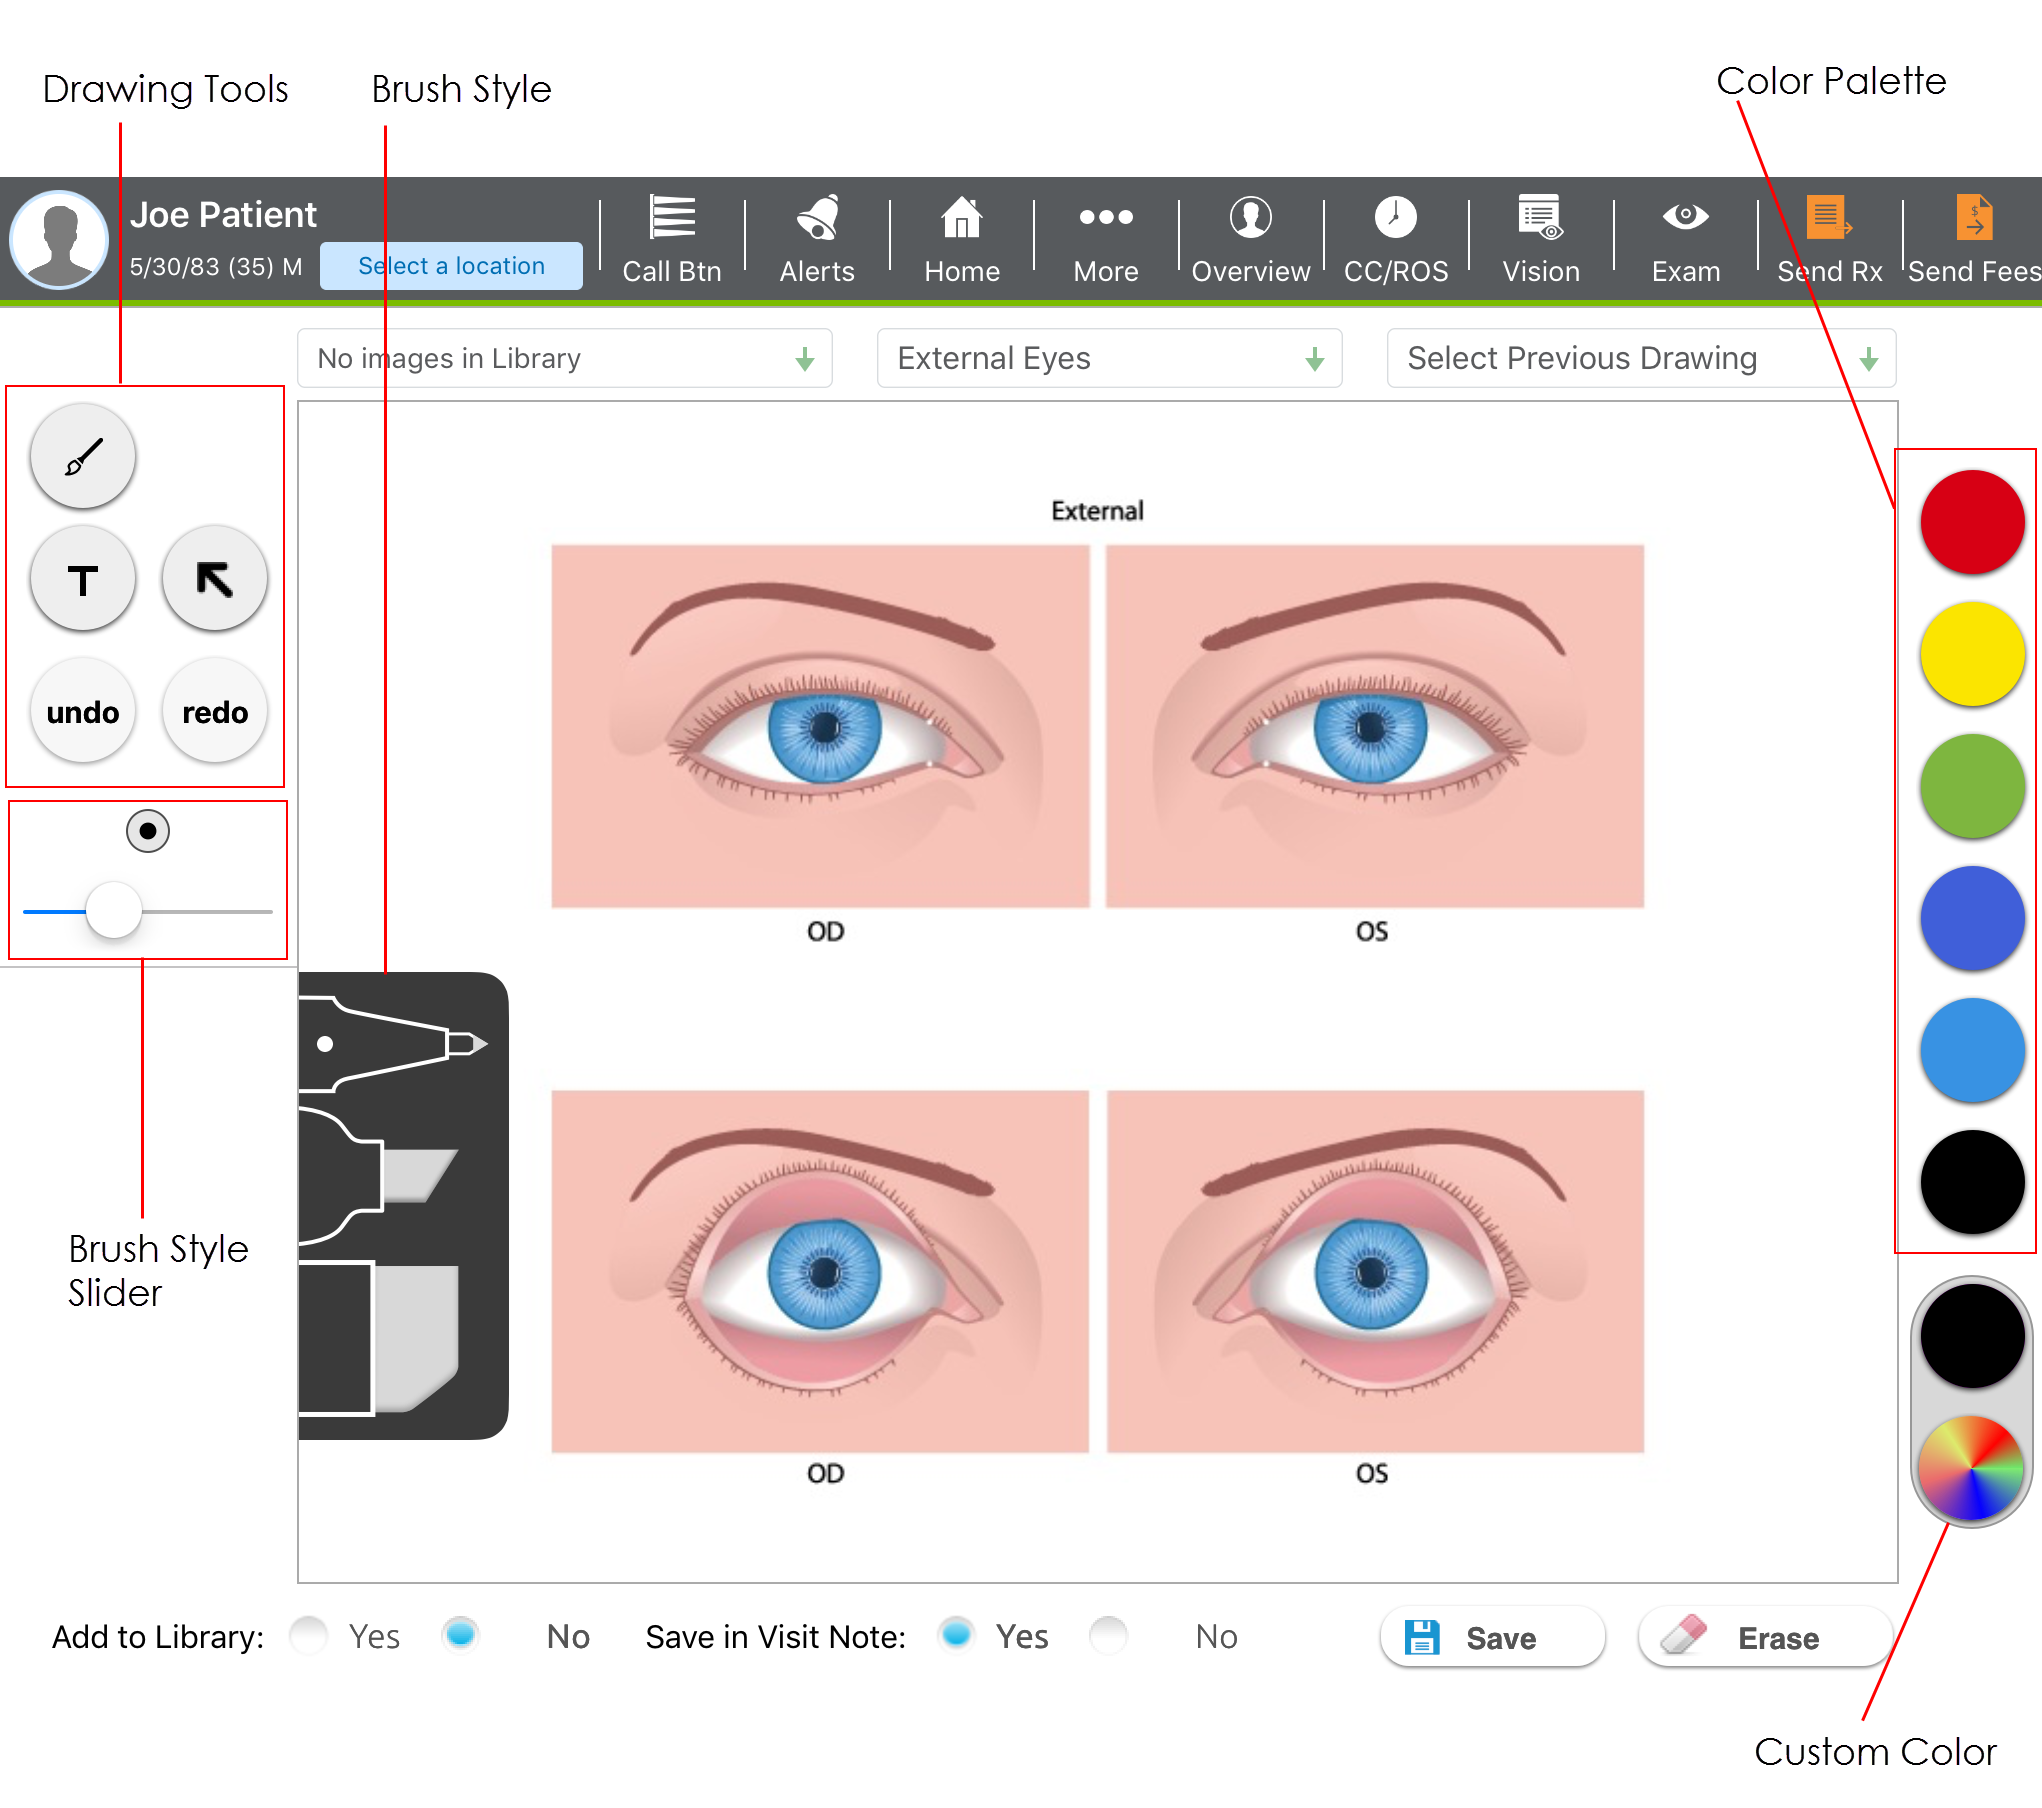
- Access the Ocular Exam Room.
- Tap More on the Action Bar, and then tap Drawing.
- From the Select Body Image drop-down menu, select the body image you want to draw on.
If you want to modify a previous drawing, select the drawing from the Select Previous Drawings drop-down.
- Select the Tools, Size, Brightness, and Colors that you want to use.
- Draw on the eyes to indicate where the disease is present or enter the text you want to add to the drawing.
If you make a mistake, tap undo to delete your last change or use the eraser to remove the last item you drew.
- In Add to Library, choose whether you want to add the drawing to the Library.
Drawings saved in the Drawing Library will be available to display in other patients’ charts as well as the current patient. The Drawing Library is user specific, not patient specific.
- In Save in Visit Note, choose whether you want to add the drawing to the current Visit Note.
- Tap Save to return to the Ocular Exam Room.
Drawings are accessible under the Drawings link in the Ocular Exam Room.