
Using a QR Code
Connect your patients to your website, their order status or even your payment application with a small and simple QR Code. You can upload your QR Code in Administrationand then print the QR Code on your receipts.
Create your QR Code using one of many applications available via an Internet search. Eyefinity does not recommend a particular app; however, we do encourage you to research options and select an app that fits your QR code and security needs.
- On the Encompass home screen, click Administration.
The Company: Setup screen opens.
-
On the top menu bar, click Preferences and select Material Orders.
-
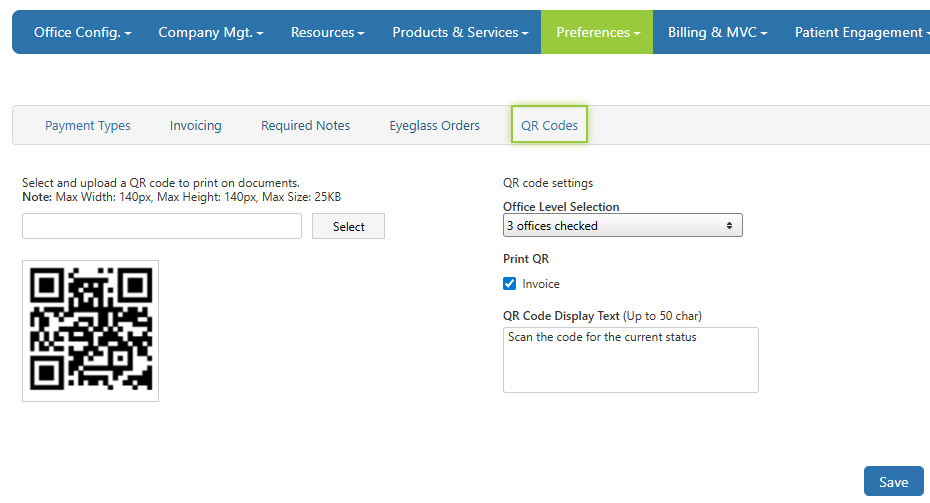
From the links, select QR Codes. The QR Codes tab displays.
-
Once you upload your QR code, you then choose your settings.
-
From the Office Level Selection drop-down, select the checkbox for each office you want to be able to print the QR Code.
-
For the QR code to print, you also need to select the Print QR Invoice checkbox. With this option, you can turn on and off the QR Code easily for all locations.
-
Finally, to add a text message that displays with the QR Code, enter the message in the QR Code Display Text field. The message can be up to 50 characters.
-
To save your changes, click Save. The QR Code will now print on the receipt for the offices selected.
Supported formats include .PNG, TIF, BMP and .JPG.
Your QR Code cannot exceed 140 px in width, 140 px in height and 25KB in size.
To turn off the QR Code for a specific office, clear the box for that office. To turn off for all offices, clear the Print QR Invoice box.
To change the QR code, select a new image. The new code replaces the old QR code.