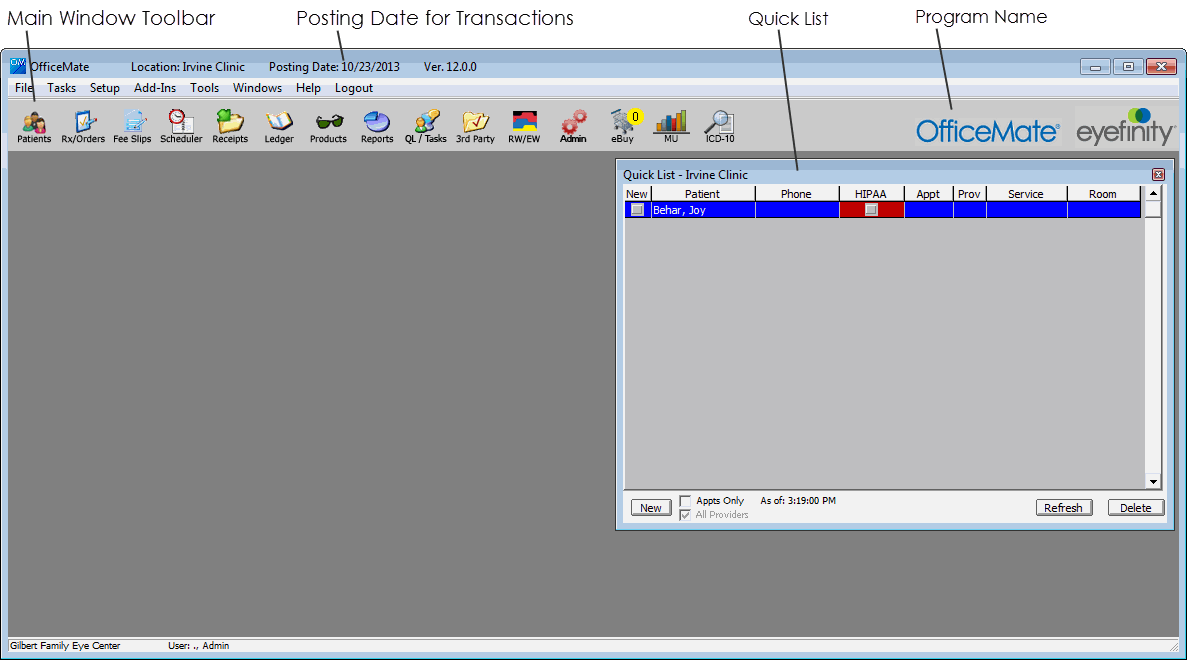
Navigation Schemes in OfficeMate
OfficeMate has many unique navigation schemes. Eyefinity highly recommends familiarizing yourself with the OfficeMate navigation schemes to more quickly and efficiently navigate through OfficeMate and perform tasks.

This topic tells you how to use the various navigation schemes in OfficeMate, including how
- Right-click the Patient Demographic, Eyewear Order, Soft Lens Order, Hard Lens Order, Fee Slip, Patient Ledger, and Receipts & Adjustments window title bars or on a patient in the Quick List window to open a shortcut window with options to open the current patient’s Patient Demographic, Rx Eyewear, Soft Lens, Hard Lens, Schedule, and Receipts windows. You can also open ExamWRITER, print labels and documents, and change the patient’s room location by right-clicking on these title bars.
- For example, right-click on the Patient Demographic window title bar and select Ledger. The Patient Ledger window opens and displays the ledger information for the same patient displayed on the Patient Demographic window.
- For example, right-click on the Patient Ledger window title bar, click Label, and select Mailing Label. The Print Labels window opens, allowing you to print a label.
- Press the F12 key when your cursor is in a drop-down box to open a Maintain window and add new items to the drop-down menu selections.
For example, press F12 while your cursor is in the City drop-down box in the Patient Demographic window. The Maintain City window opens. Type a city in the Description column and click OK to add the city to the drop-down menu selections or select a city and click Default to make that city the default selection in the drop-down menu.
- Place your cursor in the Product Name/Code column in the Fee Slip window and press the Ctrl and P keys at the same time to open the Find Product window and search for products.
- Place your cursor in the Product Code or Name text box in the Eyewear Order or Hard Lens Order window and press the Ctrl and P keys at the same time to open the Find Product window and search for products.
- Place your cursor in the Product Code or Lens Name text box in the Soft Order window and press the Ctrl and P keys at the same time to open the Find Product window and search for products.
- Place your cursor in the Product Name/Code column in the Fee Slip window and press the F5 key to open a shortcut window with a selection of products and services that you use most often.
- Place your cursor in a DIAG column in the Fee Slip window and press the F5 key to open the Select Diagnosis Codes window and search for and select diagnosis codes.
- Press the Alt key and the underlined letter in a button or tab to open the window that would open if you clicked the button or tab with your mouse.
- For example, press the Alt and L keys at the same time in the Fee Slip window to open the Patient Ledger window.
- For example, press the Alt and C keys at the same time in the Patient Demographic window to open the Correspondence History tab on the Patient Demographic window.
- Press the Tab key to move your cursor to the next text box in a window.
- For example, while your cursor is in the Last Name text box in the Patient Demographic window, press the Tab key to move your cursor to the First Name text box.
- Press the Esc key to close a window.
- Click Windows on the OfficeMate main window toolbar.
- Select Close All Windows.
All of the windows that are opened close.