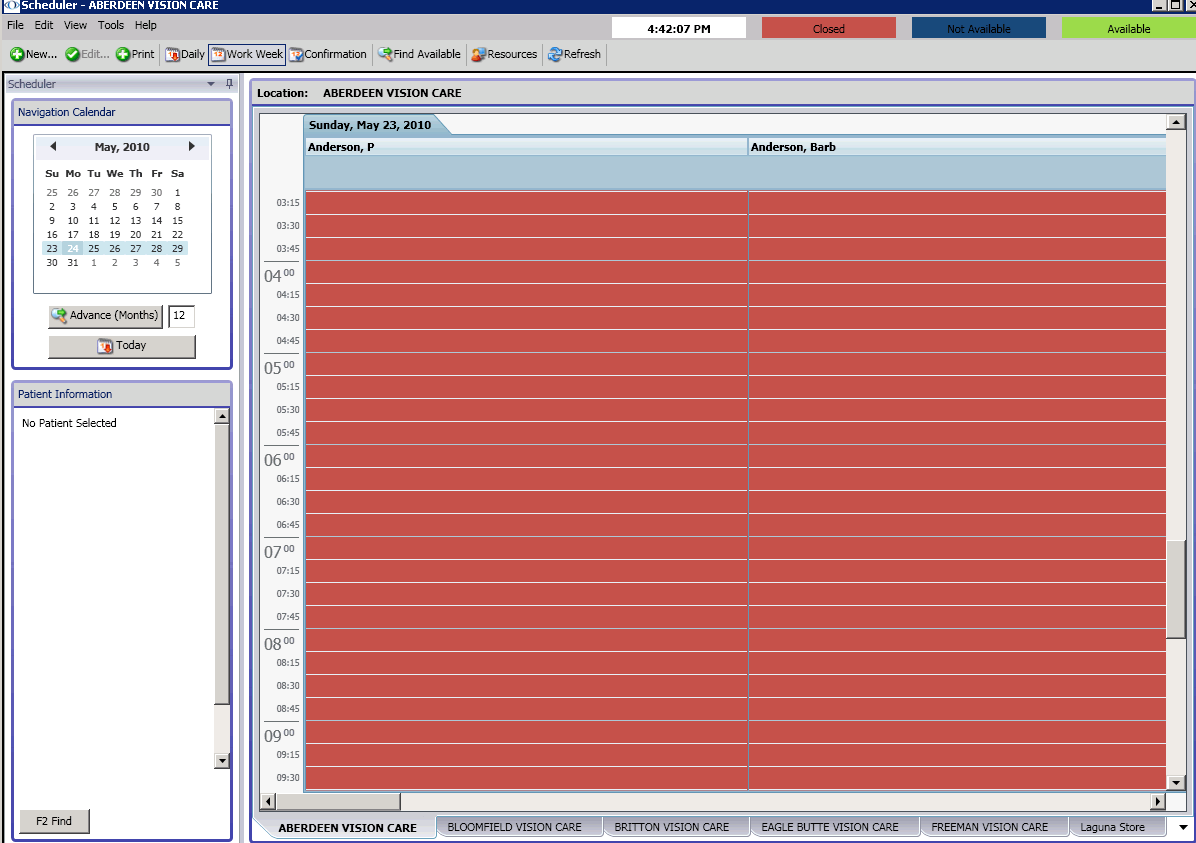
Opening and Viewing the Appointment Scheduler
This topic tells you how to open the Appointment Scheduler and modify your viewing options.
Click Refresh to refresh the Appointment Scheduler at any time with the most up-to-date appointment information.
This topic describes how
Use one of the following methods to open the Appointment Scheduler:
- Click the Scheduler icon.
- Click Tasks on the main window toolbar and select Schedule.
- Right-click on a patient in the Quick List window and select Schedule.
- Right-click on the Patient Demographic, Hard Lens Order, Soft Lens Order, Eyewear Order, Fee Slip, Receipts & Adjustments, or Patient Ledger window title bar and select Schedule.
- Click on a patient’s name in the Quick List window and drag and drop the patient on the Schedule icon.
- Open the Appointment Scheduler. For more information on opening the Appointment Scheduler, see To open the Appointment Scheduler.
- Click View and select Resources.
OR
Click the Resources button on the Appointment Scheduler toolbar.
The Resources window opens.
- Select the resources that you want to view on the daily and work week views.
- Select the Fit Resources on display check box if you want the resources that you selected to all be visible in the daily and work week views without scrolling.
- Select the Custom Order (drag resources in the list) check box to select the order in which the providers are displayed in the daily and work week views and then drag and drop the resources listed in the order that you want them to appear in the Appointment Scheduler. The resource at the top of the list will appear on the left side of the Appointment Scheduler and the resource at the bottom of the list will appear on the right side of the Appointment Scheduler.
- Click OK.
The Appointment Scheduler views will display the resources that you selected.

- Open the Appointment Scheduler. For more information on opening the Appointment Scheduler, see To open the Appointment Scheduler.
- Click View and select Locations.
The Select Locations window opens.
- Use the arrows in the middle of the window to move locations to the Locations Not Selected and Locations Selected columns. Locations in the Locations Selected column will be visible in the Appointment Scheduler.If you only want to display the location to which you are currently logged into, click the Only Display <current location> check box.
- Click OK.
The Appointment Scheduler views will display the locations that you selected in tabs at the bottom of the window. Click on the location’s tab to view the appointment schedule for that location.
- To modify your Appointment Scheduler view, click View and select Daily or Work Week. You can also modify your Appointment Scheduler view by clicking the Daily or Work Week buttons in the Appointment Scheduler toolbar.
- To hide the Navigation Calendar in the top left corner of the Appointment Scheduler, click the thumbtack icon, or if you have the auto hide feature on, click in the main Appointment Scheduler calendar. To display the Navigation Calender after it has been hidden, click the Scheduler tab.
To turn on the auto hide feature, click the down arrow and select Auto Hide.
To turn on the docking feature, which allows you to drag the Navigation Calendar and Patient Information boxes to the left and right sides of the window and drop them on the center arrows, click the down arrow and deselect Auto Hide, which will automatically select Dockable.
For more information, watch this video.