Assigning Products to Groups
Assigning items to groups enables you to apply a commission category to multiple items at one time. For example, to apply a commission category to Transitions lenses, you could assign your Transitions lens products to the Transitions item group and apply the commission category to the entire group. To change the commission category, you need to change it only once for the group rather than for the individual products.
- Item groups are also used by productivity reports and insurance schedules. Adding or removing items for an item group can affect these areas.
- To view the different item groups, select Product, select Item Groups, and then select an Item Type.
- In addition to item groups, you can set up commission categories for packages and individual products.
To assign products to groups
- In AcuityLogic Admin, click Product.
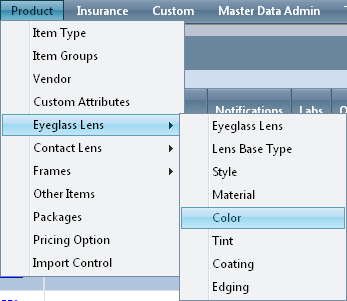
- From the menu, select the product type and then select the attribute.
In this example, the user selected Product, Eyeglass Lens, and Color.
 In addition to products, you can also assign exams to item groups. To find exams, click Products, select Other Items, and then select Exams from the Item Type drop-down list.
 - Click the item number or style ID for a product that you want to assign to an item group.
- From the Item Group drop-down list, select the group.
- Click Save.
The selected item group appears under the Item Group column on the Eyeglass Lens Color window.