Recording Physical Counts Using the Physical Inventory in AcuityLogic POS
If you selected the option to use the Physical Inventory Worksheet to record physical counts of your inventory in AcuityLogic Admin, follow the process below to record inventory information after you add an inventory session. See Adding Physical Inventory Sessions in AcuityLogic POS.
To record physical inventory using the physical inventory worksheet
- Open the Physical window. See Opening the Physical Window in AcuityLogic POS.
- Locate the inventory session you want to add information to by Physical ID in the Physical window.
- Click the Freeze link to freeze inventory. This prevents changes to inventory amounts while you are counting inventory.
- Click the Load link to begin recording inventory counts.
- Follow the process below to record the count for an item:
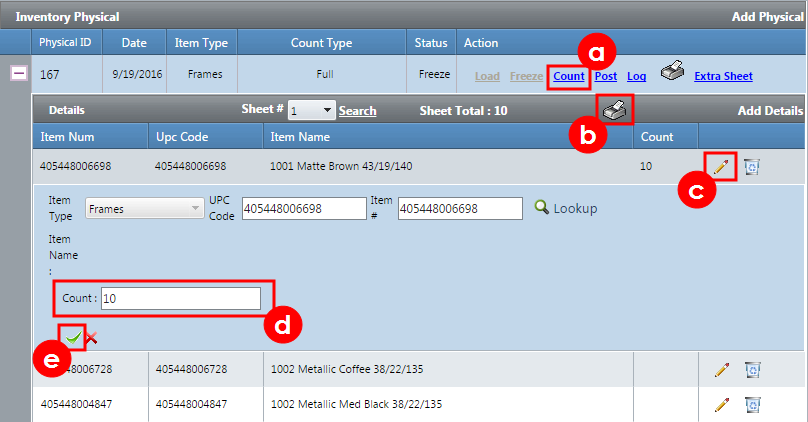
- In the Action section, click the Count link.
- In the Details section, click the Print icon to print the Physical Inventory Worksheet.
- Click the Edit icon for an item
- Enter the item quantity in the Count field.
- Click the OK icon to save the item quantity.
- In the Action section, click the Post link after you record the count for all items, and click OK in the dialog box that opens to commit the inventory counts.
- In the Action section, click the Printer icon for a record to print the Inventory Physical Reconciliation Report.You can also click the Printer icon before you post the inventory count to print and review the counts recorded during an inventory session.