Adding Patient Photos
You can add a photo to a patient's record from the Overview screen by:
- Uploading an existing photo file stored on your computer, or
- Taking a new photo using the camera built into your laptop or mobile device, or an external webcam that is connected to your computer.
What do you want to do?
Follow these instructions to upload a patient photo you have saved on your computer as a .PNG or .JPG file.
Image Type: .PNG or .JPG
Max Width: 170 pixels
Max Height: 170 pixels
Max Size: 2 MB
For instructions on resizing images to meet these requirements, see Resizing Images.
- On the top menu bar in Encompass, click Patients and select Search/Add patient.
- Enter the patient's information and click Search.
- Select the patient from the search results list or click + Patient to add a new patient.
- Click the camera drop-down button below the photo placeholder and select Upload photo.
- Under Select Image File, click Browse.
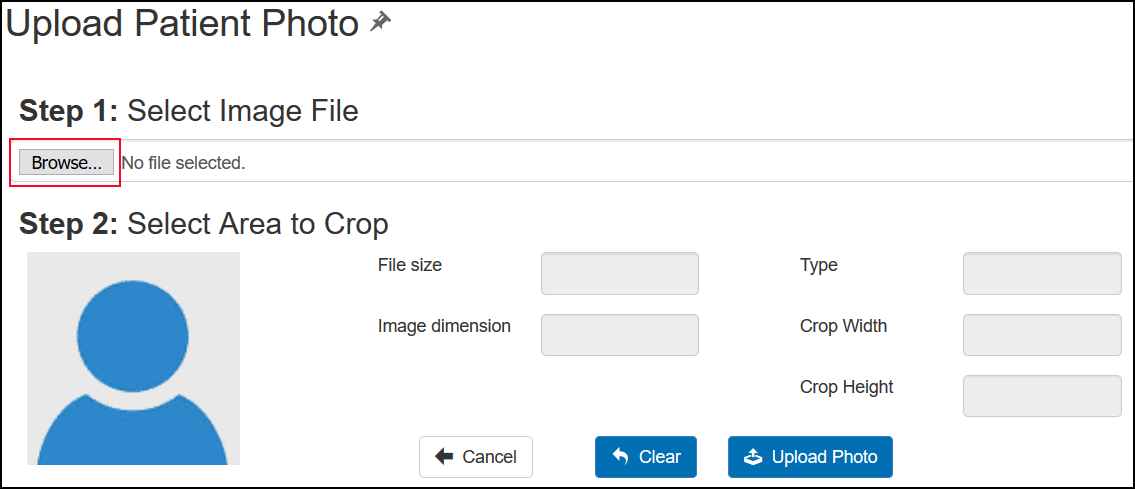
- Locate the file you want to upload and click Open.
The photo displays in the Upload Patient Photo screen. Image size and file type information displays to the right of the photo.
If you need to select a different image, click Clear and repeat steps 4 and 5. - To crop the image, click and drag your cursor diagonally inside the photo until the desired area is selected,
The Crop Width and Crop Height fields update as you select the area to crop.
- Click Upload Photo.
The photo is added to the patient's record and displays in the Overview screen.

The Upload Patient Photo screen opens.
Follow these instructions to take and upload a new photo using the camera built into or connected to your computer or mobile device.
- On the top menu bar in Encompass, click Patients and select Search/Add patient.
- Enter the patient's information and click Search.
- Select the patient from the search results list or click + Patient to add a new patient.
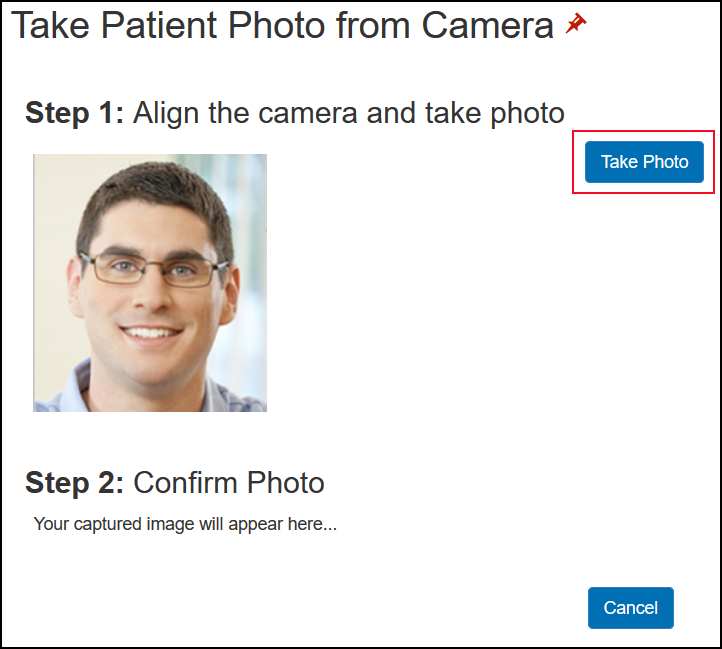
- Click the camera drop-down button below the photo placeholder and select Take photo from camera.
- Position the patient in the camera view and click Take Photo.
-
The photo displays below Step 2: Confirm Photo. If you need to retake the photo, click Take Photo again.
- Click Upload Photo.
The photo is added to the patient's record and displays in the Overview screen.
The Take Patient Photo from Camera screen opens. The camera view displays below Step 1: Align the Camera and take photo.