Scanning Documents
If you have a Twain-compatible document scanner installed and set up, you can scan patient documents directly into Encompass.
If your scanner is not compatible, see Uploading a Document for instructions on uploading scanned documents to Encompass.
-
On the left side of the Demographics screen, under Correspondence, click Documents.
- Click Scan Document.
The Scan Document window opens.
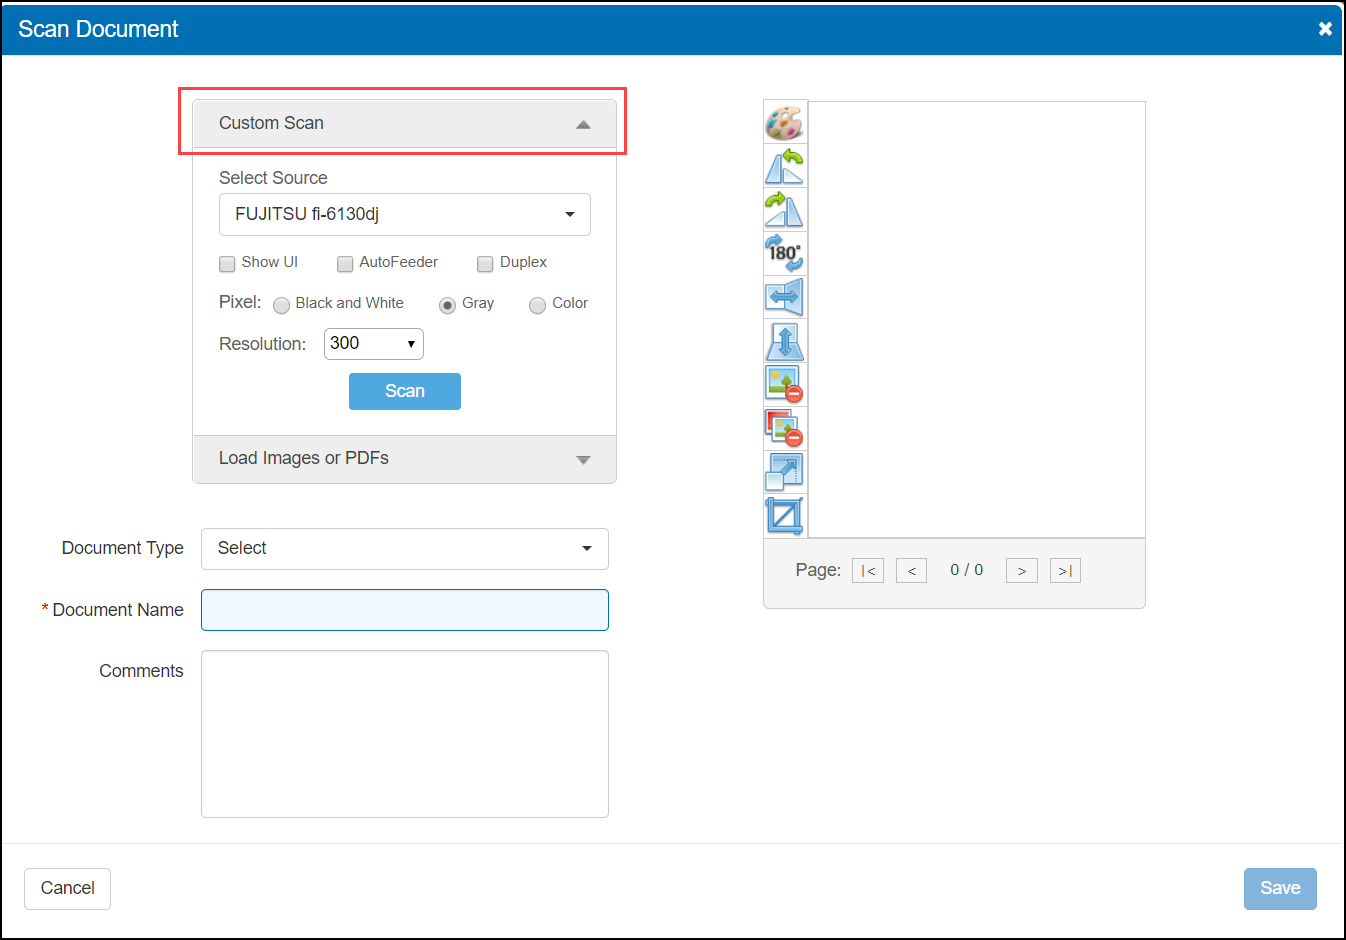
- Click Custom Scan.
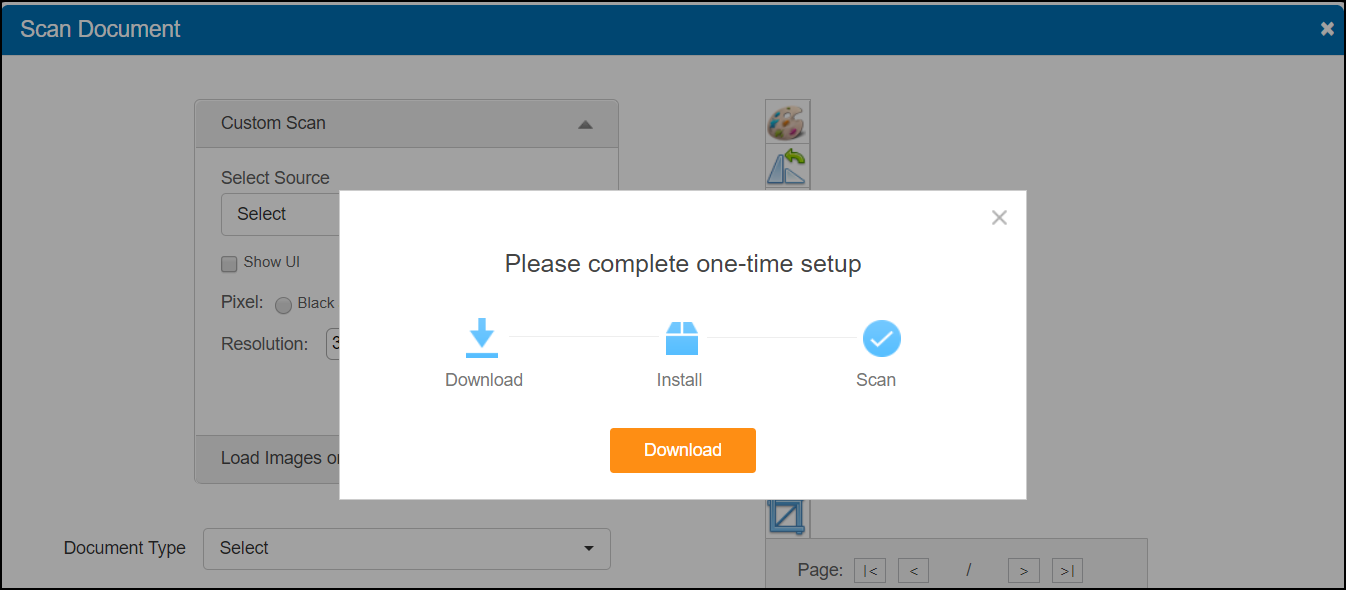
- If this is the first time you are using the Scan Document feature, you are prompted to complete a one-time setup process to install a required plugin, the Dynamsoft Service. Without this plugin, the scanning feature will not work. Click Download and follow the setup wizard to complete the installation. If you have already completed this setup, go to step 5.
- Select your scanner from the Select Source drop-down list.
If your scanner is not listed or you see the (No TWAIN compatible drivers detected) message, check the following:
- Is the scanner plugged in and powered on?
- Is the scanner Twain compatible? If not sure, check your scanner's user guide or web site, or contact the manufacturer's customer support.
- Is the correct driver for your scanner installed on your computer? If not sure, check your scanner's user guide or website, or contact the manufacturer's customer support.
- Select the desired scan settings.
- Select AutoFeeder if your scanner has an auto feed feature.
- Select Duplex if you are scanning two-sided documents.
- Select one of the Pixel radio buttons to set the scan color.
- Select a Resolution for the image.
The Show UI check box is not currently functional. Selecting this check box will cause the scan to fail. - Insert the document into the scanner and click Scan.
The scanner scans the document, and an image of the document appears in the Scan Document window.
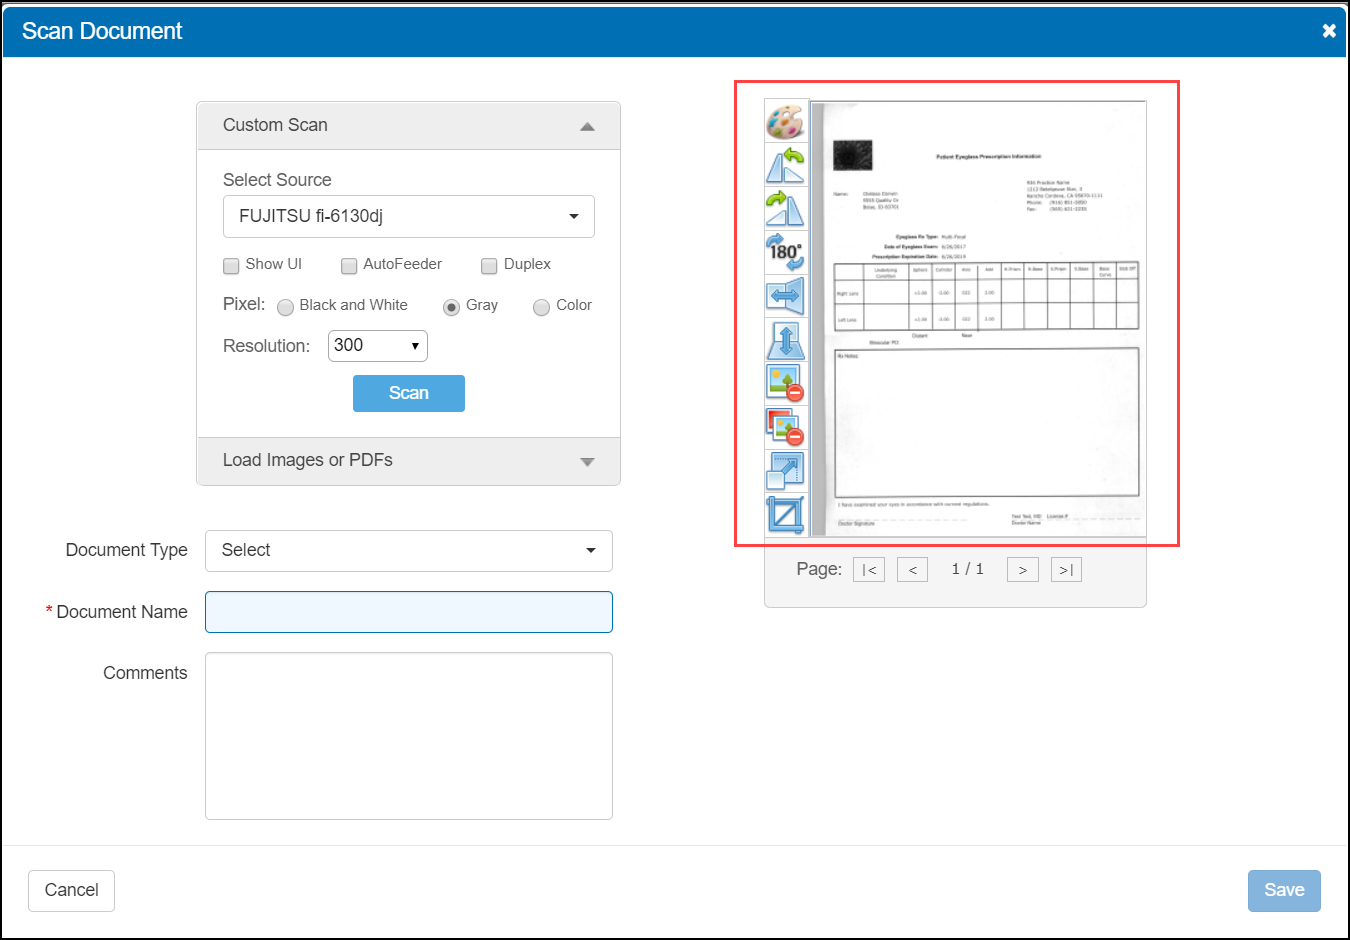
- Edit the document, if desired, using the editing tools.
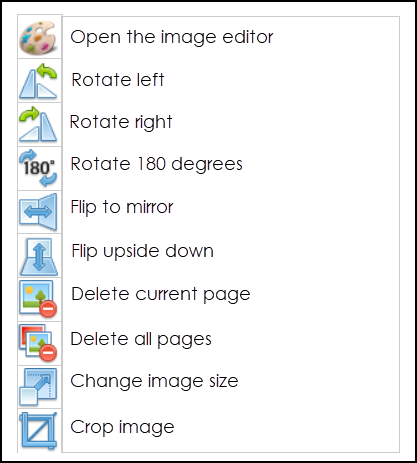 Clicking the"paint palette" icon opens the image editor, which contains all the editing tools shown here, along with several others such as Erase and Select Mode. You can also print the image from the image editor.
 - Select the Document Type.
- Enter the Document Name.
- Enter any Comments, if needed.
- Click Save.
The Scan Documents window closes and the document is saved as a PDF file in the Documents screen. For more information on editing document information, exporting, printing, and deleting documents from this screen, see Managing Patient Documents.