Setting Up the Zeiss CLARUS Camera Software
- Open the Zeiss CLARUS camera software.
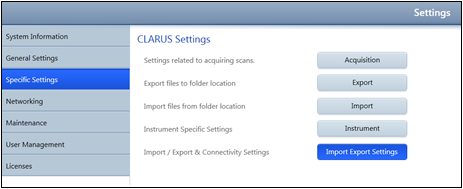
- Click the Settings (wrench) icon.

- Click Specific Settings.
- Click Import Export Settings.
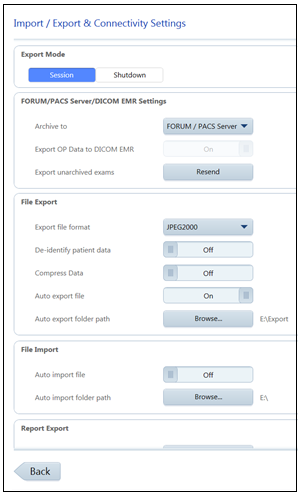
- Select an Export Mode:
- Session. This mode exports retinal images to ExamWRITER at the end of each session when you return to the Patient Selection window.
- Shutdown. This mode exports all retinal images to ExamWRITER when the Zeiss CLARUS equipment is shut down.
- Select an Export file format (PNG, JPEG, TIFF, or JPEG2000).
- Set Auto export file to On.
- Click Browse next to Auto export folder path, and browse to and select the drive and shared folder where the Zeiss CLARUS camera data is temporarily written. This should be the same export folder that you set up in the Equipment Interfaces - Setup window in step 3 in Setting Up the Zeiss CLARUS Interface.
You must select an empty folder on your network that is not used by any other application, including Zeiss CLARUS. If you select a folder that contains files (such as D:\DATA on the Zeiss CLARUS equipment), the files will be deleted during the integration and data transfer process.