Creating an Export File in OfficeMate 14.0 and Above
- Ensure that your statement preferences are set to display credit card payment information. To verify this preference setting, follow the instructions below:
- Open Administration.
- Click Setup.
- Select Preferences.
- Click the Statement tab.
- Ensure Print credit card payment information is set to Yes.
- Create a statement for a patient or group of patients. (See Creating and Printing Reports and Statements.)
- In the Selection Criteria and Sort Order area, either select or deselect the By Family check box.
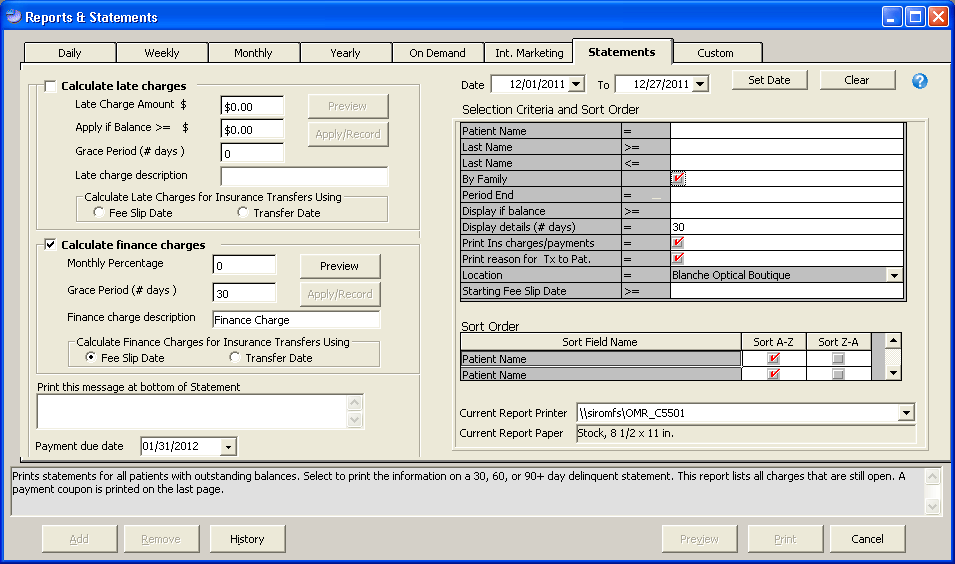
- Click Preview.
- Click the small Export Report icon in the top left corner on the Preview window.
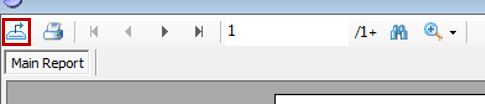
The Export Report window opens.
- Navigate to OMATE32\DATA\EMC\Statements or OfficeMate\DATA\EMC\eStatements. If you do not have an eStatements folder, create one in your OMATE32\DATA\EMC or OfficeMate\DATA\EMC folder. To create an eStatements folder, click the Create New Folder icon or right-click in the Select Export File window, select New, and then select Folder. Type eStatements as the folder name and press Enter.
- Type stmt.xls in the File name text box.
- Select Microsoft Excel Data-Only (*.xls) from the Save as type drop-down menu.
- Click Save.
- After the export is complete, submit the export file for the statement(s) to your vendor.Ensure that the path to the statements on your computer is correct when you submit statements. If you are using TriZetto and you need to locate the location where your statements are saved, log in to TriZetto, click My Account, and then click My File Locations.