Confirming Appointments
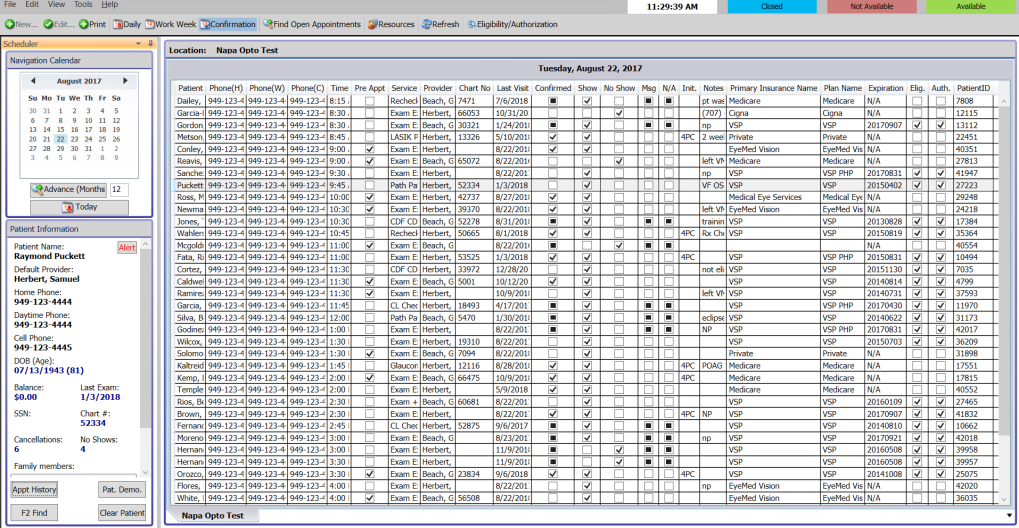
You can view and print a list of patient appointments that need to be confirmed using the Appointment Scheduler’s Confirmation button.
- Open the Appointment Scheduler and click the Confirmation button. For more information on opening the Appointment Scheduler, see Opening and Viewing the Appointment Scheduler.Click Refresh to refresh the Appointment Scheduler with the most up-to-date appointment information.
- Select a location from the tabs at the bottom of the window.
- Select a date from the calendar.
OR
Click the Today button on the Appointment Scheduler toolbar to view today’s appointment schedule.
- To view existing VSP eligibility or authorization information for a patient, select the patient, click the Eligibility/Authorization button.
- Click the Print button on the Appointment Scheduler toolbar to print a list of appointments scheduled for the date that you selected.If you do not want to print all of the columns displayed in the window, right-click on the confirmation grid and deselect column names that you do not want to print.
- Call the patients on the printed list and complete one or more of the following tasks:
- Select the Confirmed check box if you confirmed the patient’s appointment.
- Select the Msg check box if you left a message for the patient.
- Select the N/A check box if you were unable to confirm the patient’s appointment.

- Type your initials in the Init. text box.
- Type notes in the Notes text box, if necessary.
- To verify a patient’s insurance eligibility, double-click the row in which the patient’s name appears.
The Insurance Detail window opens. If you need to make any changes to the patient’s insurance information, see Recording Patient Information. Close the Insurance Detail window when you are finished.
- To denote a patient’s appointment as being confirmed, complete the following tasks:
- Find the existing appointment. For more information on finding an existing appointment, see To find an existing appointment time.
- Select the appointment that you want to confirm.
- Click Edit and select Confirm.
OR
Right-click on the appointment and select Confirm.
You can also denote a patient’s appointment as being confirmed by finding and selecting the appointment, right-clicking on the appointment and selecting Edit Selected Appointment, and selecting appropriate options in the Confirmation Information box on the Appointment Detail window.A check box calendar icon appears next to the patient’s name.
In addition to the procedure above, watch this video for more information.