Setting Up Resource Schedules in AcuityLogic POS
You can set up availability schedules for doctors and nonperson resources, such as exam rooms. The schedules show when you can schedule appointments for resources in the Scheduler. You must set up schedules for doctors before you can schedule appointments for them.
- The schedules that you set up are also available in the Scheduler in AcuityLogic BackOffice.
- You can also set up schedules for resources in AcuityLogic Admin.
To set up resource schedules
- Click Associate in the left column of menu options.
The Login window opens.
-
Select your name from the Associate drop-down list, type your password in the Password field, and click Login.
The Scheduling tab opens.
- Select the resource you want to set up a schedule for from the Resource drop-down list.
- Change the visible hours as follows:
- To show 24 hours of each day, click Show 24 hours below the schedule grid.
- To return to viewing only the scheduled office hours, click Show business hours.
- Select a rotation or date range from the Description drop-down list if needed. See Setting Up Rotations and Date Ranges in AcuityLogic POS.The Normal Hours - No Rotation date range is selected by default. The schedule you set up for this date range applies to all weeks that do not have a rotation or date range set up.
- Mark the resource as available using one of the following methods:
- Click and drag your mouse cursor over the day and time you want to mark the resource as available, right-click, and select Add Availability.
- Right-click on a day with no availability recorded and select Fill Availability to fill the resource’s availability so that it matches the office hours.
- Right-click a time slot set as available and select Deleteto remove the configured availability.
The following figure highlights some of the settings discussed above:
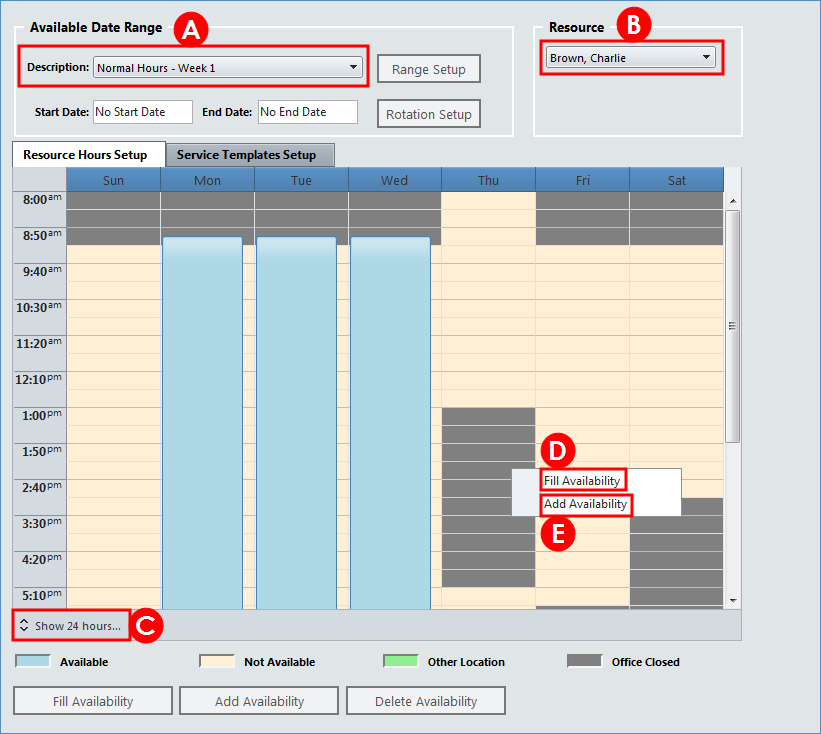
- Select a rotation or date range if necessary.
- Select a resource.
- Click to toggle the view between 24 hours and business hours.
- Right-click on a day and select Fill Availability to match the resource's availability to the office hours of the selected day.
- Select a time slot, right-click, and select Add Availability to set the resource as available.