Understanding the Patient's Portal Experience
Patients log in to their portal using the same practice URL you use to log in. If you activate a patient's portal via email, they'll automatically be directed to the practice URL. Make sure to provide patients with the practice URL if you instead activate their portal manually. For more information, see Activating a Patient's Portal.
By default, the patient portal opens to the Appointments tab. Patients can use the following tabs within their portal:
The My Health tab enables the patient to edit their contact preferences and medical history. Keep in mind that most demographic data under Contact Info is read-only, so the patient will need to contact your office to change things like their email address, phone number, and home address. The patient has access to the following tabs along the left side of the page:
- Contact Information This section enables the patient to update their communication preferences. While they can see their contact information, they will need to contact your practice staff to change it.
- Insurance and Pharmacy Patients can add or remove pharmacies. They can view the insurance carrier and plan your practice has on file, but they will need to contact your staff to update it.
- Medications Patients can request medication refills and update their medication history.
- Allergies Patients can review and update their allergies.
- Past Medical History Patients can review and update their past medical conditions and surgeries.
- Ocular History Patients can update their past ocular conditions and surgeries.
- Social History Patients can review and update their tobacco and alcohol use, driving status, and occupation.
- Additional History Patients can review and update additional history regarding vaccination status and advance care.
- Implantable Devices Patients can view implantable devices entered by your practice, such as intraocular lens implants.
- Family History Patients can review and update their family health history.
- Problem List Patients can view a list of problems documented by your practice. Additionally, patients can click a link to educational materials relative to individual problems.
- Release of Information Patients can review pending requests for sensitive health information and update data restrictions for their health data.
Changes to medical, social, and family history must be approved by a provider before they're officially entered into the patient's record. The provider is prompted to review and approve or reject the updates the next time they open the patient's chart. For more information, see Reconciling Changes Made by the Patient.
The Appointments tab displays when the patient logs into the portal and enables the patient to view upcoming and past appointments, download exam data (as CCDAs and PDFs), and view and print contact lens prescriptions. The patient has access to the following tabs along the left side of the page:
- Upcoming Appointments The patient can view upcoming appointments.
- Past Appointments The patient can view preliminary and finalized exams. For preliminary visits, the patient can view education information on any problems, diagnoses, medications, or lab results that have been documented. The patient can also view, download, and send CCDAs from here.
- Video Visits If the patient has an active video telehealth
 The practice of caring for patients remotely via telephone or video conference. Patients and providers are not physically present with each other. These visits require additional billing codes and modifiers. appointment, the button to join the video displays in the middle of the page to give the patient easy access to the video visit.
Enables the patient to exchange messages with members of your staff using intramail. To send a message, the patient clicks the Compose Message button and selects their provider's name from a list.
The patient has access to the following tabs along the left side of the page:
- Inbox. The patient can view and respond to messages from your doctors and staff.
- Sent. The patient can review messages they sent to providers and staff in your practice.
- Sent CCDA. The patient can review CCDA files they sent to providers outside of your practice.
Enables patients to review completed forms from previous visits.
Enables the patient to view their lab results. This section does not apply to many optometry practices.
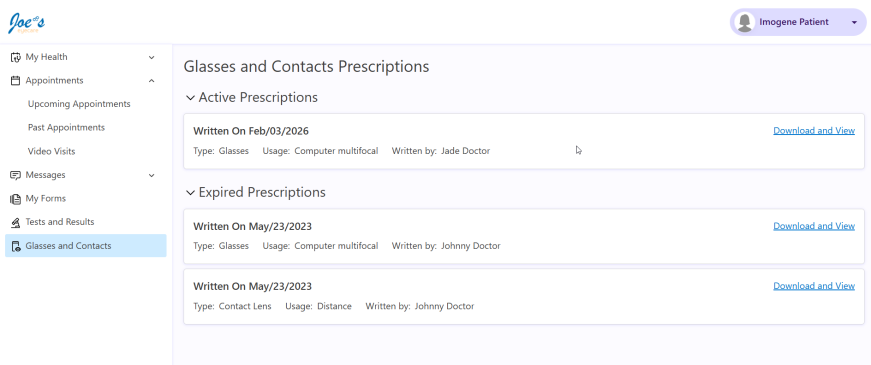
The patient can view and print contact lens prescriptions. Prescriptions are displayed as a PDF, just as they would if displayed by practice staff, except the patient’s PDF includes a “Copy” watermark. Prescriptions that are older than one year include an "Expired” watermark.

Want to truly understand how your patients experience the portal? Create a test patient and activate their portal. You can then log in as that patient and take a firsthand look at how your welcome message displays, what information your patients have access to, and what features they can take advantage of.
For information on activating the portal for your test patient, see Activating a Patient's Portal.