Adding Your Signature to Eyewear and Contact Lens Prescriptions (Web)
You can import an image of your signature into Encompass. Signatures may be printed on eyewear and contact lens prescriptions.
This page is intended to show you how to scan your signature so you can upload an image of your signature to the Encompass web-based app. If you use the iPad app, you may draw your signature directly in the app, and you don't need to follow the instructions on this page. For more information, go to Adding Your Signature to Eyewear and Contact Lens Prescriptions in the iPad App.
Whether you scan and upload your signature through the Encompass web-based app or you draw your signature within the iPad app, your signature will be available in both.
The electronic signature in Encompass is not connected to any signatures you may have saved in your practice management system. Those signatures and preferences are managed independently.
Before scanning your signature, familiarize yourself with the signature image requirements:
- Signature images must be saved in JPG, PNG, GIF, or BMP format.
- The image canvas may not exceed 188 (width) × 44 (height) pixels.
This section describes how to digitize, prepare, and add your signature to the Encompass web-based app.
Some states require an original signature on eyewear and contact lens prescriptions. Check with your state regulatory agency to find out if printing a signature on prescriptions is allowable in your state.
Before you can add your signature to your profile in Encompass, you must first create a digital image of your signature. There are many ways to accomplish this. Here are a few suggestions:
Scan a physical copy of your signature. Write your signature out on a blank, white piece of paper. Dark, bold ink works best for this method. Scan your signature using a multifunction copier or dedicated scanner. Save the file to your Windows desktop.
Take a photo of your physical signature with your smartphone. Write your signature out on a blank, white piece of paper. Dark, bold ink works best for this method. Digitize the signature using one of the following methods:
Scan your signature using a smartphone scanner app, like Adobe Scan or Microsoft Office Lens. Share the scanned file with yourself via email. Save the file to your desktop, laptop, or tablet.
Take a photo of your signature using your smartphone camera. Ensure you take the photo in a well-lit room and your phone is not casting a shadow over your signature. Apply the black-and-white filter with the most contrast. Share the photo with yourself via email. Save the file to your desktop, laptop, or tablet.
Write your signature out on a tablet or smartphone. While you can use your finger to draw your signature on screen, a stylus or digital pencil works best. You can use any drawing app and many word processing apps to capture your signature. Share the image with yourself via email. Save the file to your Windows desktop.
You are not limited to these methods. If you need more support scanning files or working with drawing apps, search for video tutorials online.
If you scanned your signature using a multifunction copier, dedicated scanner, or scanner app, the default file format is usually a PDF. If your signature file is a PDF, follow these steps to extract your signature. If your signature file is a JPEG or PNG file, skip this section.
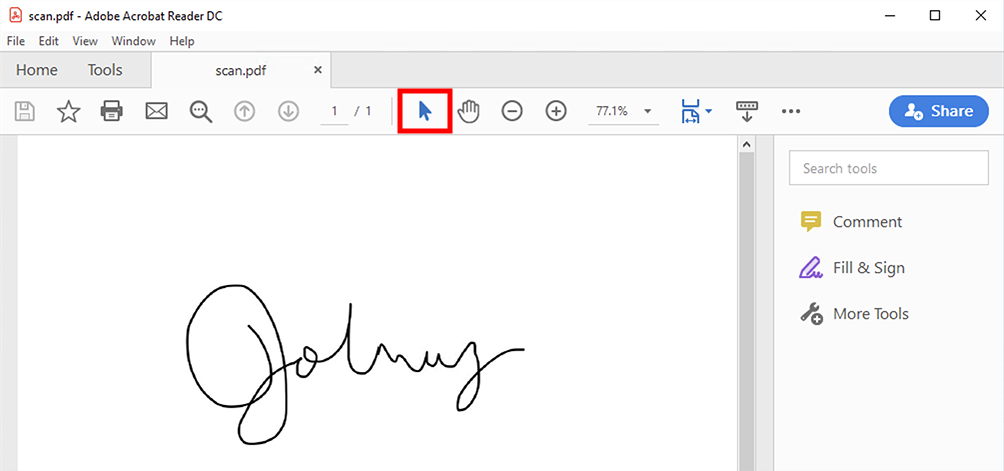
Open the signature PDF file in Adobe Reader.
Click the Selection Tool (depicted as a solid arrow in the toolbar).
Click anywhere in your signature image.
The entire page is shaded in blue to indicate the image is selected.
Click the Edit menu and select Copy.
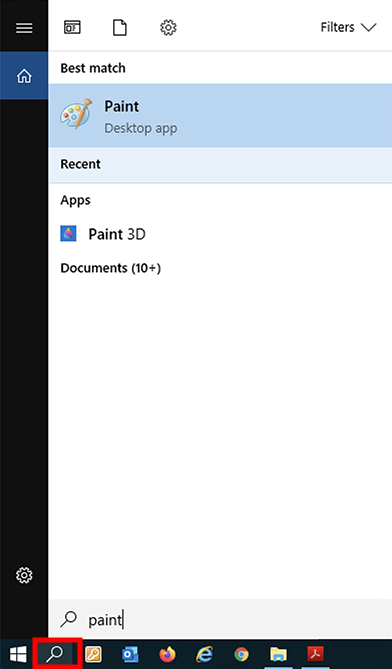
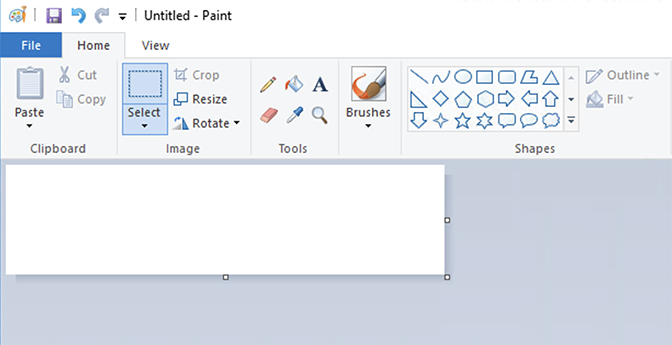
Open Paint and paste the scanned image:
Once you have the image file saved on your Windows desktop, you'll need to resize the signature and crop any white space so the signature fits within a 400×100-pixel canvas.
The image below displays a 400×100-pixel canvas in Paint. Use this image as a guide to help you resize your signature appropriately. For example, the width of your signature cannot extend beyond the first column of Shapes displayed in the toolbar.
While the following instructions explain how to accomplish this task using Paint—a drawing application that is installed on every Windows computer—you may use any drawing or photo editing application you wish. If you copied your signature from a PDF, described in Extract your signature from a scanned PDF, skip to step 3.
Right-click the signature image file you saved on your Windows desktop.
Select Open With and select Paint.
Paint opens and displays your signature image.
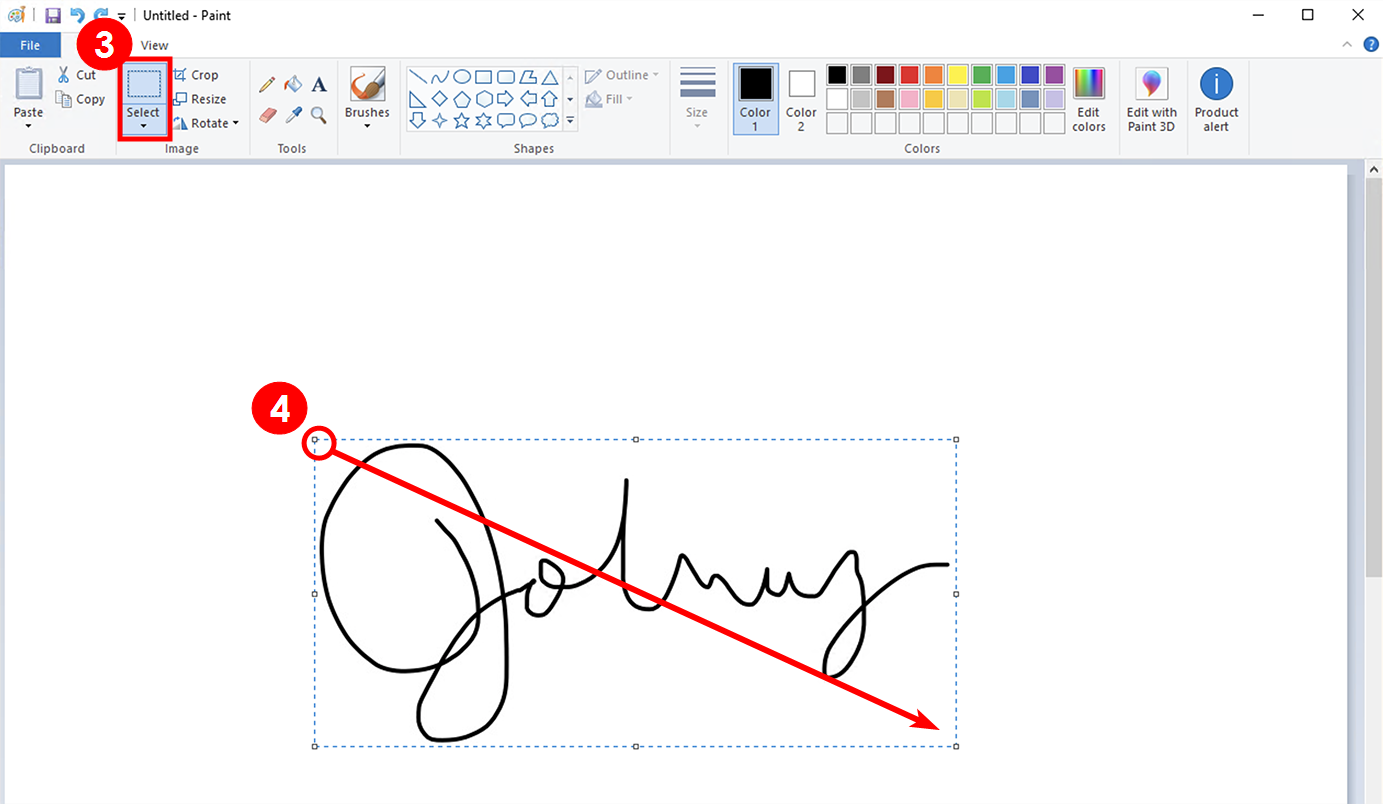
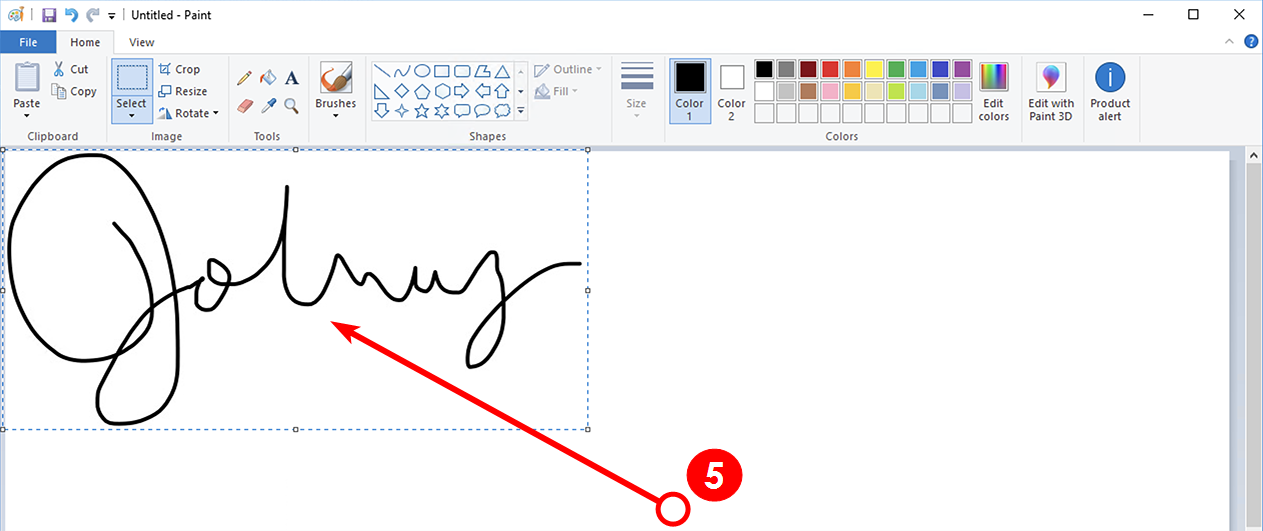
Click the Select toolbar icon.
Select your signature:
Click near the upper-left corner of your signature.
Drag your cursor to the lower-right corner of your signature.
Drag your selection as close to the lines of your signature as possible. Ensure no part of your signature falls outside of the selection.
A marquee or dashed line indicates the selected area.
Click anywhere in the selected area and drag the signature to the upper-left corner of the canvas.
Be careful not to drag any part of your signature over the edge of the canvas.
Resize your signature image:
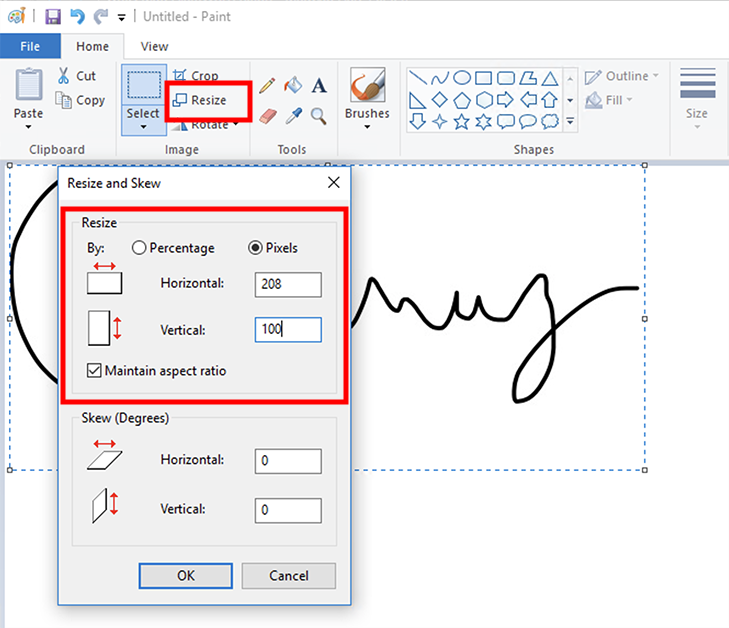
With the signature still selected, click the Resize toolbar icon.
Select the Pixels radio button and ensure the Maintain Aspect Ratio check box is selected.
Type 188 in the Horizontal field.
If the Vertical field exceeds 44, type 44 in the Vertical field.
Your signature will probably not be exactly 188 × 44. It's acceptable for one of these values to fall below 188 × 44. It's more important that neither value exceeds 188 × 44.
Click OK.
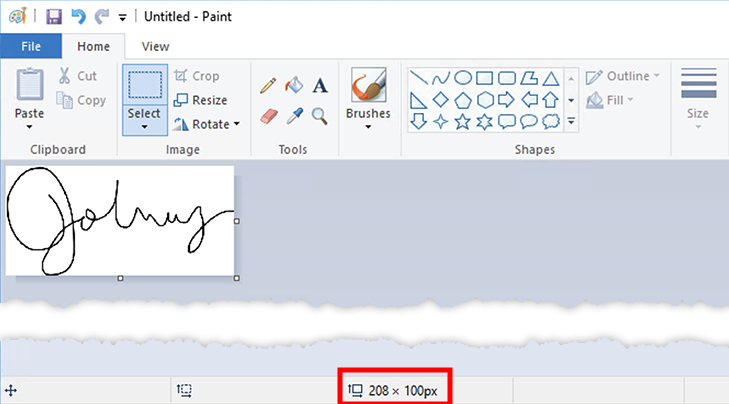
With the signature still selected, click the Crop toolbar icon.
Paint crops the canvas (or background) to the boundaries of your signature.
Locate the canvas size listed at the bottom of the app window and ensure the width and height do not exceed 400×100.
Save your signature image as a JPEG file:
Click File, select Save As, and select JPEG Picture.
Type a File Name.
Save the file on your Desktop.
Click Save.
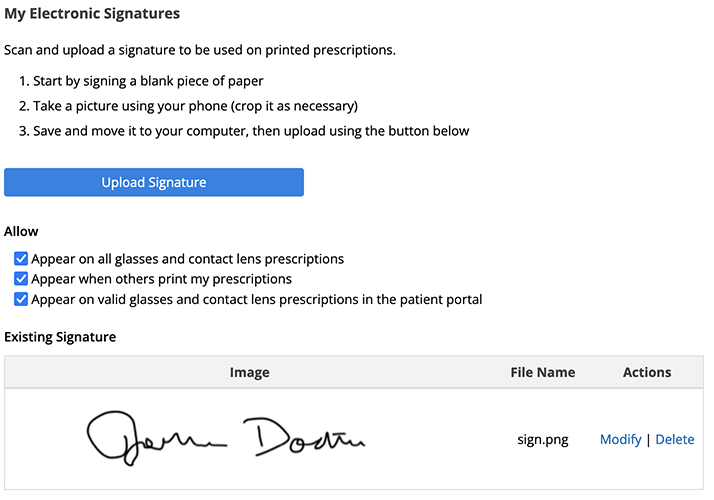
- Within the Encompass web-based app, click Preferences.
- Click the Upload Signature button.
- Locate the signature image file on your computer.
- Select or deselect the signature permission check boxes as needed:
- Select Appear on all glasses and contact lens prescriptions to enable your signature to print on eyewear and contact lens prescriptions. If this box is unchecked, your signature will not print.
- Select Appear when others print my prescriptions to allow your signature to appear when other clinicians or staff print your patients' prescriptions. If this box is unchecked, your signature will appear only when you print your patients' prescriptions.
- Select Appear on Valid Glasses and Contact Lens Prescriptions in the Patient Portal to allow patients to print valid prescriptions with your signature from the patient portal. Your signature will not appear on prescriptions that are over 365 days old. Allowing your signature to appear on patient-printed prescriptions helps you reduce the administrative burden of the FTC Eyeglass and Contact Lens Rules.
Click Save.
