Using the Patient Marketing Dashboard
The Patient Marketing Dashboard allows you to view and print patient information filtered by many different criteria, including insurance carrier and products purchased, to assist with your practice's targeted marketing campaigns.
- Only providers and staff with the Operations dashboard security permission selected in Administration can access this dashboard.
- To watch our video tutorials about the Patient Marketing Dashboard, see Patient Marketing Dashboard.
- Click Reporting and select Dashboard.
- In the left-side menu, click Patient Marketing.
The Patient Marketing Dashboard opens. The dashboard defaults to displaying all patients. The Total Patient Count appears at the top of the dashboard.
- If your practice has multiple locations, click the Select Locations drop-down menu to select/deselect locations to include in the dashboard.
- To see information for specific providers, click the Select Provider drop-down menu and select/deselect providers to include.
- In the left-side menu, click the + next to each filter you want to use and select the desired criteria. The available filters are:
- Report Type - Select All, Invoiced, or Non-Invoiced.If you select Invoiced patients, additional filters become available. See below.
- Status - Select All, Active, or Inactive.
- Age Range - Type a beginning and ending age.
- Gender - Select Male, Female, and/or Unknown.
- Email on file - Select All (patients with and without email addresses on file), Yes, or No.
- Referred By - Select the referring party from the drop-down menu. Type a term in the search area to locate the referring party in the list. Click to clear your selections.
- Insurance - Select the insurance carrier(s) from the drop-down menu. Type a term in the search area to locate a carrier in the list. Click to clear your selections.
- Last Exam Date - Select or enter a date range and click Apply.
- CPT Code - Select a CPT code
 Current Procedural Terminology. The numeric codes that are submitted to insurers for payment. Every billable procedure has its own individual CPT code. from the drop-down menu. Type a term in the search area to locate the CPT code in the list. Click to clear your selections. Only active CPT codes appear in the drop-down menu.
 - Diagnosis Code Category - Select a diagnosis code category from the drop-down menu. Type a term in the search area to locate the diagnosis code in the list. Click to clear your selections.
- Frame Collection - Select a frame collection from the drop-down menu to see patients that purchased frames from that collection. Type a term in the search area to locate the frame collection in the list. Click to clear your selections.
- Contact Lens Styles - Select a contact lens style from the drop-down menu to see patients who purchased lenses of that style. Type a term in the search area to locate the contact lens style in the list. Click to clear your selections.
- Eyeglass Sales - Type beginning and ending retail sales amounts, before taxes, for eyeglass purchases (lenses, frames, lens base type, material add on, style add on, color/coat add on, tint, edging, coating, miscellaneous extras).
- Exam Sales - Type beginning and ending retail sales amounts, before taxes, for exam services (exams, medical procedures, contact lens fitting, etc.) Exams billed as part of eyeglass and contact lens orders are included in the results.
- Contact Lens Sales - Type beginning and ending retail sales amounts, before taxes, for contact lens purchases.
- Misc Sales - Type beginning and ending retail sales amounts, before taxes, for miscellaneous purchases (accessories, gift cards, repair charges, shipping fees, miscellaneous fees).
- If you selected Invoiced for the Report Type, select a transaction date range in the upper-right corner of the dashboard and click Apply. The date range defaults to the last calendar year.

- After you have selected all your filtering criteria, click Apply at the top of the left-side menu.
The Table updates to display the patients who meet your selected criteria.
- Click the gear symbol to change the columns that are displayed, the sort order, grouping criteria, and the number of rows displayed per page. You can also calculate totals, averages, and minimum/maximum for various criteria. (For example, you can calculate the average age of the patients listed.)

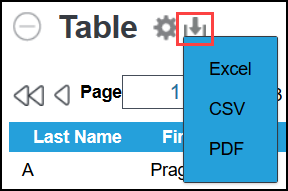
- Click the download symbol to export the data to an Excel, CSV, or PDF file.
- To remove all selections and start over, click Clear in the left-side menu.
The following additional filters are available if you select Invoiced for the Report Type:
