Using the Eyefinity Integrated Online Scheduler
This topic explains how to use the Integrated Online Scheduler with Encompass. The Integrated Scheduler allows your patients to schedule appointments online via your website, twenty-four hours a day, seven days a week. Appointments are recorded in your Encompass Scheduler in real time, and email confirmations are sent to your patient, all automatically.
Before you can use the integrated online scheduler, you need to make sure your providers/staff, services, and insurance information are set up properly in Encompass. For more information, see Setting Up Eyefinity Patient Engagement Solutions.
Once your website is set up to use the online scheduler, your new or existing patients can schedule a new appointment, reschedule or cancel an appointment (based on the options you select and your configuration). When a new patient creates an appointment, they are also added to your system.
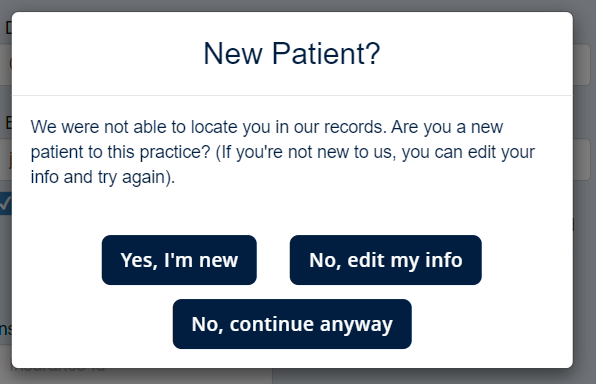
When a patient schedules an appointment using the Eyefinity Integrated Online Scheduler and no patient record is found for them in Encompass, the Scheduler asks them to confirm whether they are a new patient.

If the patient clicks No, continue anyway, the appointment is scheduled and a patient record is created in Encompass.
A message then displays on both the Encompass home screen and Search/Add Patient screen to notify you that you need to review the patient record.
Notifications display only for patients scheduled at the office you are logged in to.
-
From the home screen or the Search/Add Patient screen, click the Click to review link.

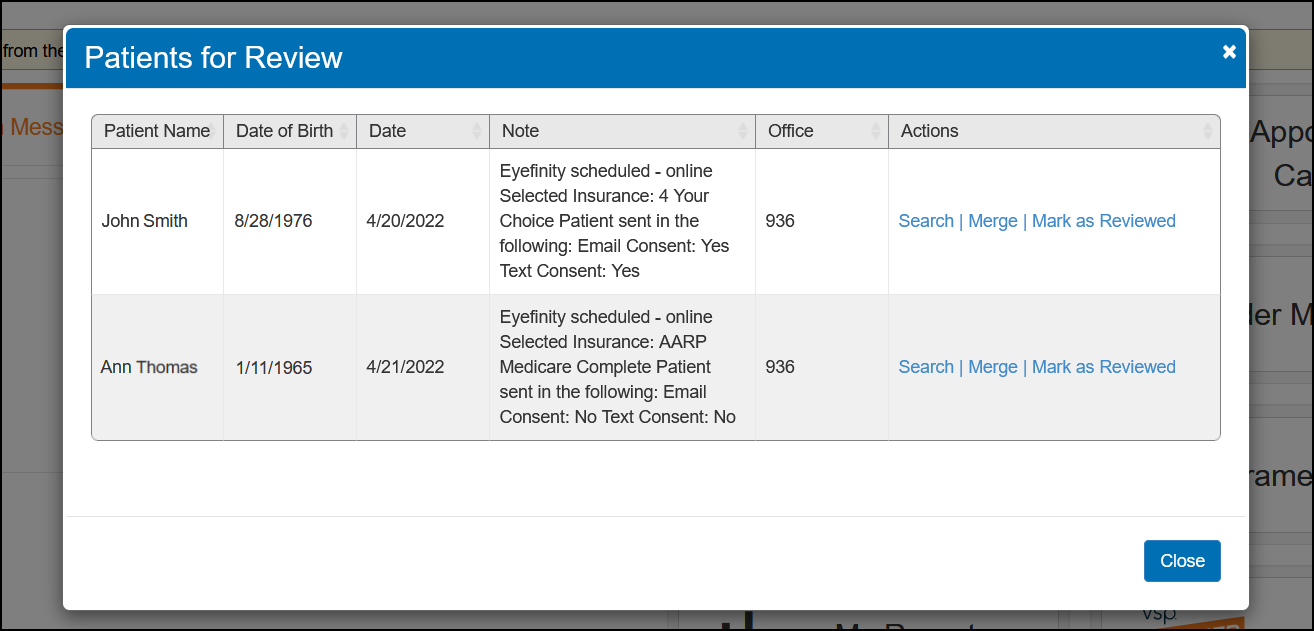
The Patients for Review window opens.

-
Review the list of patients and click the appropriate action for each.
Search – Opens the Search/Add Patient screen and automatically searches for a matching patient record. Use this option if you want to locate and review the patient's record.
Merge – Opens the Merge Duplicate Patients screen. Use this option if you believe the patient is a duplicate. See Merging Patients for instructions on performing a patient merge.
Only providers and staff members with the Merge Patients security permission selected in Administration can use the Merge option.
Mark as Reviewed – Accepts the patient record and removes the patient from the patient review list. Use this option to keep the patient's record in your system.
A message also displays on the Demographics screen of any patient that needs review. Go to the patient's Notes screen to see information about the appointment the patient scheduled online. For more information on the Notes screen, see Entering, Editing, and Printing Notes.
