Setting Up Eyefinity Patient Engagement Solutions
This section explains how to set up Eyefinity's integrated patient engagement solutions with Encompass. For information on how the solutions work, see Using Eyefinity Patient Engagement Solutions.
Before you can use the Eyefinity Integrated Online Scheduler, verify the following areas of Encompass are set up correctly:
Offices
Verify the Office Name entered in Administration matches what you want to show on your online forms and scheduler. If you have multiple locations, check the office name for each location. See Setting Up Office Contact Information. The office name you enter also appears on invoices, prescriptions, and reports in Encompass.
Providers
Verify the following for each provider you want to have available in the online scheduler and/or collect forms for:
- The Active and Online Schedule check boxes are selected for each provider in Administration. See Editing Resources.
- The providers' schedules are set up in Administration. See Setting Up Resource Schedules.
Staff
If you opt to enable staff appointments, verify the following for each staff member you want available in the online scheduler:
- The Active and Online Schedule check boxes are selected for each staff member in Administration. See Editing Resources.
- The staff schedules are set up in Administration. See Setting Up Resource Schedules.
Scheduler
Verify:
- Office hours are set up in Administration. See Setting Up Office Hours
- Providers/Staff for online scheduling are visible in the Scheduler in Front Office. If they are not, click the blue button with white lines on it and select Resource Settings. In the Resource Settings window, select the check box next to each provider/staff member.

Services
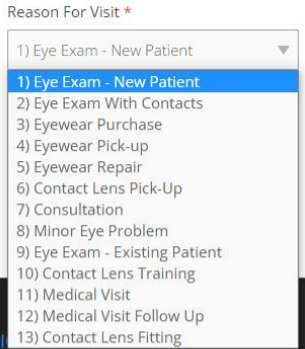
Set the Reason for Visit options available in the online scheduler.

- Verify at least oneCPT code
 Current Procedural Terminology. The numeric codes that are submitted to insurers for payment. Every billable procedure has its own individual CPT code. is fully configured and activated in Administration. For more information, see Setting Up Services.
Default codes include:92004: Comprehensive Exam – New
92014: Comprehensive Exam – Existing
92310: New Contact Lens Fit
99203: Office Vst Level 3 New
- Set up and activate the CPT code(s) in Appointment Service Setup in Administration. Be sure to select the Active check box for each CPT code. See Setting Up Appointment Services
Insurance
Verify each insurance plan you want to appear in the online scheduler is set up and activated in Administration. See Setting Up and Activating Insurance Plans
Cancel/Reschedule
You can opt in to enabling patients to cancel or reschedule existing appointments via the online scheduler. With this feature, you can establish when the patient can cancel or reschedule; for example, you can allow cancel/reschedule up to 24 hours prior to the appointment. You can also indicate when your practice should receive an email alerting you to the cancel/reschedule.
When creating your eWebExtra website, you need to opt in to use Eyefinity Integrated Online Forms. When you opt in, the New Patient Form is available for use. You can also opt in to customize and use additional forms, such as the HIPAA or Notice of Privacy Practices form, and the Retinal Scan form.