Eyefinity Practice Management 10.13 Release Notes
Release Date: November 12, 2019
Eyefinity announces the newest version of Eyefinity Practice Management. This updated version improves upon your system's robust attributes and offers new features and expanded functionality.
This section includes:
Front Office Enhancements
Eyefinity Practice Management 10.13 Front Office includes enhancements to the following areas:
- Document Scanning and Editing
- Enhanced Inventory Valuation Report
- Frame Photos in Material Orders
- Order Number Included on Printed Eyeglass Order Summary
- Insurance Information Included on Contact Lens Lab Reports
Document Scanning and Editing
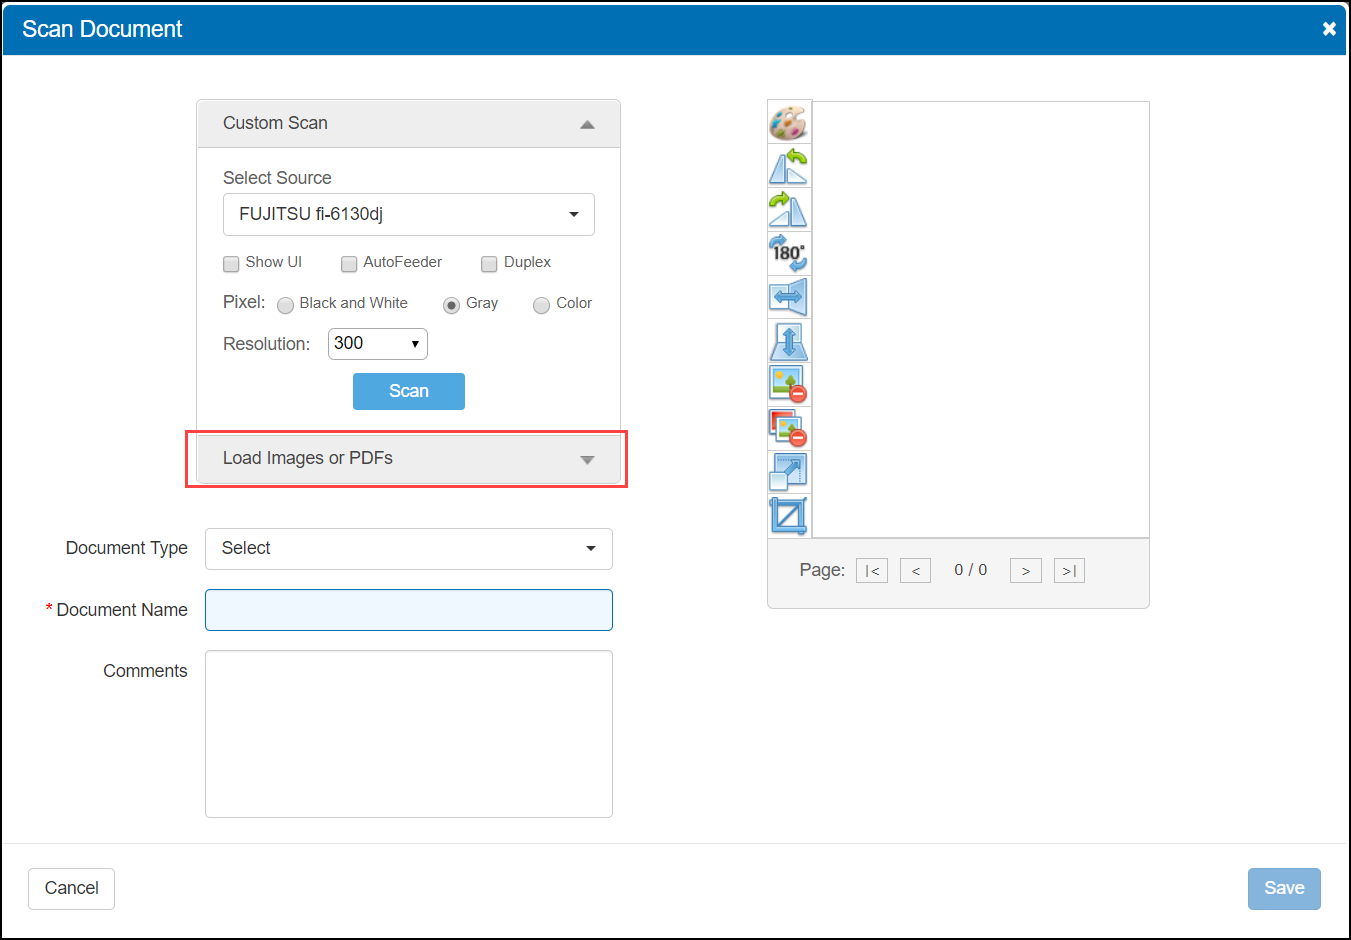
If you have a Twain-compatible document scanner installed and set up, you can now scan patient documents directly into Eyefinity Practice Management. The new Scan Document window enables you to scan or upload documents and then edit and save them without leaving the patient's record.
Scanning Documents from the Scan Document Window
- Before using this feature, test your scanner outside of Eyefinity Practice Management to ensure it is set up and working correctly. Only scanners that are Twain compatible will work with Eyefinity Practice Management. If you are unsure if your scanner is Twain compatible, check your scanner's user guide or web site, or contact the manufacturer's customer support.
- To watch our training videos about this new feature, go to Document Scanning.
-
On the left side of the Demographics screen, under Correspondence, click Documents.
- Click Scan Document.
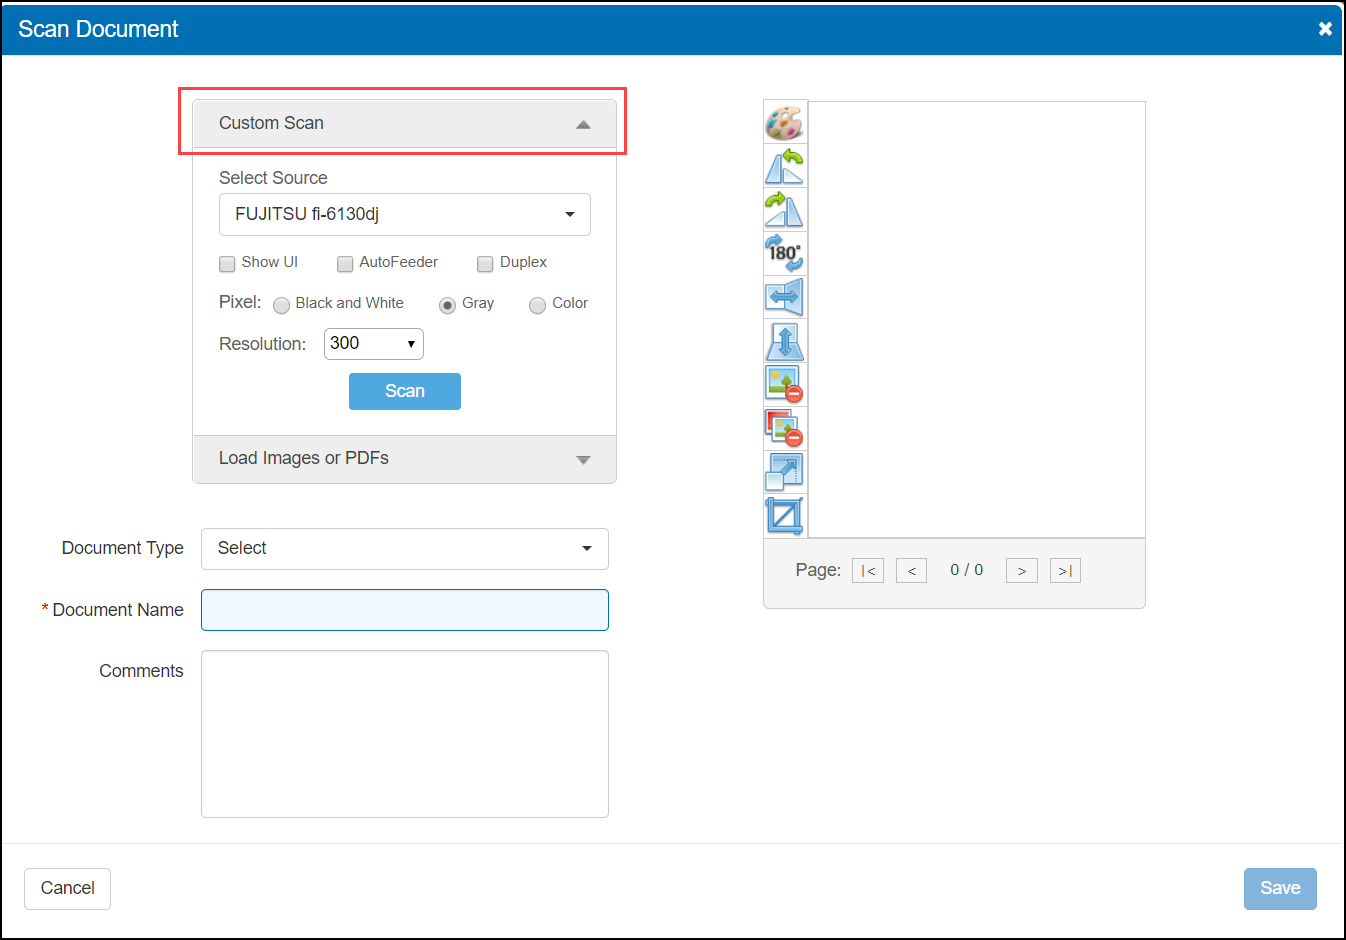
The Scan Document window opens.
- Click Custom Scan.
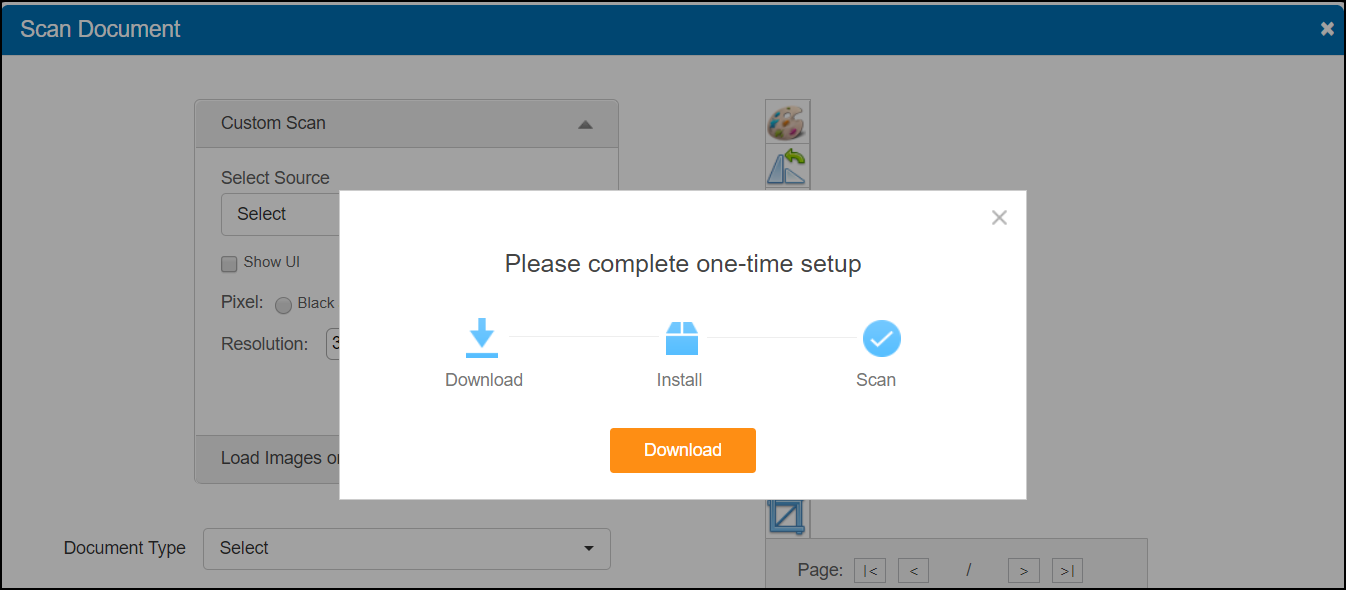
- If this is the first time you are using the Scan Document feature, you are prompted to complete a one-time setup process to install a required plugin, the Dynamsoft Service. Without this plugin, the scanning feature will not work. Click Download and follow the setup wizard to complete the installation. If you have already completed this setup, go to step 5.
- Select your scanner from the Select Source drop-down list.
If your scanner is not listed or you see the (No TWAIN compatible drivers detected) message, check the following:
- Try logging out of Eyefinity Practice Management and then logging back in. This can ensure that the scanning service plugin installation is complete.
- Is the scanner plugged in and powered on?
- Is the scanner Twain compatible? If not sure, check your scanner's user guide or web site, or contact the manufacturer's customer support.
- Is the correct driver for your scanner installed on your computer? If not sure, check your scanner's user guide or website, or contact the manufacturer's customer support.
- Select the desired scan settings.
- Select AutoFeeder if your scanner has an auto feed feature.
- Select Duplex if you are scanning two-sided documents.
- Select one of the Pixel radio buttons to set the scan color.
- Select a Resolution for the image.
The Show UI check box is not currently functional. Selecting this check box will cause the scan to fail. - Insert the document into the scanner and click Scan.
The scanner scans the document, and an image of the document appears in the Scan Document window.
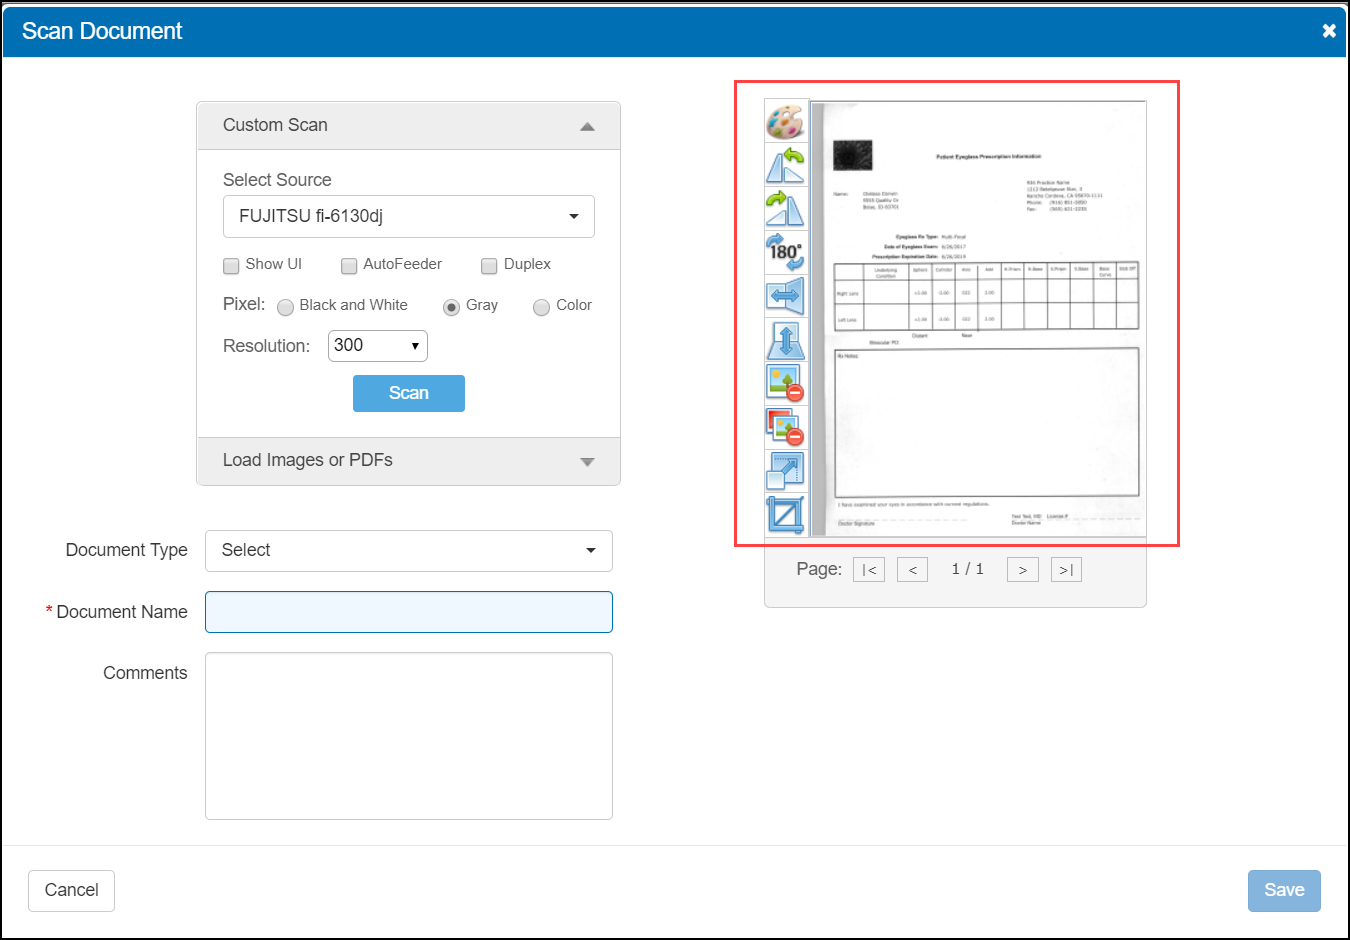
- Edit the document, if desired, using the editing tools.
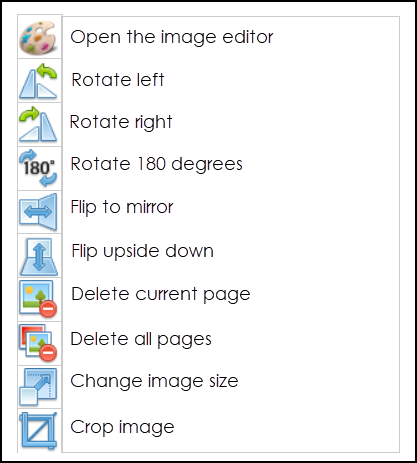 Clicking the"paint palette" icon opens the image editor, which contains all the editing tools shown here, along with several others such as Erase and Select Mode. You can also print the image from the image editor.
 - Select the Document Type.
- Enter the Document Name.
- Enter any Comments, if needed.
- Click Save.
The Scan Documents window closes and the document is saved as a PDF file in the Documents screen. For more information on editing document information, exporting, printing, and deleting documents from this screen, see Managing Patient Documents.
Uploading Documents from the Scan Document Window
You can also use the Scan Document window to upload documents you have saved to your computer.
- In the Scan Document window, click Load Images or PDFs.
- Click Load.
- Browse for the file you want to upload and click Open.
The document appears in the Scan Document window.
If the document fails to upload, close the Scan Document window and click + Upload Document to try again. See Uploading a Document. - Edit and save the document, as described in Scanning Documents from the Scan Document Window, steps 8–12.
Enhanced Inventory Valuation Report
The Inventory Valuation Report has been enhanced to provide more useful data. Better insight into your true inventory valuation saves you time determining your company's investment in frame inventory and helps when filing taxes or making insurance claims. The Valuation Cost and Extended Cost columns have been replaced by the following new columns:
- Wholesale Cost: The wholesale amount of the item
- Total Wholesale Cost: The sum of the wholesale amounts for all the items on hand
- Your Cost: The amount your practice paid for the item
- Total Your Cost: The sum of the amounts your practice paid for all the items on hand
- Retail Price: The price your practice is charging for the item
- Total Retail Price: The sum of the prices your practice is charging for the items on hand
Report totals for each column are also provided. The data shown is as of the last physical count. For information on performing a physical count, see Maintaining Physical Inventory.

Frame Photos in Material Orders
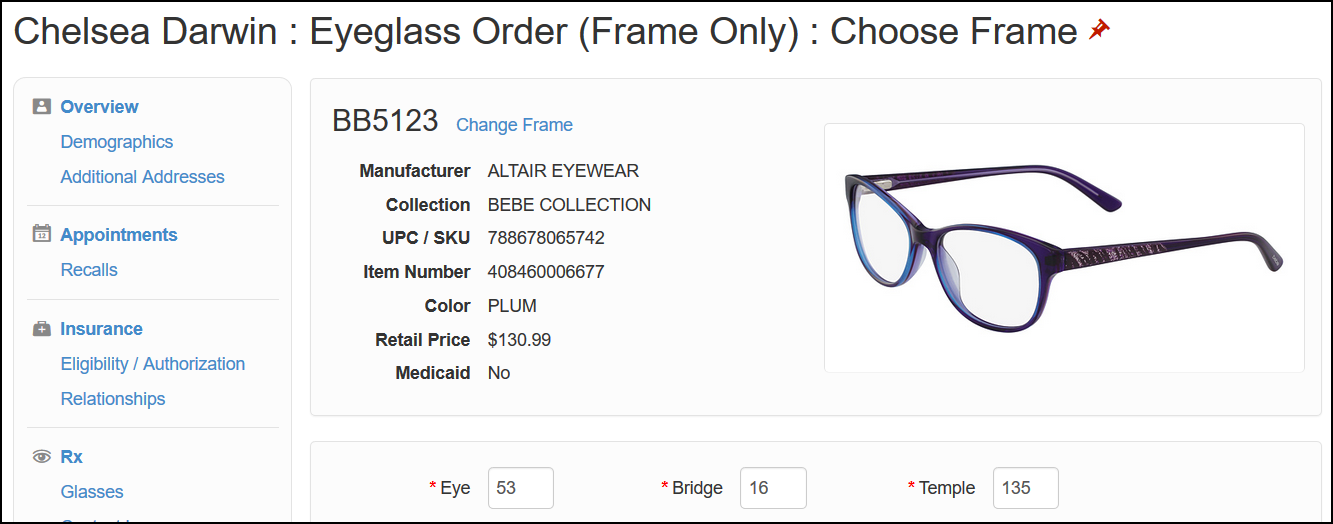
Material Orders now includes a more complete catalog of frame photos. If the frame you select in Choose Frame is present in the Frames Data database, a color photo of it is now displayed along with the other frame information. The image database is updated nightly, so you always have the most up-to-date photos. Having photos makes it easier to help patients choose frame colors and styles, as well as confirm that you are adding the correct frame to the order.
Order Number Included on Printed Eyeglass Order Summary
The printed Eyeglass Order Summary now includes the order number.

Insurance Information Included on Contact Lens Lab Reports
Contact lens lab order reports now include insurance authorization information, similar to eyeglass lab order reports.
Fixed Issues
Front Office
- The O.C. Height field in the Choose Lenses screen now accepts entries with up to two decimal places. Previously, an error would occur when numbers with decimals were entered. The decimals are included when the order is transmitted to the lab and shown on the order summary.
- The Find Open Appointments feature now returns all open time slots that meet your search criteria. Previously, schedule exceptions could cause the feature to miss open time slots.
- The tax rate applied to progressive lenses is now correct when using global discounts.
- For contact lens orders that contain two lenses with two different suppliers—one lens (right or left) with ABB as the supplier and the other lens with no supplier—the "no supplier" lenses are no longer incorrectly transmitted to ABB.
Claims Management
-
Errors due to patient first and last names being in reverse order no longer occur when electronic remittances are processed.