Troubleshooting Barcode Label Printer Errors & Issues
If your barcode label printer is not working properly, ensure that
- the printer labels and ribbon are loaded correctly. See Loading Labels in Your Barcode Label Printer and Loading Ribbon in Your Barcode Label Printer.
- the green POWER button on the top of the printer is illuminated. If it is not, press it to reboot the printer. The green light is illuminated when the printer is ready to print. The printer may stop working if it overheats due to excessive use.
- the print head is completely closed. The print head clicks into place on both sides when it is properly closed, and a green light is illuminated.
- product items are selected to print on labels in the Product Setup window. See Printing Barcode Labels.
- the correct Comm Port for Barcode Printer is in use. See Error Message 8015.
- the printer’s hardware is properly connected. See one of the following topics:
For additional issues and error messages, see the following sections for troubleshooting instructions:
- Red Printer Light
- Error Message 8002
- Error Message 8005
- Error Message 8015
- Labels Print Off Center
- Missing Characters on the Label
- Numbers Printing beyond the Edge of the Label
- Zeros Appended to the Beginning of the Barcode
- Print Darkness
Red Printer Light
If the printer’s light is red instead of green, follow thesse instructions:
- Turn the printer’s power off.
- Turn the printer’s power on.
- Press the FEED button to ensure that the printer is not in pause mode.
- Ensure that labels are properly loaded. See Loading Labels in Your Barcode Label Printer.
- Ensure that the print head is completely closed. The print head clicks into place on both sides when it is properly closed, and a green light is illuminated.
Error Message 8002
If Error Message 8002 appears, you are using an invalid communication port number. Click No in the Error Message window, and ensure that you are using the correct Comm. Port for the barcode label printer. For more information, see the Comm Port for Barcode Printer steps in Error Message 8015.
Error Message 8005
If Error Message 8005 appears, your communication port is already open. Click No, close OfficeMate, and double-click the OfficeMate icon to re-open the program.

Error Message 8015
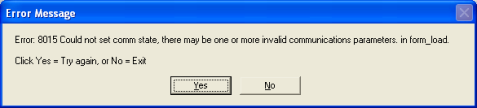
If Error Message 8015 appears, you have selected the wrong communication port on a computer that has more than one communication port installed. Correct the error as follows:
- In the Error Message window, click No.
- Ensure that the correct Comm Port for Barcode Printer is being used. If you receive another Error Message 8015 or 8002 after ensuring that you are using the correct communication port number, click No, and go to step 3.
- On your desktop, click Start.
- Select Settings, then Control Panel, then System.
The System Properties window opens.
- Click the Hardware tab, the Device Manager.
The Device Manager window opens.
- Double-click Ports (COM & LPT).
- Right-click the Communication Port that the printer is using, and select Properties.
The Communication Port Properties window opens.
- Click the Port Settings tab.
- Ensure that the following settings are selected from the drop-down lists, then click OK:
- Bits per second: 9600 (SATO printers use a baud rate of 9600.)
- Data bits: 8
- Stop bits: 1
- Flow control: None
- Click the Driver tab, and click Update Driver.
- Click the Install from a list or specific location (Advanced) radio button, and then click Next.
- Click the Don’t search. I will choose the driver to install radio button, and then click Next.
- Select the device driver you want to install, click Next, and then click Finish.
Labels Print Off Center
If your barcode labels print off center, realign them as follows:
- Open the printer's print head.
- Widen the blue clips.
- Move the labels toward the right.
- Close the print head on both ends.
The print head clicks into place on both sides when it is properly closed, and a green light is illuminated.
Missing Characters on the Label
Due to limitations in barcode printing and scanning systems, ensure your Product Code and UPC Code meet the following requirements:
- Must be 6–12 digits
- Must contain only numbers
- Must be an even number of digits. Enter leading zeros as needed to ensure an even number
- Must be unique among the products in your system
Numbers Printing beyond the Edge of the Label
The barcode labels can accommodate up to 12 numerical characters. If the number entered in the UPC or Product Code field exceeds 12 numerical characters, you must shorten the code so it fits on the label.
Zeros Appended to the Beginning of the Barcode
The SATO barcode label printer requires barcodes to have an even number of digits. If a barcode has an odd number of digits, the printer appends a leading zero to the barcode. The scanner, however, doesn't recognize the barcode with the leading zero as the same barcode without the leading zero. To fix this problem, ensure the codes entered in the UPC or Product Code field contain an even number of digits.
Print Darkness
If the print on your labels is too light or too dark, adjust the darkness of the print as follows:
- Start the SATO WS4 Printer Utility.
If the utility is not already installed on your system, see SATO WS4 Printer Utility.
- From the drop-down list on the top-left side of the utility’s toolbar, select COM for the printer’s input/output port.
- From the drop-down list beneath the port specification, select WS408 for the SATO printer model.
- In the navigation pane on the utility’s left, click the Parameter Setting icon.
- In the properties pane, click the General tab.
- In the Action section of the tab, enter or select a number in the Print Darkness field to lighten or darken the label print.
Darkness is adjusted relative to the current darkness setting. The higher the number, the darker the print. The range is 0–30.
- To update the printer parameter, click Send and then Yes.