Using the Eyefinity Integrated Online Forms
This topic explains how patients access, fill in, and submit forms to your practice using the Integrated Online Forms with Encompass. If your practice has an eWebExtra website, your patients can complete their patient information, insurance, reason for visit, and medical history forms online, twenty-four hours a day, seven days a week. Forms are recorded in your Encompass system in real time, and email confirmations are sent to your patient, all automatically.
All customers can access online forms; if the customer is not an existing patient, the patient can register or call your office.
Before you can use the integrated online forms, you need to make sure your providers are set up properly in Encompass and that you have opted in and set up your forms. For more information, see Setting Up Eyefinity Patient Engagement Solutions.
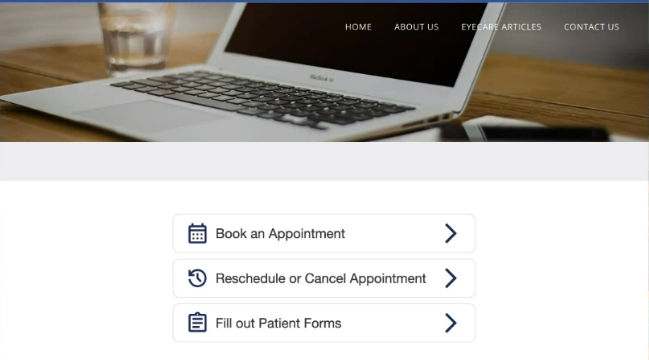
- From your website, the patient clicks Fill out Patient Forms.
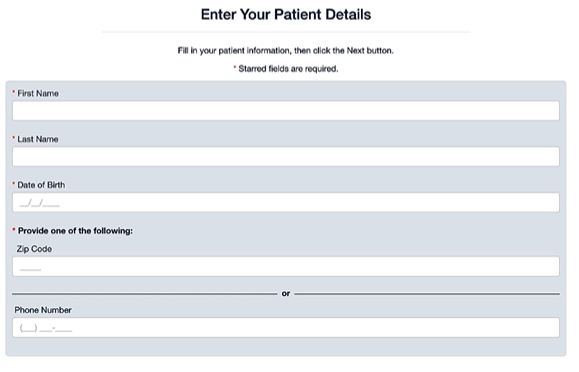
The Patient Details screen displays.
-
The patient enters: First Name, Last Name, Date of Birth and either the ZIP Code or Phone Number and clicks Next.
The system checks to see if the patient has an existing patient record in your Encompass system. Patients not found in your system see a message directing them to edit the information entered or call your office.
Patients found in your system, continue to a screen similar to the one below.
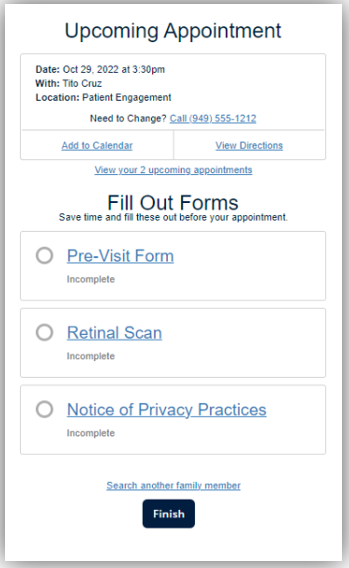
From here, the patient selects the form to complete.
After a patient completes and submits a form, it is added as a PDF file to the patient’s Documents in Encompass. A link to the form also displays in the patient information panel (shown when you click an appointment in the Encompass Scheduler).
The Pre-Visit form is available once you opt-in to using Eyefinity Integrated Online Forms. This form captures the patients demographics, insurance, reason for visit and medical history.
- From the Fill Out Forms list, the patient clicks the Pre-Visit Form link.
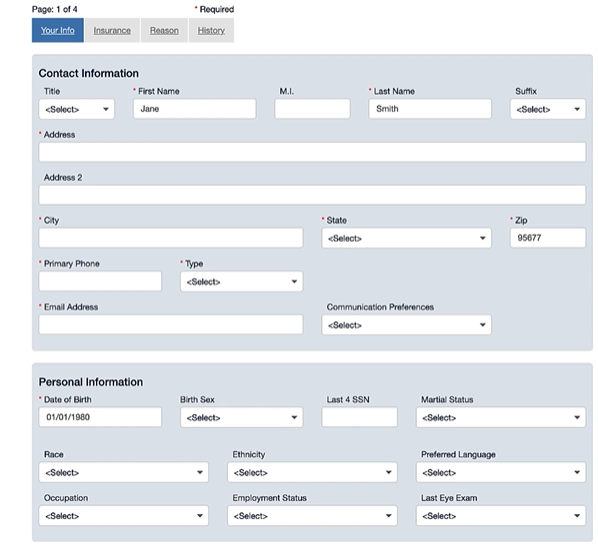
- On the Your Information tab, the patient enters contact and personal information and clicks Next.
-
The patient then enters insurance information and clicks Next.
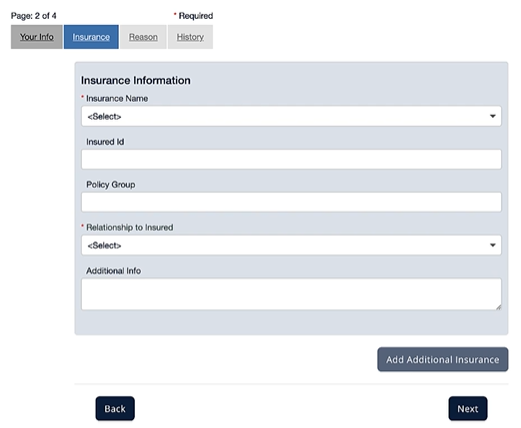
The patient can click Add Additional Insurance to information for another policy if needed. -
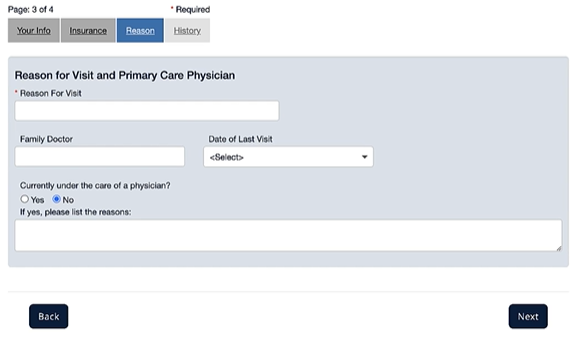
The patient selects a reason for visit and enters their family physician information and clicks Next.
-
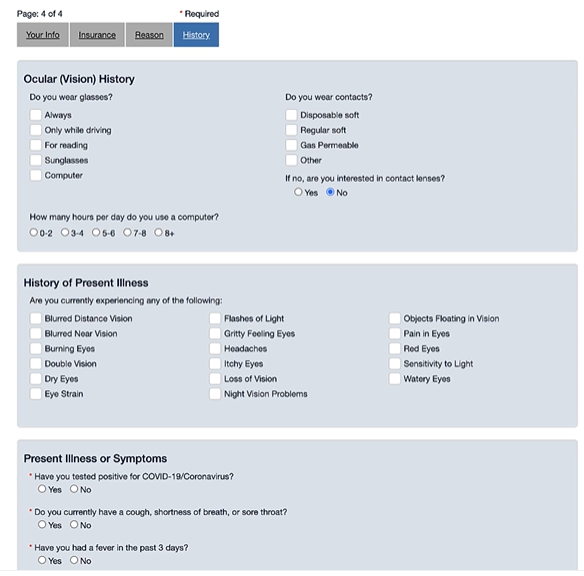
The patient then enters the appropriate medical history.
-
Once complete, the patient clicks Submit. A confirmation message displays. The patient can click Return to Next Steps to submit any additional forms.
This form can be used to collect an acknowledgment that the patient has viewed and agrees to your privacy practices. This form is only available if you have opted-in and set up the form.
- From the Fill Out Forms list, the patient clicks the Notice of Privacy Practices link. The Acknowledgment screen displays
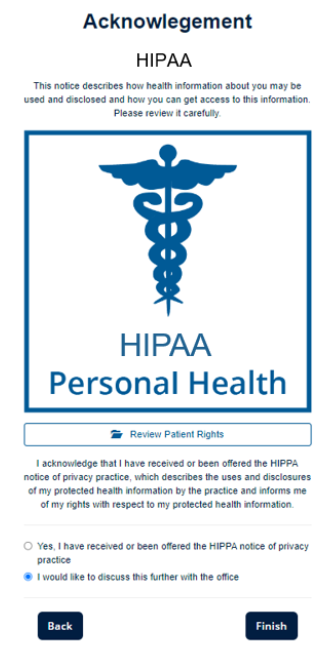
From this screen, the patient can click Review Patient Rights to view a PDF (provided by your office) of your privacy policy. - The patient then selects either:
Yes, I have received or been offered the HIPAA notice of privacy practice
or
I would like to discuss this further with the office - The patient then clicks Finish. The patient is returned to the forms list.
The Reinal Scan form is used to get a patient's acknowledgment that they want a digital retinal scan or to discuss the retinal scan with the doctor.
Note: This form is only available after you opt in and work with Customer Support to set up the form, see Patient Engagement Opt In Features.
- From the Fill Out Forms list, the patient clicks the Retinal Scan link. The Acknowledgment screen displays.
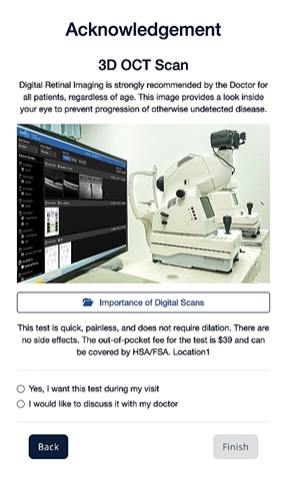
From this screen, the patient can click Importance of Digital Scans to view a PDF (provided by you) with additional digital scan information. - The patient then selects either:
Yes, I want this test during my visit
or
I would like to discuss it with my doctor - The patient then clicks Finishand is returned to the forms list.