
Getting Ready to Go Live with Encompass
This topic explains the areas of Encompass that you need to set up prior to going live.
Company Setup
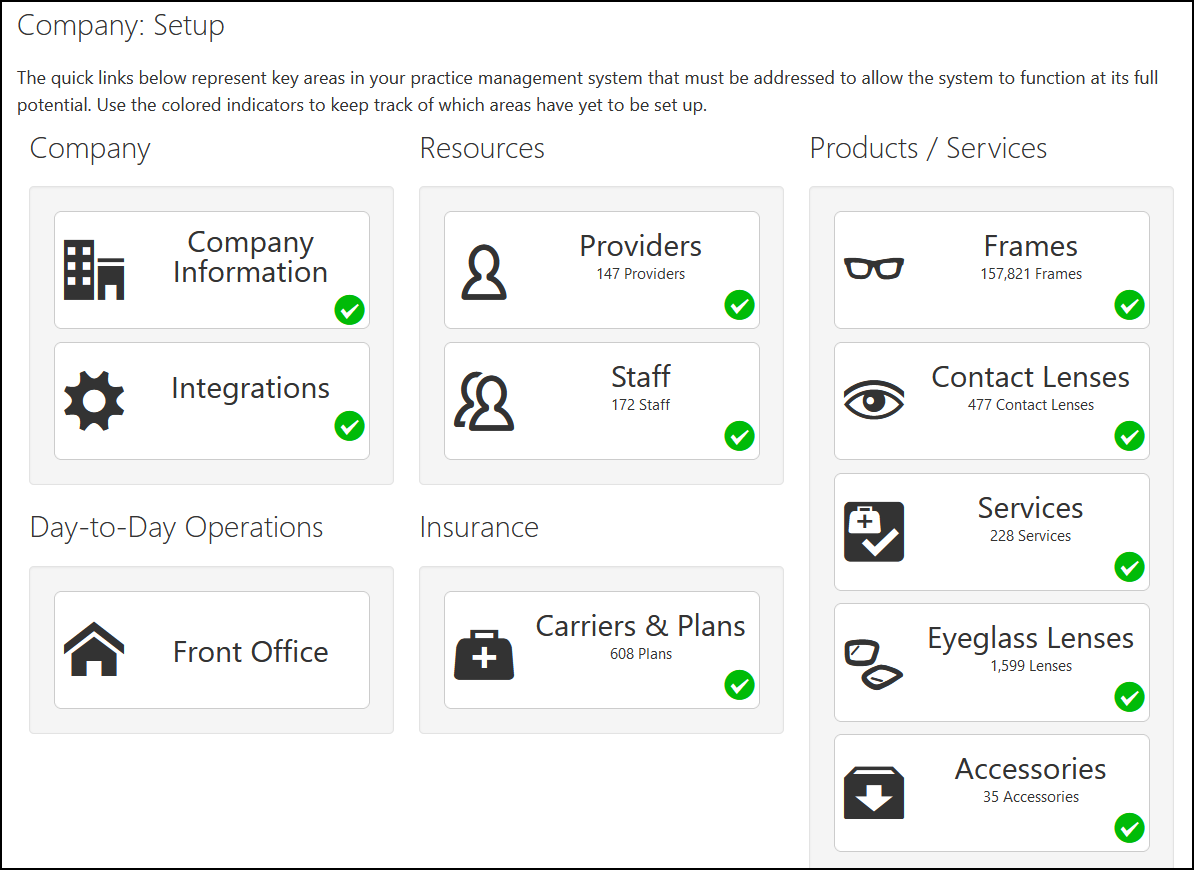
The table below lists the setup areas in the Company: Setup screen that you must complete before going live, and provides links to the instructions for each area. Click the tiles in the Company: Setup screen, shown below, to access each setup area. For instructions on how to access and navigate the Company: Setup screen, see Navigating Administration.
| Setup Area | Tasks | Instructions |
|---|---|---|
|
Company Information |
Check that all information entered is accurate and make any necessary edits. |
|
|
Integrations |
No action required. |
|
|
Providers |
Add your providers to the system. Make sure to enable their security settings.
The password for all new providers is start123. |
|
|
Staff |
Add your staff members to the system. Make sure to enable their security settings.
The password for all new staff is start123. |
|
|
Frames |
Activate and price the frames your practice sells.
Note: This is not a physical inventory count. This is simply telling the system "we sell this frame, and this is the price." Physical Inventory counts cannot be done until after you are live. |
|
|
Contact Lenses |
Activate and price the contact lenses you sell. Activate trial contact lenses if you will be sending them from EHR to Practice Management. If you are using the ABB integration, be sure to include the Cost of the lens (what you pay) and the Price (what the patient pays). |
|
|
Services |
Activate and price the services your practice will bill for. You can edit the Service Names. Service Names appear on orders and in the Scheduler. Changing the Service Name for a service does not affect the CPT code or Service Description. Appointment Duration is not required for services you do not schedule appointments for. To search for a service that does not have a CPT code so you can set it up:
|
|
|
Eyeglass Lenses |
To set up eyeglass lenses:
See Instructions for details. |
|
|
Accessories |
Price and activate any accessories your practice sells. |
|
|
Carriers & Plans |
Activate the insurances your practice participates with. Note: It is recommended that you activate one insurance per Payor ID. When doing so, choose the Manual or Unknown plan name. If your practice bills some claims on paper, make sure that the correct address is activated (this may result in more than one insurance per Payor ID). |
Office Setup
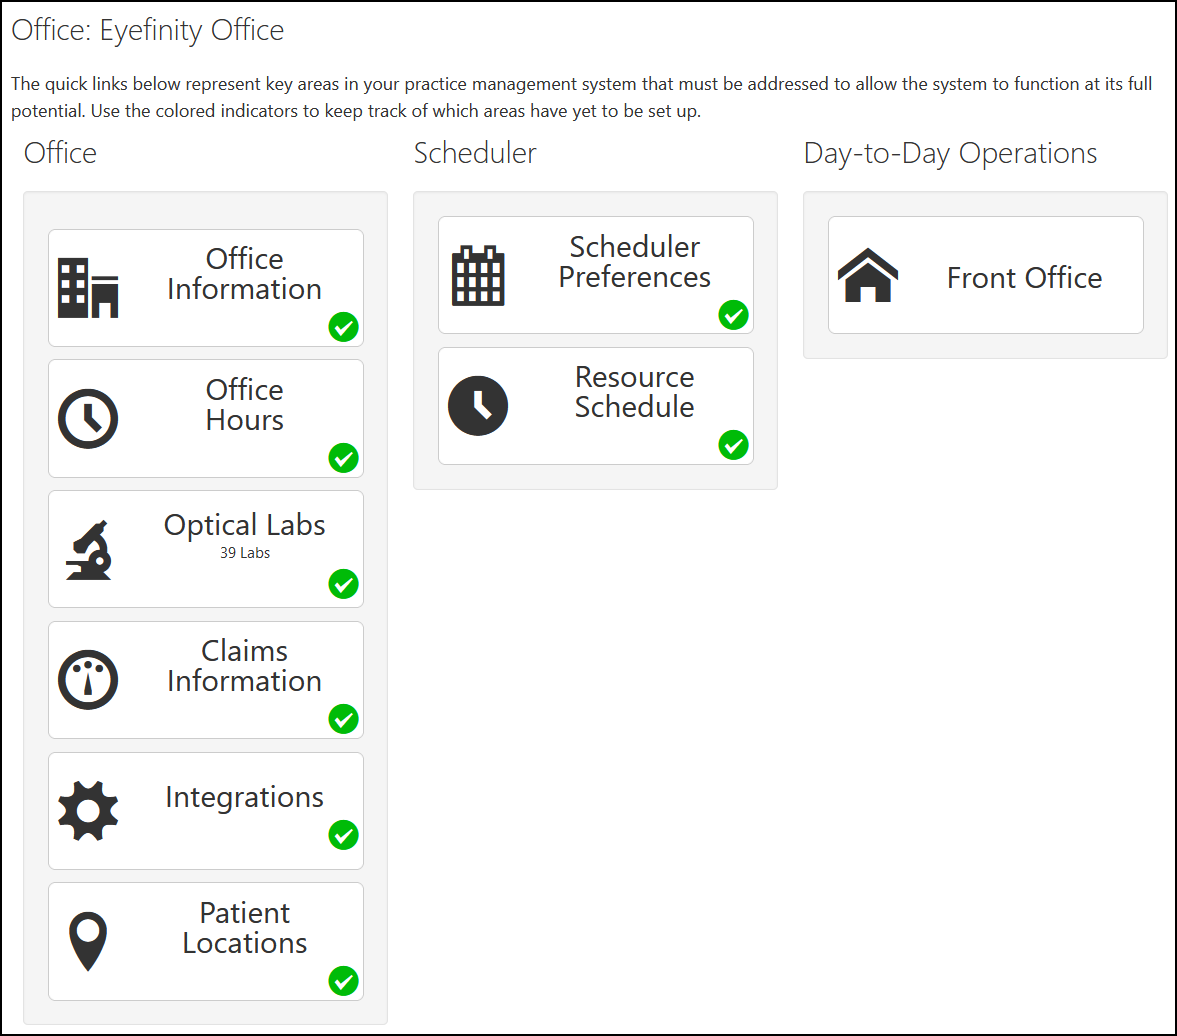
Once you complete the setup tasks under Company Setup, go to the Office: Setup screen and complete your setup there. The table below lists the setup areas and provides links to the instructions for each area. For instructions on how to access and navigate the Office: Setup screen, see Navigating Administration
| Setup Area | Tasks | Instructions |
|---|---|---|
|
Office Information |
Check that all information entered is accurate and make any necessary edits. Be sure to fill in the 4-digit ZIP code extension. Set up taxes if you are in a state where it is required. |
|
|
Office Hours |
Office hours are the hours that your office is open (not necessarily when the provider is in the office). |
|
|
Optical Labs |
Activate all labs your office will use. Be sure to activate both the VSP and non-VSP versions of labs. |
|
|
Claims Information |
Check that all information entered is accurate and make any necessary edits. |
|
|
Integrations |
Check that your Contact Lens Ordering information for ABB Concise is accurate and make any necessary edits. Note: About 5-7 days prior to go live you will need to sign up for a FramesData subscription. We will enter the username in Integrations. |
|
|
Patient Locations |
No action required. |
|
|
Scheduler Preferences |
Select your Appointment Configuration options, Overrides, and Scheduler Colors. |
|
|
Resource Schedule |
Set up the hours each provider is available to see patients. |
|
|
Appointment Service Setup To access, click Scheduler in the top menu bar and select Appointment Service Setup. |
Activate and color code any service you will need to schedule appointments for. If you do not schedule appointments for a service, you can inactivate it. Note: Service names are set up in Service Setup. (See Services in the Company Setup table, above.) |
Additional Setup Required After You Go Live
Most of your Administration settings will carry over to your Live environment. The following settings will not carry over, and will need to be set up in your Live environment: